The Campaigns List
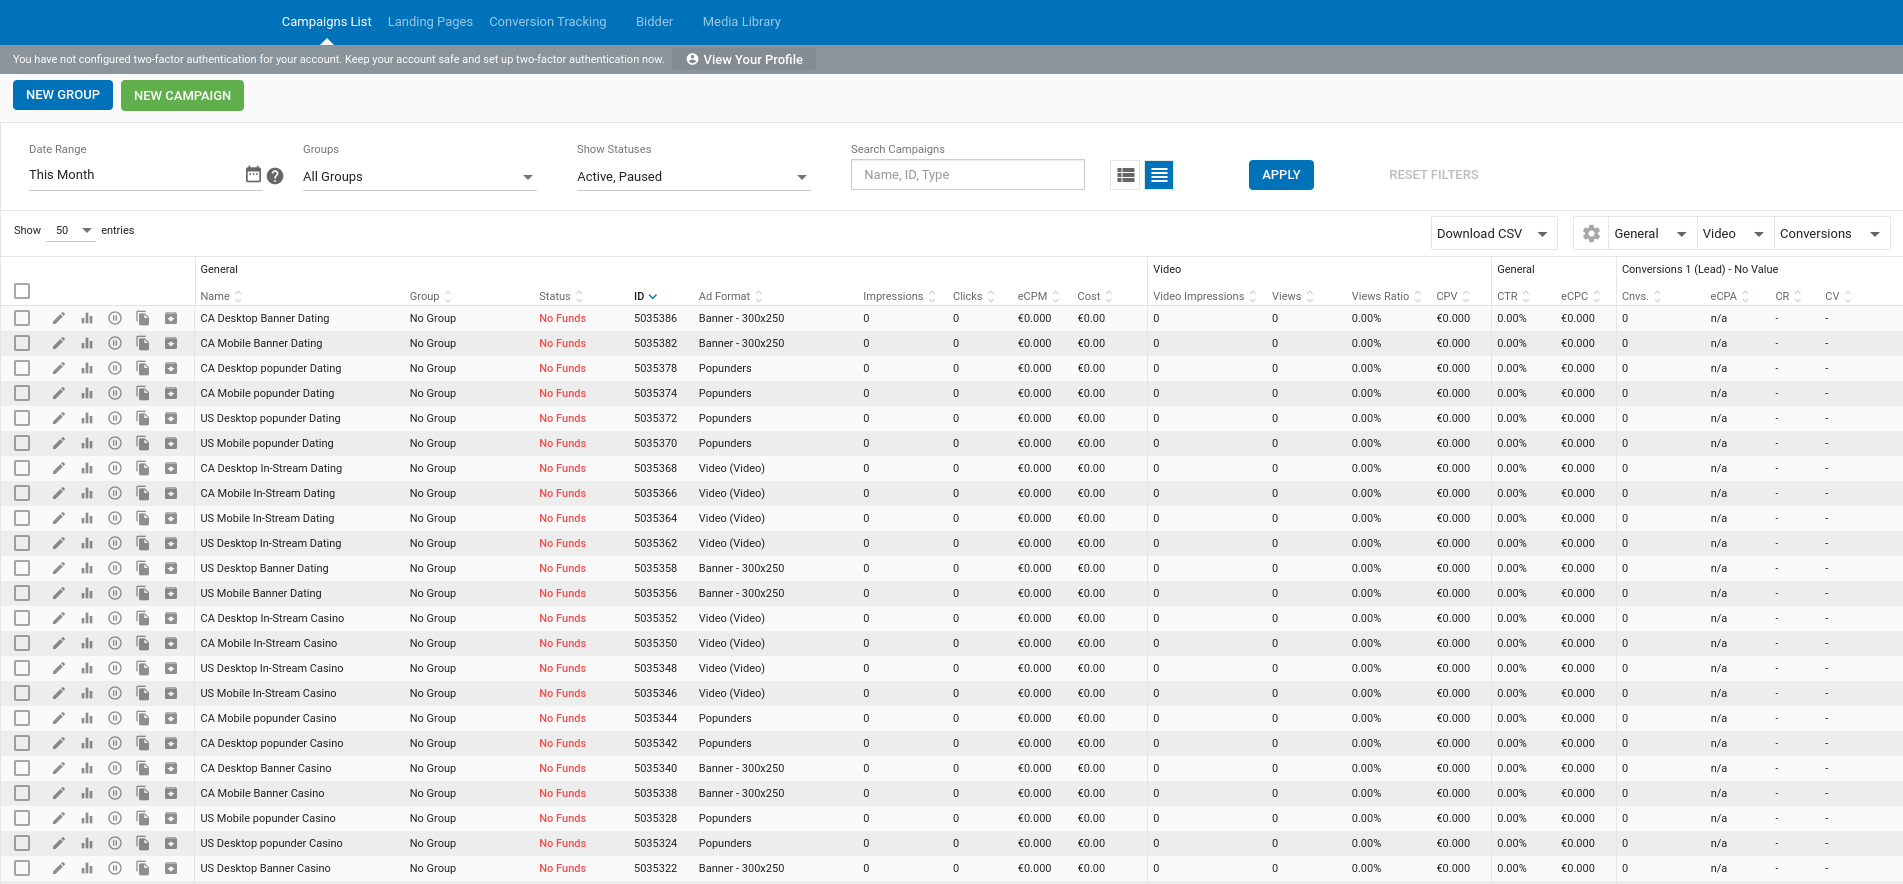
In the Campaigns List tab you can create, delete and organise your campaigns into groups. You can also archive, edit, pause, and view statistics for individual or multiple campaigns.
Filtering the campaigns list
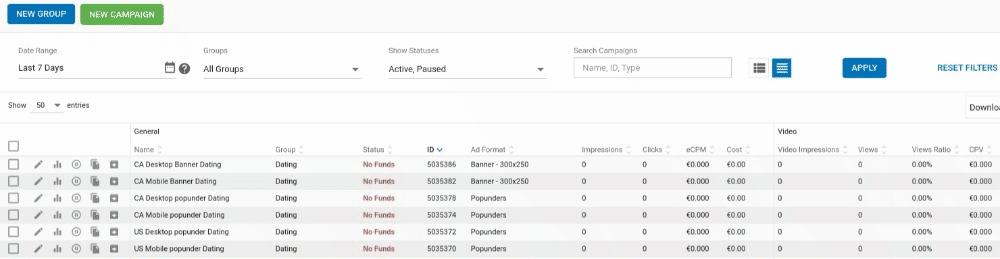
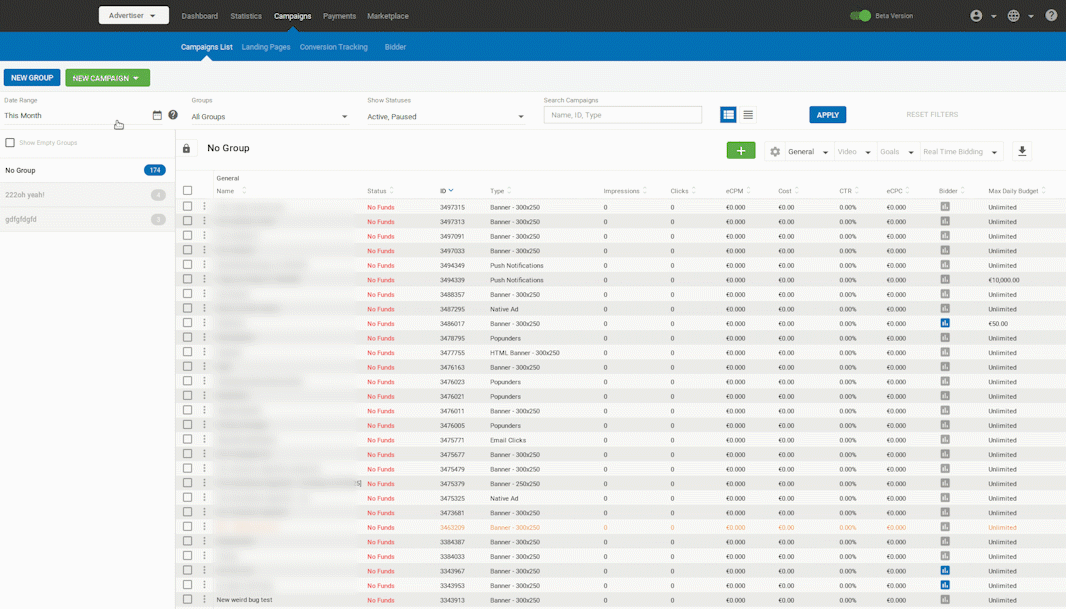
You can filter the campaigns list in several ways:
- Click on the calendar icon to choose a Date Range to show in the list.
- Select a group from the Groups drop-down to show in the list (See Campaign Groups below).
- Select a status in the Show Statuses drop-down to show in the list. Choose from Active, Paused or Archived.
- You can also search campaigns by Name, ID number, and Type (the name of the ad format it uses).
When you have chosen your filtering options, click the Apply button to the right of the filtering options. Click Reset Filters to start again.
Campaign Options
There are different options available on the Campaigns List:
![]()
Edit
![]()
This option allows you to go back to editing the campaign in question.
View Statistics
![]()
This option allows you to view the statistics for this campaign. This option will lead you to the Statistics menu with all the corresponding filters already applied.
Start / Pause Campaign
![]()
Depending on the Campaign Status, this option allows you to either start or pause a campaign.
Copy Campaign
This option allows you to copy/duplicate a campaign. When using it, there are two possibilities:
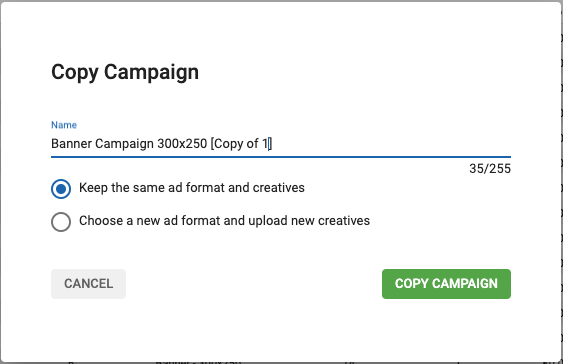
- *Keep the same ad format and creatives: the entire campaign will be duplicated.
- Choose a new ad format and upload new creatives: you will need to select the ad format you wish to create the campaign with. Then, you will have to confirm that you agree to the price being automatically updated if the original campaign price does not match, or beat, the minimum price allowed for the chosen format. Note that, when selecting this option, all your Zone targeting settings will be reverted back to default, even if the ad format you chose is the same as the format of the original campaign.
Archive Campaign
This option will archive the campaign in question.
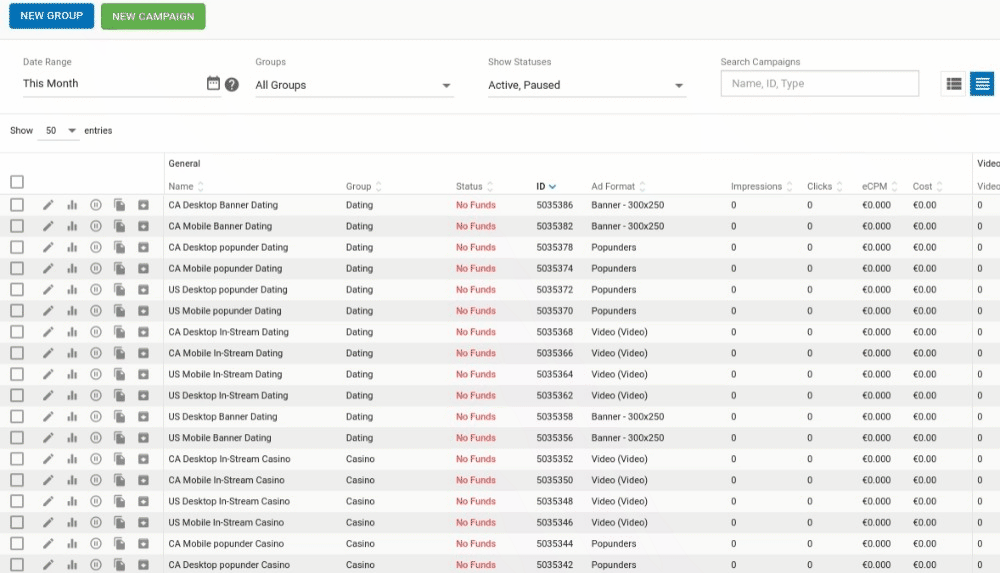
Campaign Groups
The groups feature allows you to organize campaigns and put them into groups based on your chosen criteria. It is especially useful if there are a large number of campaigns that you need to keep track of.
You can group campaigns by country, type of product, device targeted, and many other criteria.
Toggling between group and non-group view
You can choose whether or not you wish to see the groups panel on the left side of the screen, using the two buttons on the right of the filtering panel.
If your campaigns are organized into groups, you can choose which group of campaigns to show in the list by clicking on the group in the groups panel on the left.
Note: When you are in non-group view, there is a Groups column to the right of the Campaign name, showing what group each campaign is in. This will show No Group if the campaign is not in a group. You can toggle this on and off in the column settings.
By default, the groups panel will only show campaign groups that have at least one campaign in them. To view empty groups, tick the Show Empty Groups checkbox.
Please note that these buttons might not appear if your browser screen is zoomed.
Creating a new group
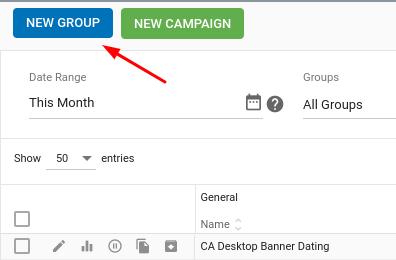
To create a new group, click on the Campaigns tab. In the Campaign List section, click the NEW GROUP button.
Note: Keeping the group name short will ensure that it’s fully visible in the Campaigns List page.
Assigning a campaign to a group
When you click NEW CAMPAIGN in the Campaigns List tab to create a new campaign, you will see a drop-down list of all the available groups that you can assign it to, or choose No Group from the list. You can also move a campaign or campaigns to a group using the bulk update bar (See below).
Campaign Statuses
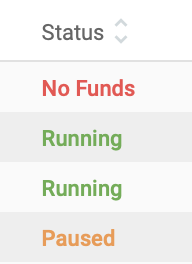
The Campaigns List will show you the status of your campaigns in the Status column.
| Status | Explanation |
|---|---|
| Archived | Campaigns which have been archived. You will only see these campaigns if Archived is selected in Show Statuses. |
| Paused | The campaign has been paused, using the pause button on the left side of the Campaigns List. You will only see these campaigns if Paused is selected in Show Statuses. |
| Running | The campaign is running. |
| No Funds | There are no funds in the account (which will mean the campaign is not running). |
| Global Daily Budget Reached | The Global Daily Budget which you set in your profile page has been reached. This is the maximum you are willing to spend on all campaigns in a single day. |
| Pending Approval | The campaign is not running because it has not yet been approved. |
| Rejected | The campaign has been rejected. |
| Completed | The campaign has reached the total number of impressions that you set it to achieve. |
| Daily Limit Reached / Daily Budget Reached | The campaign has reached the daily limit of impressions/budget that you set in Step 4: Pricing & Limits of creating a campaigns. |
| Partially Running | One or more variations of the campaign is not running for some reason. |
| No Variations | The campaign has been created but no variations have been created. Campaigns cannot run without at least one variation. |
| Won’t Run | The campaign will not run because it has not been set up correctly. |
| Too many zones targeted/blocked | The campaign is targeting/blocking too many zones. |
| Expired | The campaign was scheduled to end at a certain date, and this date has passed. |
| Scheduled | The campaign is not running yet, but has been scheduled to start at some point in the future. |
Note: When Daily Limit/Budget has been reached, it will be reset at 00:00 from our server time, which is NY time zone.
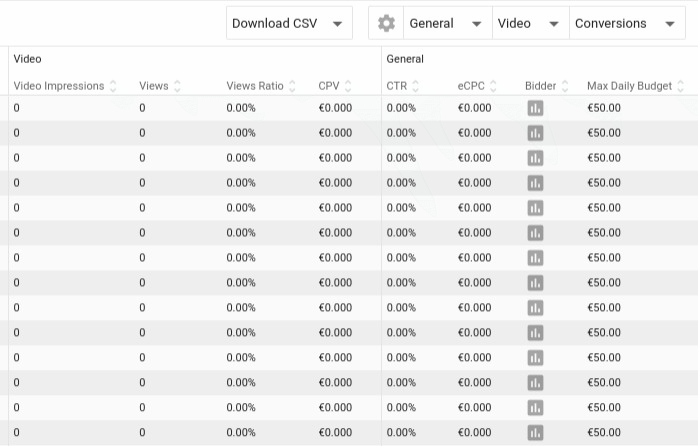
Column Settings

On the top right of the campaigns list you can choose what columns to display in the list.
- Click General to choose from a range of different columns to show in the list.
- Click Video to turn on and off the Video section and then choose what to display in it.
- Click Conversions to choose which conversion tracking goals to show in the list.
- Click Real Time Bidding to turn on and off the Real Time Bidding section and then choose what to display in it.
The Bulk Update Bar
When you select a campaign or campaigns using the check-boxes on the left side of the screen, the blue bulk update bar will appear at the bottom of the screen. The bulk update bar allows you quickly make changes that apply to all of the campaigns that you have selected.
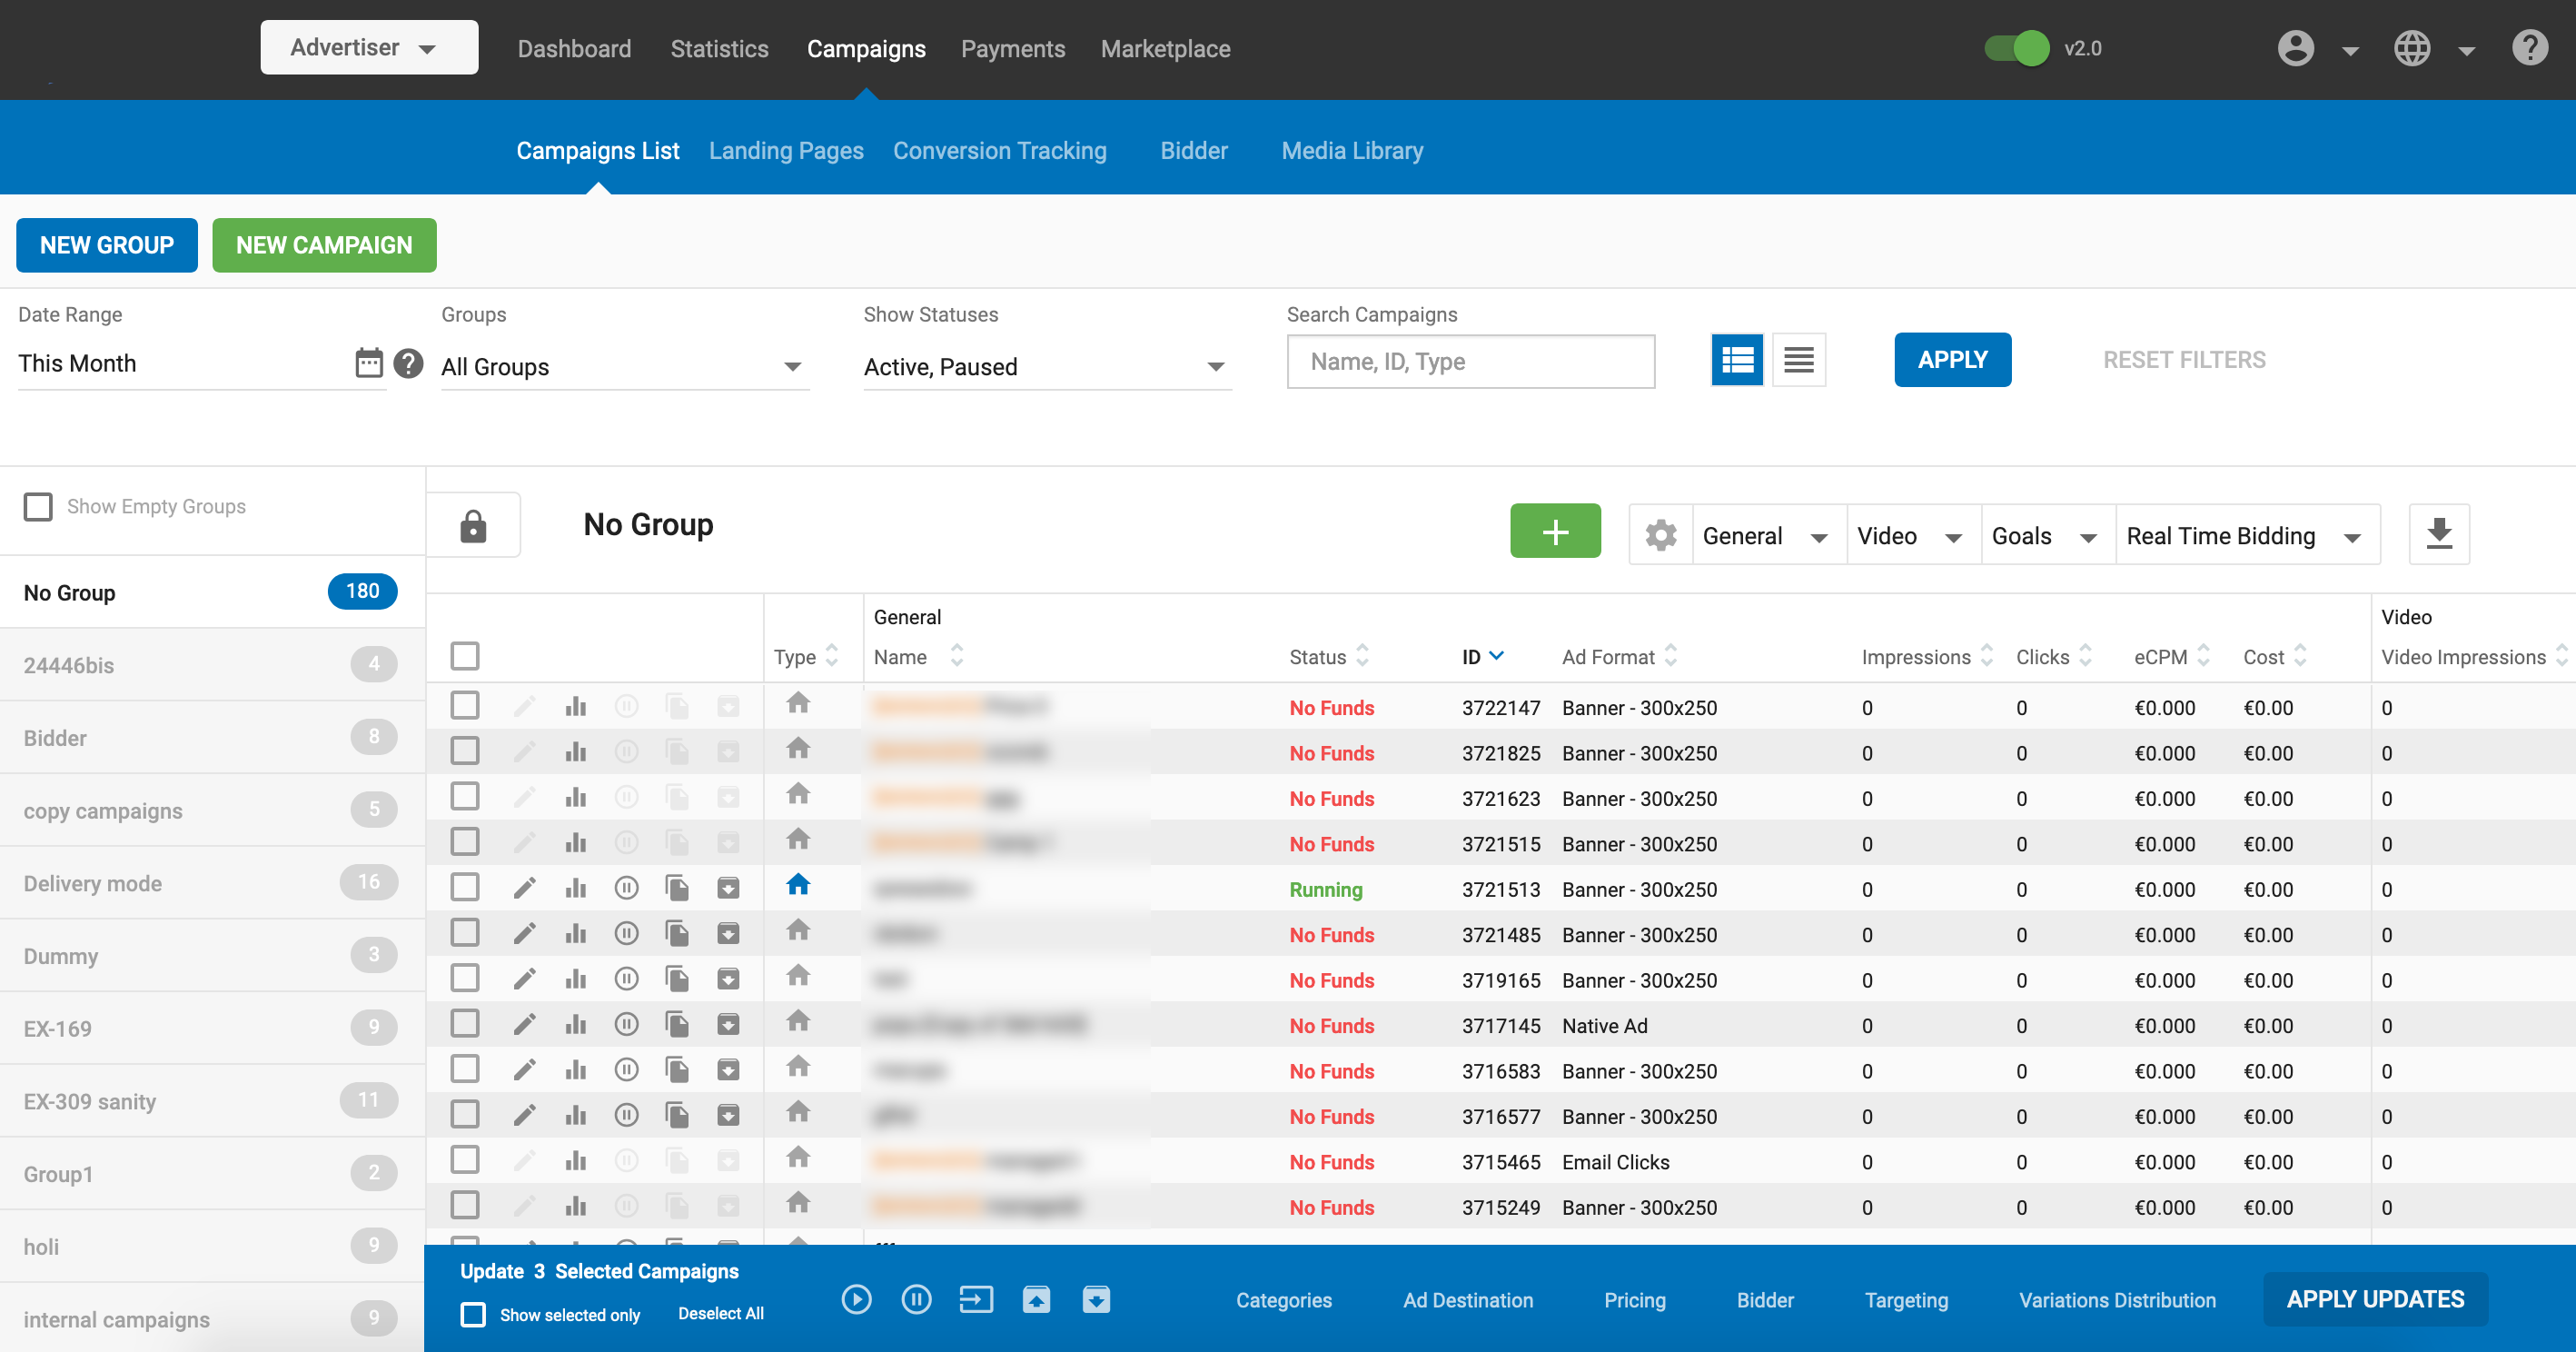
Once you have selected multiple campaigns, in the bulk update bar, you can:
- Pause and Play the campaigns.
- Move the campaigns to a different group. Click the Move icon. In the Move Campaigns box, select the group to move the campaign(s) to from the drop-down.
- Archive and Restore the campaigns.
Categories
- Click the Categories option to open the Update Categories dialog. From there, you can select or deselect the categories assigned to the campaigns. If multiple top-level categories are available, a Target All toggle will appear, allowing you to quickly select or deselect all categories at once.
Ad Destination
Click the Ad Destination option to change the landing page (entire URL or part of the URL) or landing page group for the selected campaigns.
Pricing
Click the Pricing option to change the pricing on the campaign for all the campaigns: Clicking on the Pricing option will bring up a pop-up menu allowing you to choose from:
Time Period: Set a time period for the campaigns to run in.
Total Limits: In this section you can set a limit on the Budget and/or Impressions the campaign can receive. The campaign will run for as much time as it takes to reach these limits.
Daily Limits: Here you can set daily limits for budget and impressions for the campaigns, as well as choosing how you want these delivered:
- Quick Delivery: The budget or impressions limits should be reached as quickly as possible.
- Distribute throughout the day: An algorithm will control how the campaign displays to ensure that the budget or impressions limits are reached over the course of the whole day.
- Frequency Capping: Turn frequency capping on or off, and select how many impressions a visitor will receive in a time period.
- Pricing: Choose between Smart CPM and CPM.
Bidder
Click Bidder to adjust bring up the Bidder settings for the campaigns. You can choose to turn the Bidder on or off and select a bidding algorithm to use.
Targeting
Adjust the targeting settings. Clicking on Targeting will bring up a pop-up menu consisting of all the targeting options from Locations to IP Ranges.
Variations Distribution
Here you can choose the Distribution Algorithm that the campaigns use. Choose from Even, Automatic on CTR, Automatic on Conversion Rate.
When you have finished updating the settings for your selected campaigns, click the APPLY UPDATES button.