Bidder

The Bidder is a Smart Assistant designed to help you optimize your campaigns. Bidder consists of two features:
- Automatic Bidding Optimization: Intelligently adjust the bids for ad zones according to how many conversions they get, and block those that don't convert.
- Blocking Rules: Block under-performing browsers, countries, devices, languages, mobile carriers, operating systems, sites and zones automatically according to rules that you set.
To use the Bidder, create a Bidder Algorithm in the Campaigns > Bidder tab.
Select your Data Period
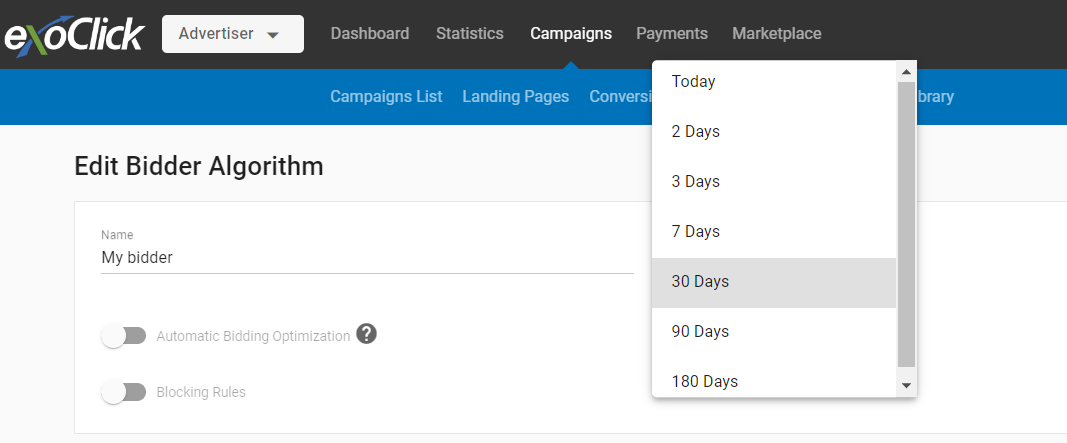
Automatic Bidding Optimization and Blocking Rules use historical data in order to determine the actions that will be carried out by the Bidder algorithm. In Data Period, you can select the timespan of the data that will be used for this optimizations. This ranges from 180 days back to Today (default 30 days).
Automatic Bidding Optimization

The Automatic Bidding Optimization feature allows an Advertiser to automatically adjust the price set on each zone based on the conversion value, and block zones that do not convert.
Note: To use Automatic Bidding Optimization, you must have at least one conversion goal set up. The tool works for both pixel and S2S tracking.
Select a Conversion Goal and a Method to determine the Conversion Value
Select a conversion goal from the Conversion Tracking drop-down. Based on the conversion goal's value, you can choose either of these two options:
- Use the Goal's Conversion Value: This method is applicable for Fixed and Dynamic value conversion goals. When this method is chosen, the Bidding Algorithm uses the value set on the conversion goal.
- Set Target Conversion Value: This method will allow the Advertiser to input a conversion value that will be used by the Bidding Algorithm to optimize the bid.

Set a Maximum Test Budget
The Maximum Test Budget determines how much you are willing to spend in a zone before Bidder starts optimizing. Bidder needs some information of the traffic you are buying in order to determine its profitability, so the Maximum Test Budget determines how much the campaign can spend on a zone before it can begin optimizing.
The Maximum Test Budget can be set in three different ways:
- Automatic: By default, the Maximum Test Budget will be set at 5 times the target conversion value that is set.
- Set Maximum: Manually set your own Maximum Test Budget. You can set up a Maximum Test Budget up to 20 times the target conversion value.
- No Maximum: Zones can continue to generate costs in the campaign even if they do not generate conversions. In this scenario, zones will continue to run with the campaign default bid until 3 conversions are generated, at which point Bidder will begin optimizing.

When Automatic Bidding Optimization Starts
- If a zone gets more than three conversions, then Bidder will start optimizing, regardless of whether your Maximum Test Budget has been reached or not.
- If a zone has less than three conversions and the Maximum Test Budget has been reached, then Bidder will start optimizing. In this case, Bidder might assign a lower bid to keep the traffic at minimum until the zone starts generating more conversions.
- If a zone has zero conversions and reaches the Maximum Test Budget, then Bidder will block that ad zone for the campaign forever.
Once Automatic Bidding Optimization starts running, it will fine-tune your bids for each zone to keep them under the conversion value for the selected conversion goal. Every optimization carried out by Bidder is recorded in the history of the algorithm.
Bear in mind:
Depending on the performance from the zone you are receiving conversions from, Bidder can significantly increase the bid you are using in this zone. You could find your campaigns paying several times your original bid in specific zones. Because of this, please be very careful when determining the Daily Budget your Bidder camapigns will use. Should your zone bids scale up, your Daily Budget might not be respected.
Blocking Rules

When you turn on the Blocking Rules option, you can create rules that determine which campaign targeting setting or dimension is blocked automatically based on the rules set.
The available dimensions that can be blocked are the following:
- Zone (default)
- Browser
- Country
- Devices
- Language
- Mobile Carrier
- Operating System
- Site
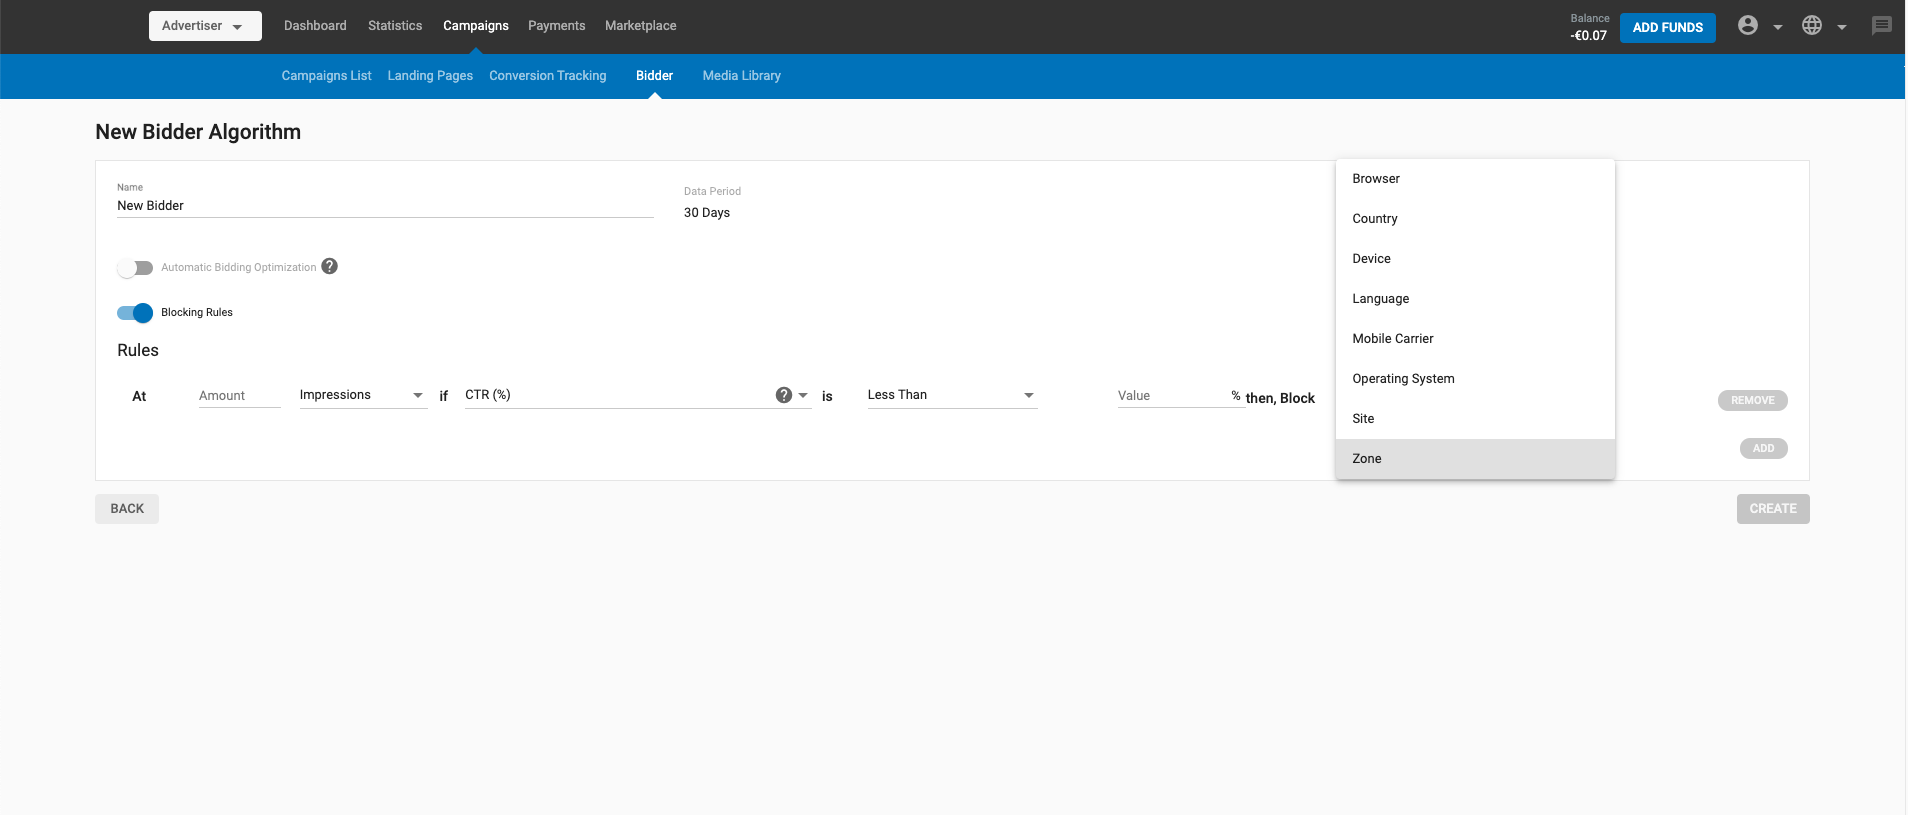
The rules are enforced once the selected dimension has reached a certain amount of Impressions, Clicks or Spending. In order to determine whether this dimension needs to be blocked, Bidder will look at one of the following metrics: CTR, Conversions, eCPA, ROI or Profit.

Note: In the second drop-down menu, if you select Conversions, eCPA, ROI or Profit, you must then select which goal is associated with them from the Select a Goal drop-down menu that appears.
You can add up to 10 Blocking rules. Each rule will be applied on an OR basis and not an AND basis, which means that each rule is applied individually. Whichever of the set rules fulfills the condition first will be triggered and will block the ad zone.
Once all the desired rules are added, click Update. Once you click Update your new Blocking Rule will begin working.
Assigning the algorithm to a campaign
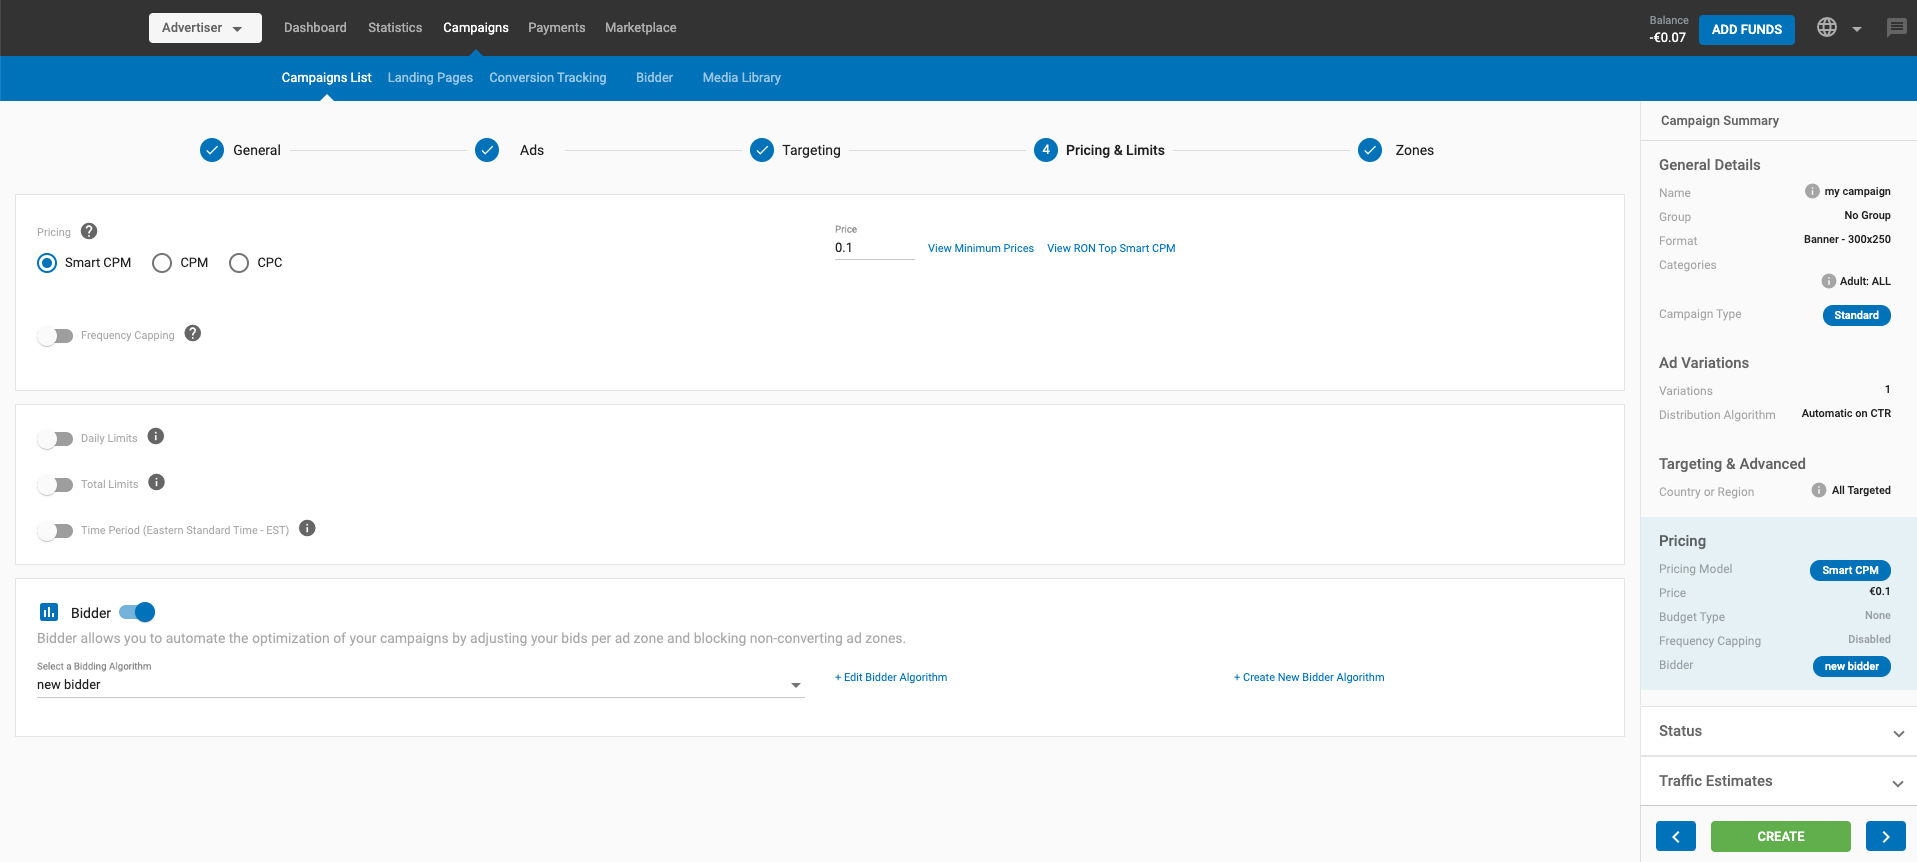
You can assign a Bidder algorithm to a campaign in the Step 4: Pricing & Limits page from campaign settings. Under the Bidder section, you will find the option to assign your newly created Bidder algorithm.
History and Campaigns Using this Bidding Algorithm
The Bidder algorithms you create will be added to the list of available algorithms in the Bidder tab. You can click Edit to view/edit the details for any of them.
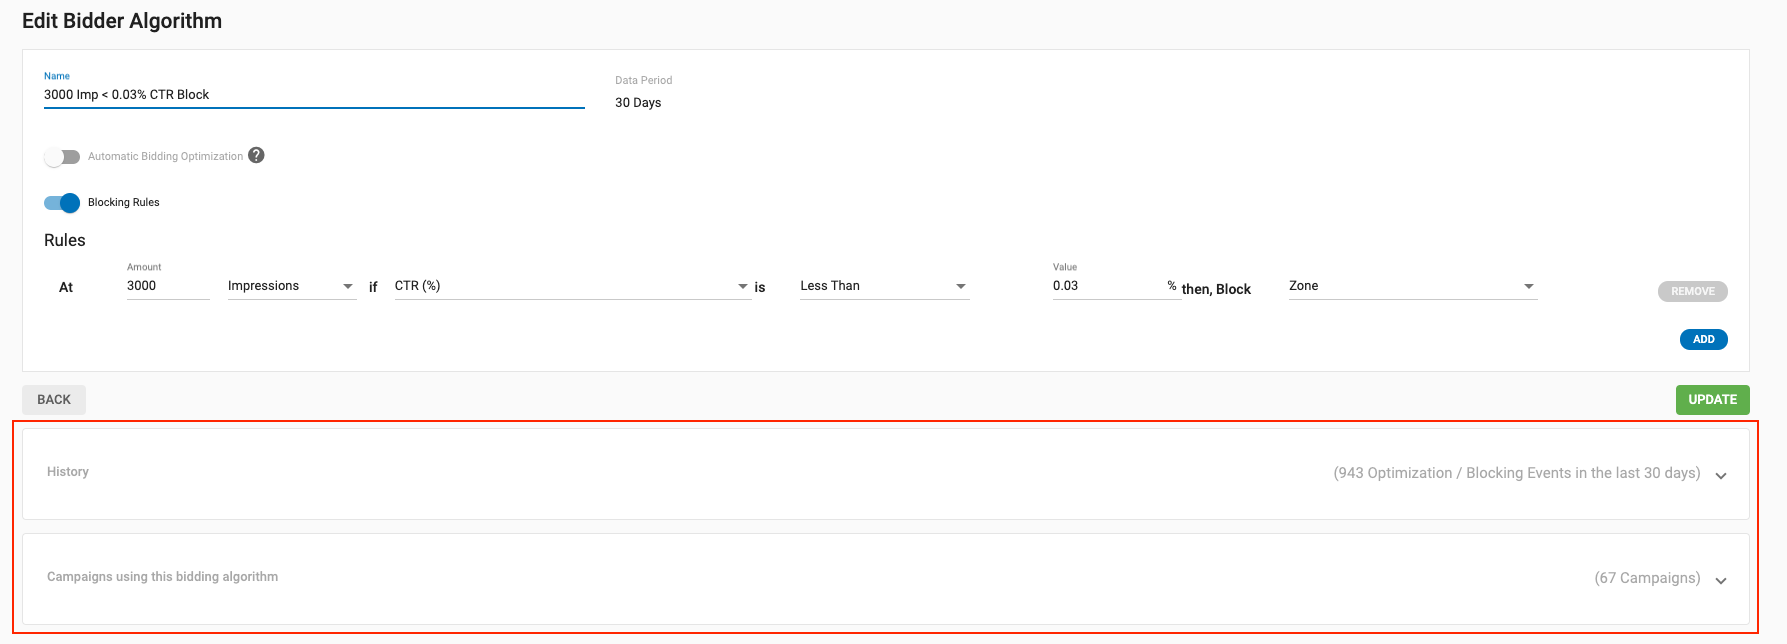
If you edit an existing algorithm, you will see two new sections below the Blocking Rules: History and Campaigns using this bidding algorithm.
History
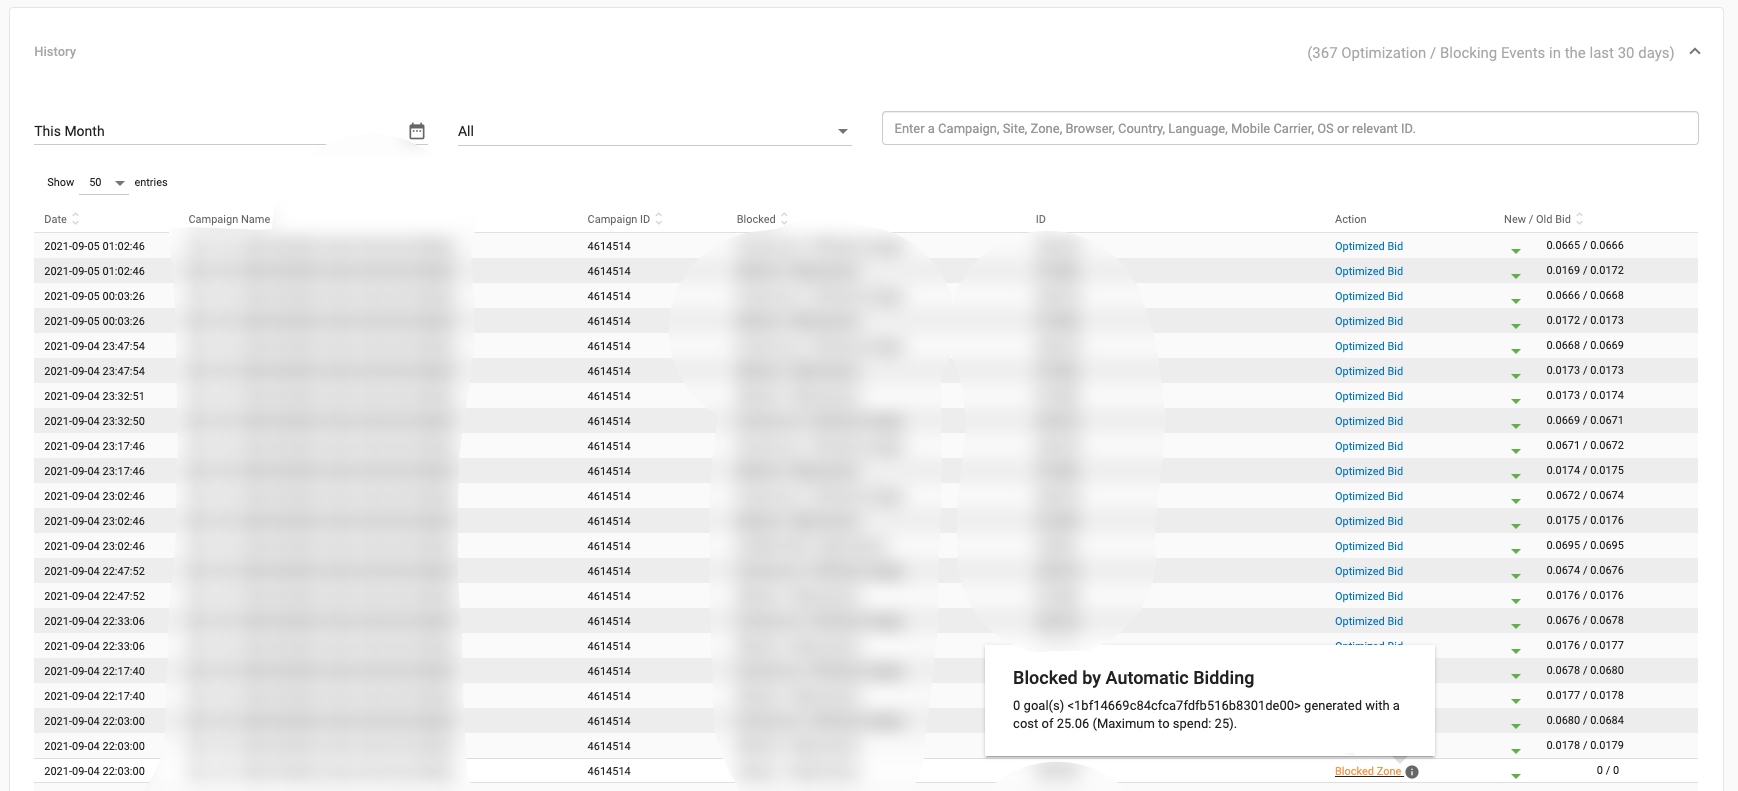
This section shows a list of detailed information of all previously created campaigns set using a specific algorithm. This section shows any optimization events (such as increasing or lowering the bid) and blocking events that have occurred over the last 30 days.
You can filter the results by date, or choose whether to see Optimized Bids or Blocked Zones. You can also search by Campaign Name, Campaign ID, Site/Zone Name, Site/Zone Name ID, Browsers, Countries, Languages, Mobile Carriers, Operating Systems, Devices or any relevant ID.
If you hover over the information icon of a blocked dimension in orange, you will see the reason why the dimension is blocked, based on the campaign targeting. For the bidding under the Action header, you will see the Optimized Bid in blue. Under the New/Old Bid header, you will see the new bid obtained by the Bidder and the original bid set.
Notes:
- If the Bidder looks to block the only remaining value for a specific dimension, the campaign will be set to Won’t run status. You can put it back to running by editing the campaign settings.
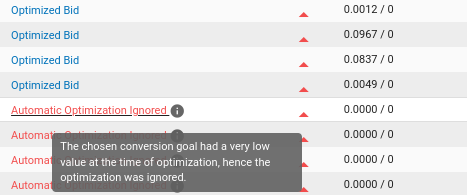
- In case of a Dynamic conversion goal that has a very low value (less than $/€0.001) or no value at the time of optimization, the Bidding Algorithm will ignore the optimization making an entry in the Bidder history with an action "Automatic Optimization Ignored".
Campaigns Using this Bidding Algorithm

This section shows all the campaigns using this specific algorithm. It will show Campaign ID, Campaign Name, and Type of Ad Format. On the left of this list, you will find two buttons: one to Edit the associated campaign and another one to unassign Bidder from the linked campaign.
Additional Bidder Insights
Bidder needs a minimum amount of traffic from the zone in order to start working:
- For CPM and Smart CPM campaigns, at least 500 impressions are needed.
- For CPC campaigns, at least 20 clicks are needed.
- If you have rules set with goals, for all the payment models the campaign needs at least 3 goals.
Bidder is very flexible. You can mix Automatic Bidding Optimization and Blocking Rules together in order to control what is optimized and what is blocked. This means that you can:
- Have Automatic Bidding Optimization and Blocking Rules working at the same time.
- Disable Automatic Bidding but leave Rules working.
- Disable Rules and keep Automatic Bidding working.
Note that you can use the Bidder while doing zone targeting in your campaign. Bidder will work on the specific zones you are targeting and/or respect the zones you are blocking. This means that you can:
- Manually block or target zones when setting up a new campaign with the Bidder.
- Manually block or re-enable ad zones that have been automatically optimized or blocked by the Bidder.
- Enable the Bidder on an existing campaign without erasing any existing optimizations made manually by the advertisers.
For more information, please check our Zone targeting page.
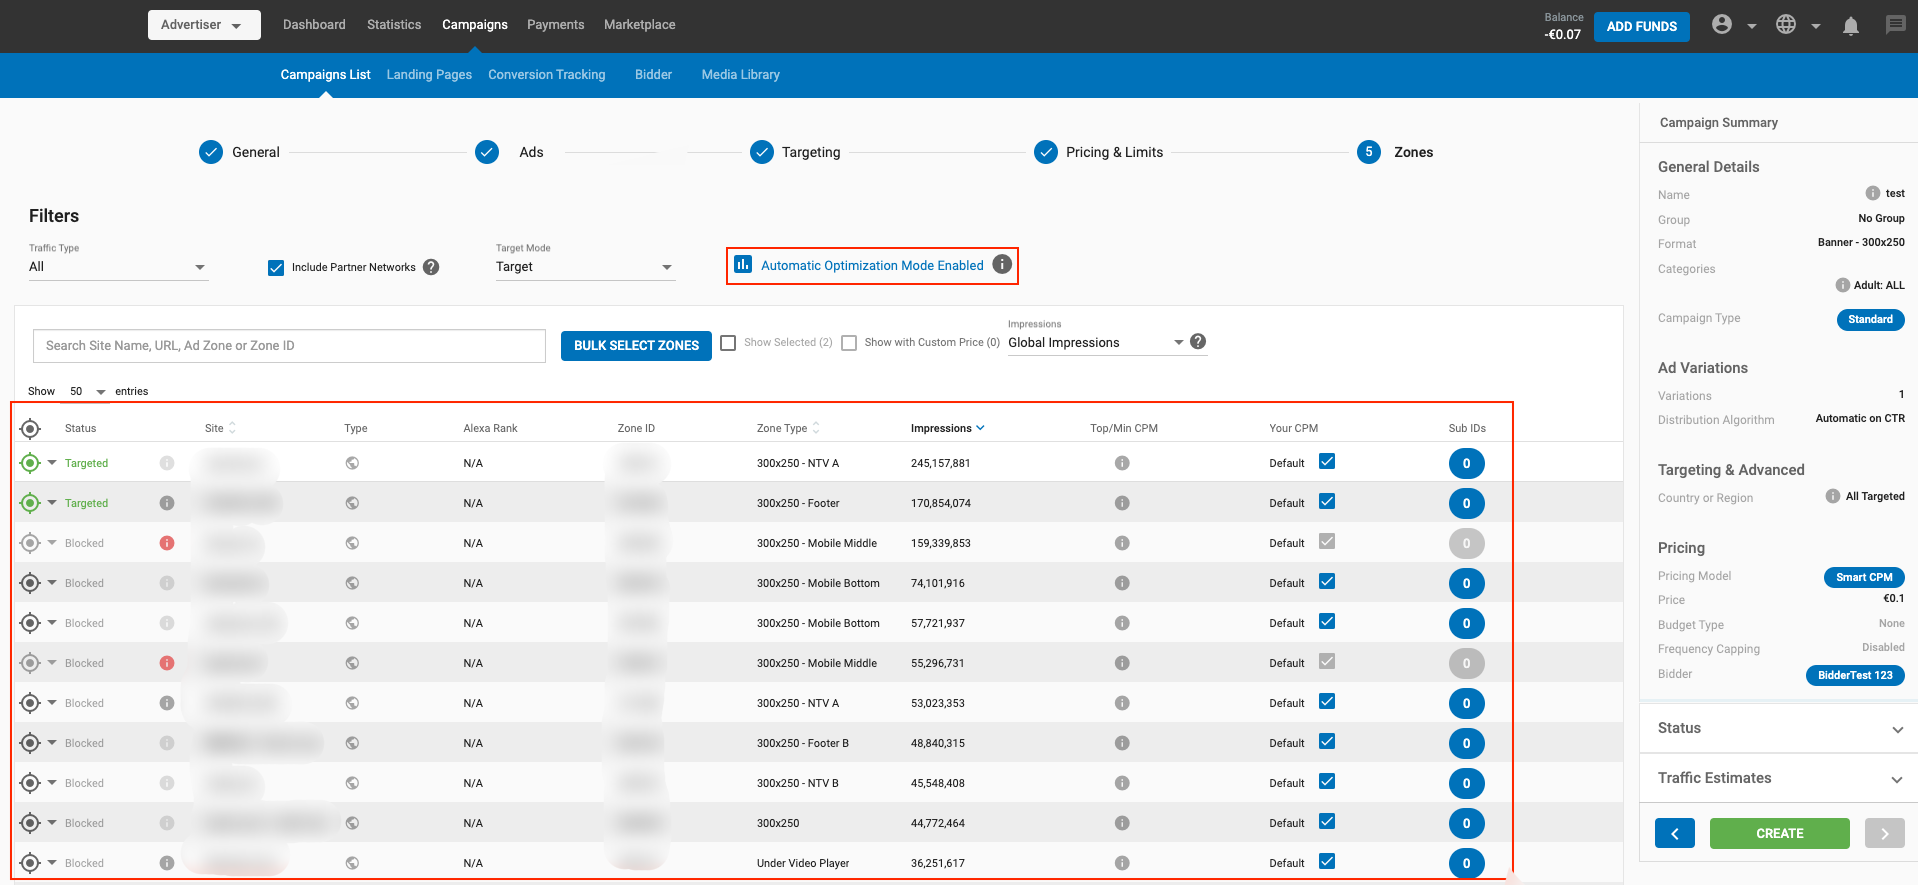
If you are not convinced about the optimizations carried out by Bidder, you can temporarily disable it while you fine-tune the settings of the algorithm or your campaign targeting. When Bidder is disabled, optimizations carried out by Bidder remain in the campaign, including optimized bids and blocked dimensions.
Please note that campaigns with Bidder enabled can block up to 4000 zones. If your campaign needs to block even more zones, consider using Domains targeting or switching to Target zones instead of Block zones.
Lastly, it is not possible to re-use Bidder optimizations from a campaign on a different campaign because each campaign is optimized individually, even if you use the same Bidder algorithm.