How to track conversions with RedTrack
This guide is for Redtrack only. If you want to know the generic steps for S2S tracking, please check the Advertisers section.
This guide consists of two sections:
a) How to set up conversion tracking in Redtrack. This section will focus on knowing how to set up the Postback URL in Redtrack, how to notify conversions to Redtrack and how to display these conversions in both Redtrack and ExoClick.
b) How to integrate Exoclick in Redtrack via API. This section will show how to edit ExoClick's campaigns from Redtrack and how to match your campaign costs in both platforms.
If you want to receive additional information, please check RedTrack's integration guide.
How to set up conversion tracking in Redtrack.
ExoClick gives you access to global traffic sources, targeting features, big data and statistical analytical tools to filter results and optimise your campaigns. This manual explains how to track conversions on the ExoClick network when you are using tracking software Redtrack.
Step 1: Create the Goal ID for your Postback URL.
Log into your ExoClick Admin Panel and go to Campaigns > Conversions tracking. This allows you to create the Goal ID and get the structure to be used in your postback URL:

Click "New Conversion Goal". There are three fields you must complete: Name, Conversion Value and Order. In Name, simply add a name for the goal, for example: "Postback".
The available Conversion Values are:
- No Value: value is 0
- Fixed: you determine the payout of the conversion manually when setting up the Goal.
- Dynamic: the value of the payout will be passed through the Postback URL. Dynamic value passing will be explained in detail later during the guide.
Order is used to organize the different goals you have created in your account. If you have created multiple Conversion Goals, the Order will help you organize how these goals are displayed in your Statistics and in the Campaigns List.
Once you have added all these fields, click on the "Create" button. The Admin Panel will display the structure of the Postback URL as well as the Goal ID corresponding to the Goal you just created. It should look something similar to this:
http://s.magsrv.com/tag.php?goal=66a8605e6cce49fbb8056f273f8e1a2e&tag=
You can also check our Conversions Tracking page to find out more details about our Goal creation process.
Step 2: Add ExoClick as traffic source in Redtrack and configure the Postback
To track conversions on ExoClick you will need to add a dynamic tracker to your campaign URL {conversions_tracking} which identifies each click uniquely.
You must store this tracker on Redtrack and get it to notify ExoClick’s API each time a user generates a conversion. This is achieved in Redtrack by configuring ExoClick as the traffic source, using the pre-defined template.
Click the “Traffic sources” tab, then click "New From Template":
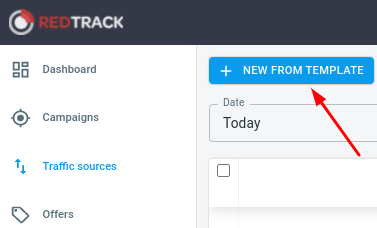
Select "ExoClick". Redtrack will pre-populate the traffic source settings from the template.
Select the same currency as your ExoClick account. Then, in the Postback URL field replace the word “REPLACE”, with the goal ID value you generated in Step 1.
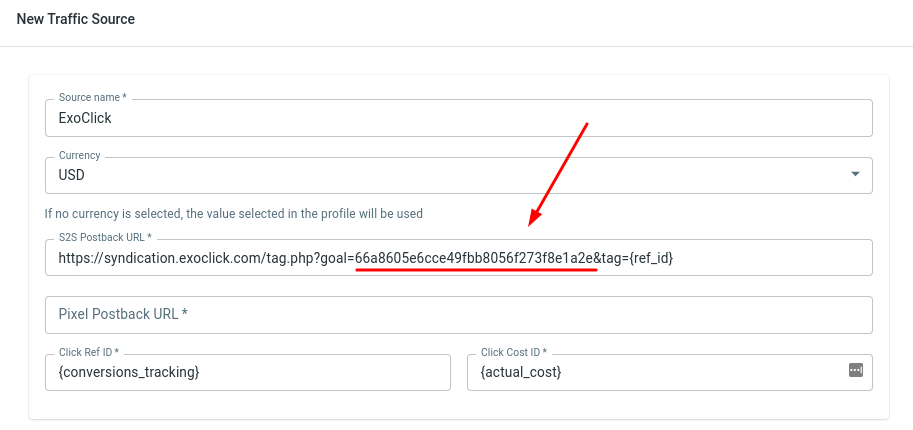
Your postback URL should now look like the following:
http://s.magsrv.com/tag.php?goal=66a8605e6cce49fbb8056f273f8e1a2e&tag={ref_id}
Note: If you selected Dynamic value when setting up your Goal in ExoClick, then you will also have to add &value={offer_payout} at the end of the Postback URL so as to pass the value of the conversion. In this case, your postback URL will look like the following:
http://s.magsrv.com/tag.php?goal=66a8605e6cce49fbb8056f273f8e1a2e&tag={ref_id}&value={offer_payout}
Once you have made these edits, you can go ahead and save the Postback.
Step 3: Set up an Affiliate Network on redtrack
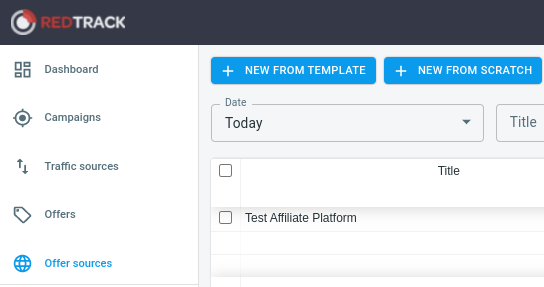
Click the "Offer sources", then click on "New from template". If you can't find your affiliate platform or if you are running a custom offer, click on "New from scratch":
When setting up the Offer source, the only compulsory parameter is the "Name". However, if you want to send conversions to the affiliate platform and track the payout of each conversion, then you will have to add all the "Postback parameters" from this page:
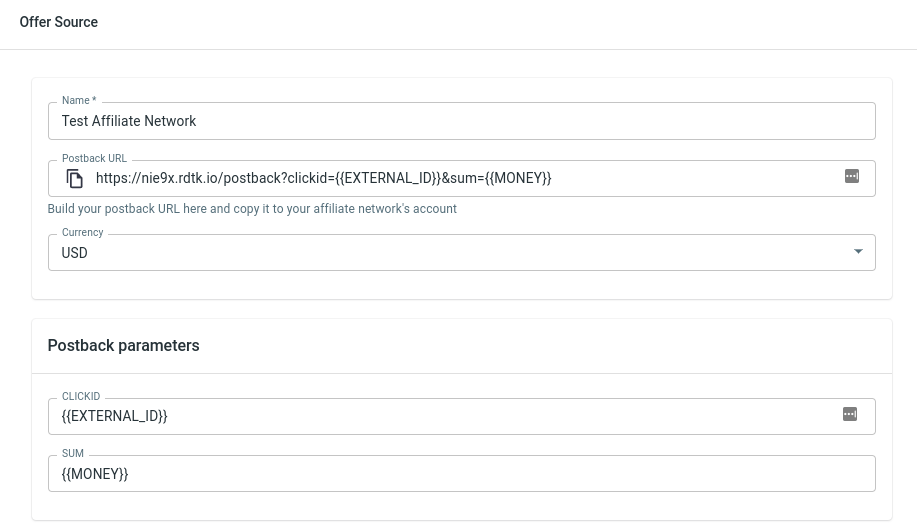
Copy the Postback URL from this page and add it to the corresponding section from the affiliate platform.
Note: Remember that the Posbtack URL you see here corresponds to the Affiliate Platform. This is not the same postback URL as the one you used in Traffic Source settings.
For ExoClick, the most important parameter in this page is the Sum. Make sure that you are using the right token from your affiliate platform in order to track the payout from the associated offers. You need to make sure that the value from this token reaches the postback URL from Exoclick.
If your Affiliate platform cannot pass payout information through tokens, then you can specify the payout in the Offer settings. We will cover this in the next section.
For more information on how to set up the Affiliate network in Redtrack, please check their manual.
Step 4: Create an Offer in Redtrack.
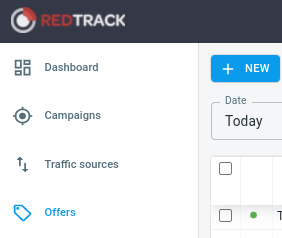
Click the ”Offers” tab, then click "New" .
Select the Offer source and put a "Name" to the Offer. If you did not add a parameter for Sum in the "Offer Source" settings, then you need to add a "Payout" to the Offer.
Then, add the URL of your product to the Offer URL. For instance:
http://mypage.com/?a=14030&c=64375&s1
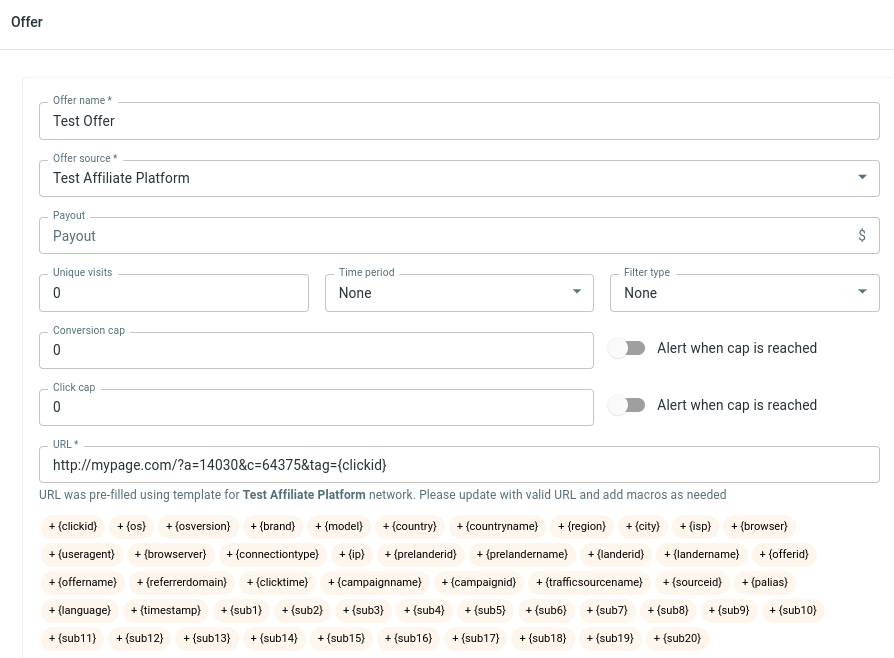
"Save Changes" to finish setting up the Offer.
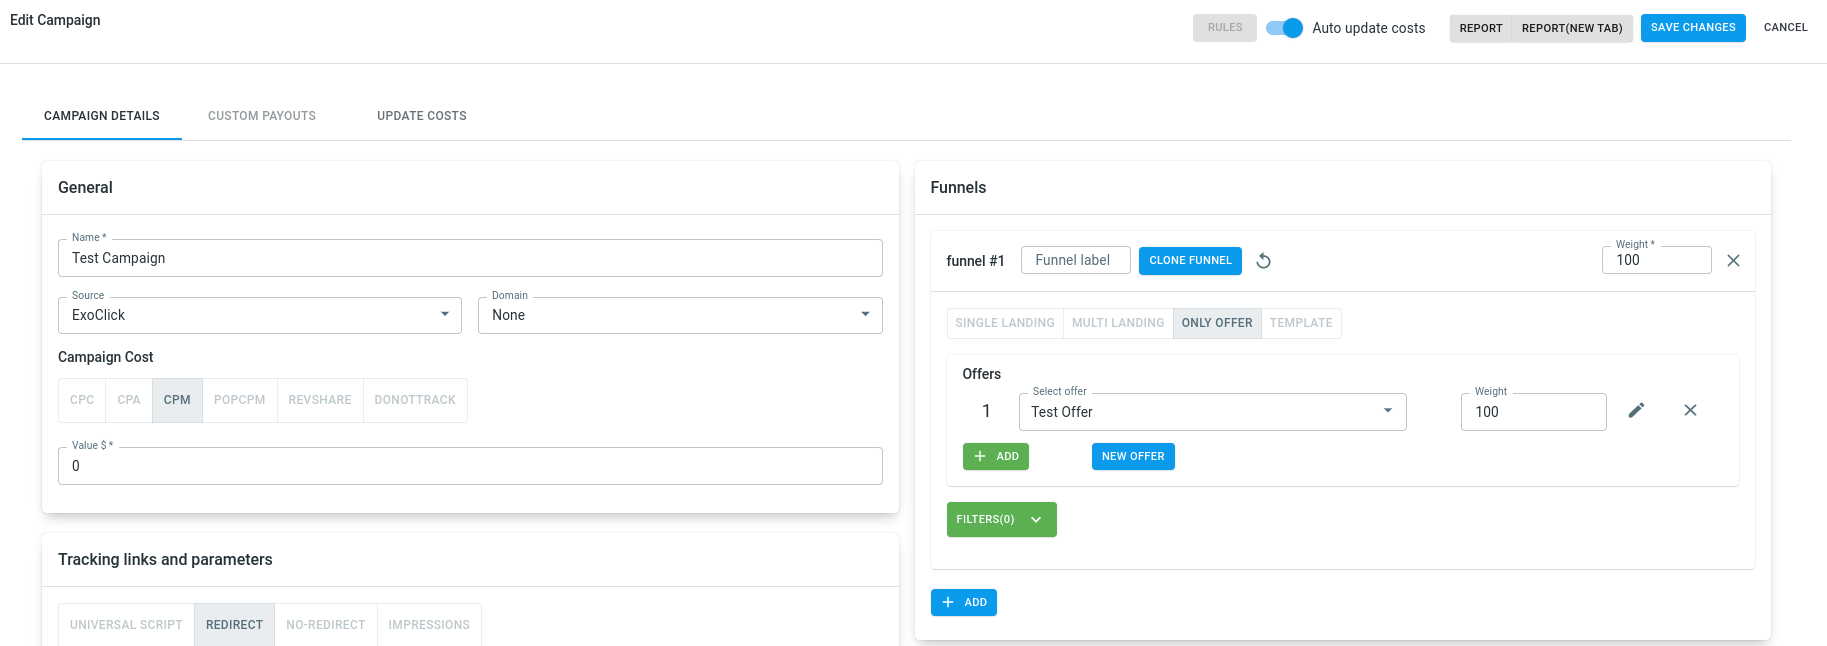
Step 5: Create a campaign in Redtrack.
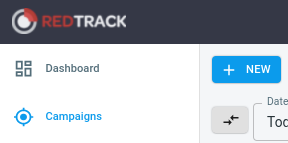
Click the "Campaigns" tab, then click "New"
Here is the process you must follow in order to create a campaign in Redtrack with ExoClick as the source:
- Add a Name to the campaign and select ExoClick as your Source.
- In Campaign cost, select the same Price model as your ExoClick Campaign.
- Scroll down to make sure ExoClick's Postback URL is correct.
- In "Funnels", add your Offer. If you also created Landing Pages for this offer, select "Single Landing" or "MultiLanding". Otherwise, click "Only Offer"
- If possible, enable "auto update costs" to fetch the data from your campaign via API. API integration is explained in this section
- Save the campaign.
Your settings should look something similar to this:
Click "Save". Redtrack will provide you with your Campaign URL. You can find it next to your campaign in the Campaign list and in your Campaign settings:
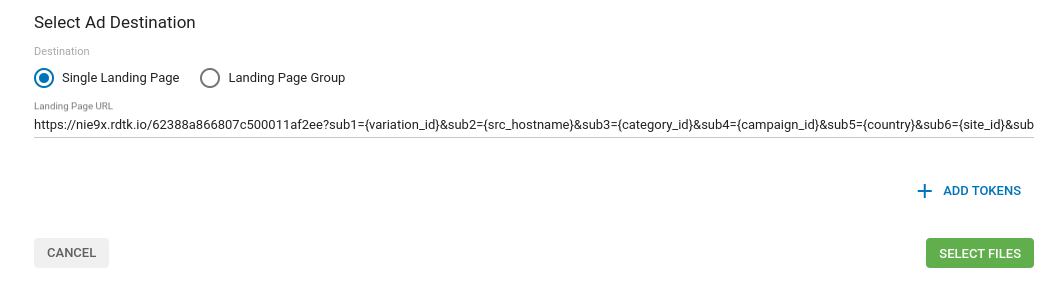
Example campaign URL:
https://nie9x.rdtk.io/62388a866807c500011af2ee?sub1={variation_id}&sub2={src_hostname}&sub3={category_id}&sub4={campaign_id}&sub5={country}&sub6={site_id}&sub7={zone_id}&sub8={format}&ref_id={conversions_tracking}&cost={actual_cost}

Step 6: Create the campaign in Exoclick
Copy the campaign URL created from the previous section and paste it as your "Variation" in your campaign in Exoclick. Make sure it contains the {conversions_tracking} tag to send the conversion details to Redtrack.
Finish the campaign set up. You can find a detailed guide on how to create a campaign in Exoclick here.
If the set up has been done correctly, you will start seeing conversions both in Redtrack and ExoClick. Do not forget to enable the corresponding Goal column in your Campaigns List and your Statistics
ExoClick API Redtrack integration
By integrating Redtrack with ExoClick via API, you will be able to manage certain aspects of your ExoClick campaigns while at the same time make use of Redtrack's reporting tools.
Each change you make in Redtrack will have an instantaneous effect in ExoClick. Here are some of the actions you can make through API Redtrack integration
- Synchronize costs: The "auto update cost" feature will allow you to fetch cost data from your ExoClick account.
- Add automation rules This allows you to pause campaigns, variations or zones automatically based on conditions from your choice.
Requirements
Before you can integrate with Redtrack, you need to generate an API Token in ExoClick.
Login to your Exoclick account, then click on your username to access your Profile. Click on New API Token, give a name to that token, then hit Save. You will see the API token under the "Token" column:


Instructions
In order to integrate ExoClick API, add your API token to the "API key" section from your Traffic Source settings:
If the API token is valid, then the "Active" label will appear next to the API key section.
Then, you can go to "Campaigns" in Redtrack, select the campagin where you want to enable the automized rules, then click on "Rules". An extensive description of how rules are set can be found here
If you need further guidance on how to set up Conversion tracking or API Integration in Redtrack, please don't hesitate to contact Redtrack support. You can also contact ExoClick's Customer Success to review these steps.