How to track conversions with Skro
This guide is for Skro only. If you want to know the generic steps for S2S tracking, please check the Advertisers section.
This guide consists of two sections:
a) How to set up conversion tracking in Skro. This section will focus on knowing how to set up the Postback URL in Skro, how to notify conversions to Skro and how to display these conversions in both Skro and ExoClick.
b) How to integrate Exoclick in Skro via API. This section will show how to edit ExoClick's campaigns from Skro and how to match your campaign costs in both platforms.
If you want to receive additional information, please check Skro's integration guide.
How to set up conversion tracking in Skro
Step 1: Create the Goal ID for the Postback URL
Log into your ExoClick Admin Panel and go to Campaigns > Conversions tracking. This allows you to create the conversions tracking code to be used in your postback URL:

Click "New Conversion Goal". There are several fields you must complete:
- Name: The name you want to give to your conversion.
- Conversion Type: The type of action being or offer being tracked through this conversion.
- Conversion Value: The method with which you will track the payout of your conversions. There are three options:
- No Value: value is 0
- Fixed: you determine the payout of the conversion manually when setting up the Goal.
- Dynamic: the value of the payout will be passed through the Postback URL. Dynamic value passing will be explained in detail later during the guide.
- Order: used to organize the different goals you have created in your account. If you have created multiple Conversion Goals, the Order will help you organize how these goals are displayed in your Statistics and in the Campaigns List.
Once you have added all these fields, click on the "Create" button. The Admin Panel will display the structure of the Postback URL as well as the Goal ID corresponding to the Goal you just created. It should look something similar to this:
http://s.magsrv.com/tag.php?goal=66a8605e6cce49fbb8056f273f8e1a2e&tag=
You can also check our Conversions Tracking page to find out more details about our Goal creation process.
Step 2: Add ExoClick as a traffic source in Skro and configure the Postback
To track conversions on ExoClick you will need to add to your campaign URL a dynamic tracker called {conversions_tracking}, which identifies each conversion uniquely.
You must store this tracker on Skro and get it to notify ExoClick’s server each time a user generates a conversion. This is done very easily by configuring ExoClick as the traffic source, using the pre-defined template. To do so:
- Log in to your Skro dashboard.
- Click the "Traffic Sources" tab, then click "+Create".
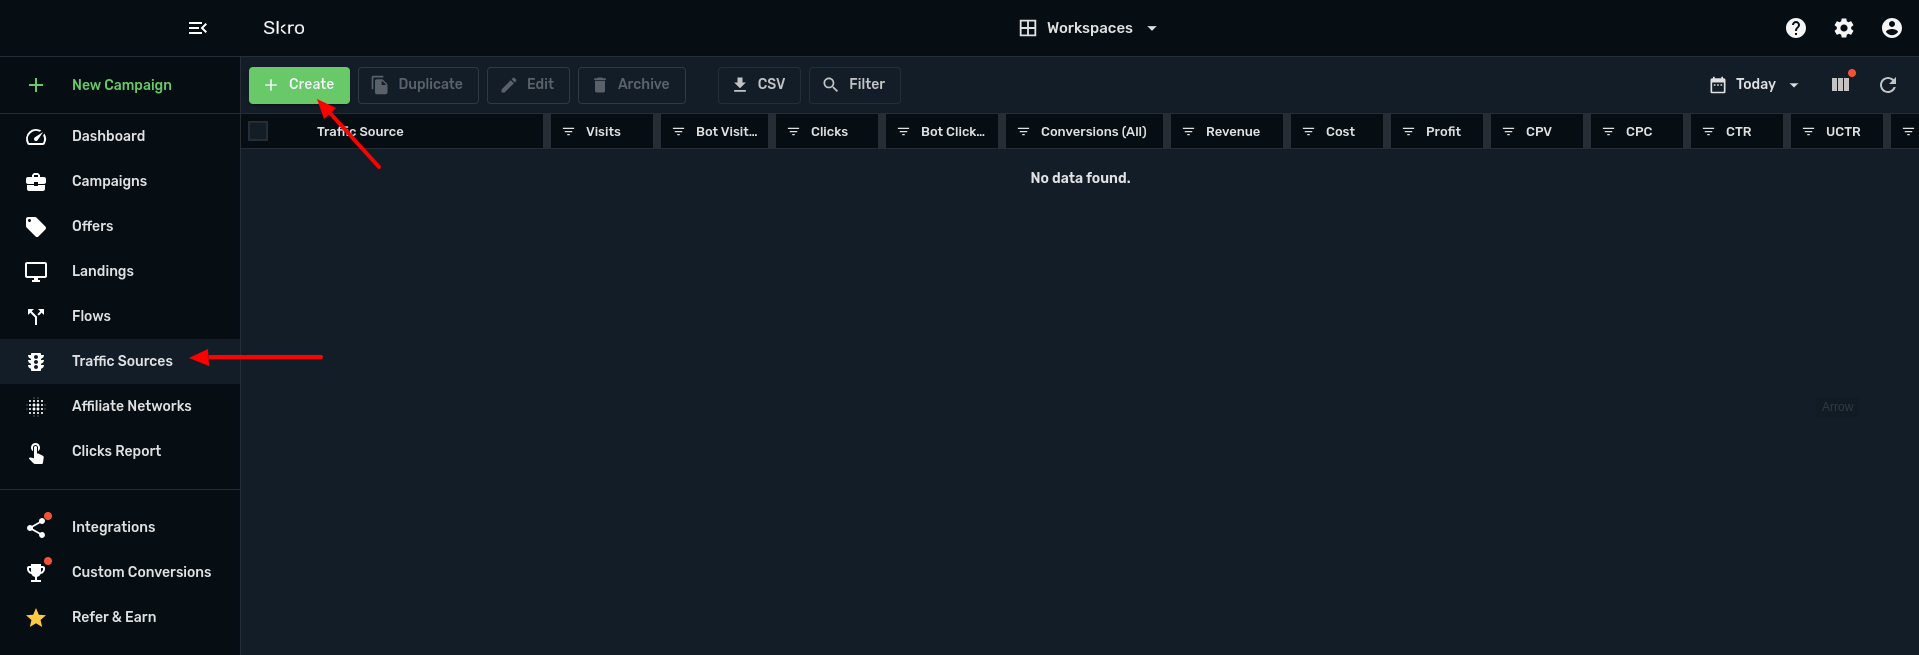
- Choose ExoClick from the list of templates. Skro will pre-populate all the traffic source settings.
- In the "Traffic Source postback URL" section, paste the structure of the postback URL you copied from the Admin Panel in ExoClick.
- Replace {conversions_tracking} with {externalId}. Your postback URL should now look like the following:
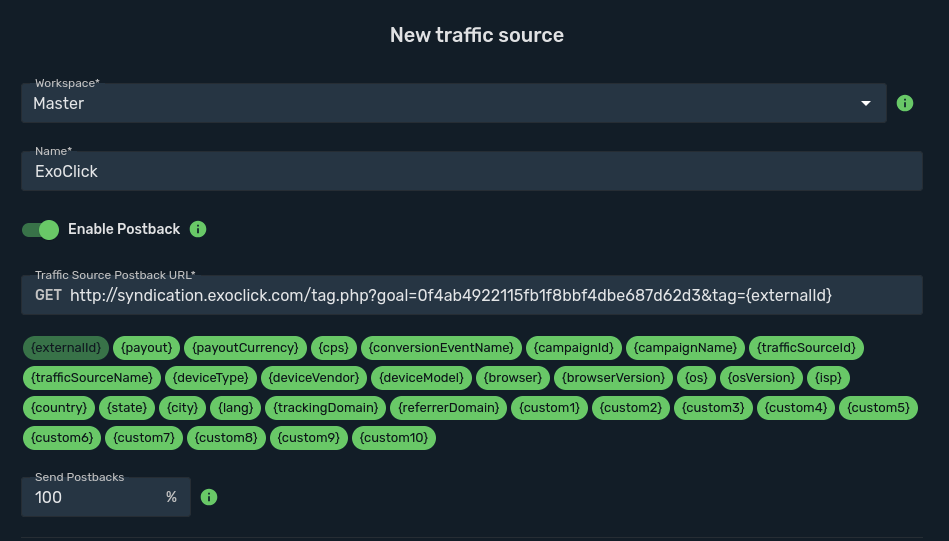
Note: If you have selected “Dynamic” value when creating your Conversion goal STEP 1, then you must add value={payout} at the end of the postback URL. In this case, your postback URL will look like the following:
http://s.magsrv.com/tag.php?goal=66a8605e6cce49fbb8056f273f8e1a2e&tag={externalId}&value={payout}
- Click "Create" to save the postback.
Step 3: Add an Affiliate Network Source to Skro (optional)
If you are not using an Offer from an Affiliate platform, please skip to Step 4
- Click the "Affiliate Networks" tab, then click "+Create":

- Select an Affiliate network from the list. If your Affiliate network is not on the list, you can manually set up your affiliate platform settings by clicking "Create Custom".
- Copy the postback URL provided by Skro and paste it in the settings from the Affiliate network you are using. The postback URL will have the tokens needed by your affiliate platform.
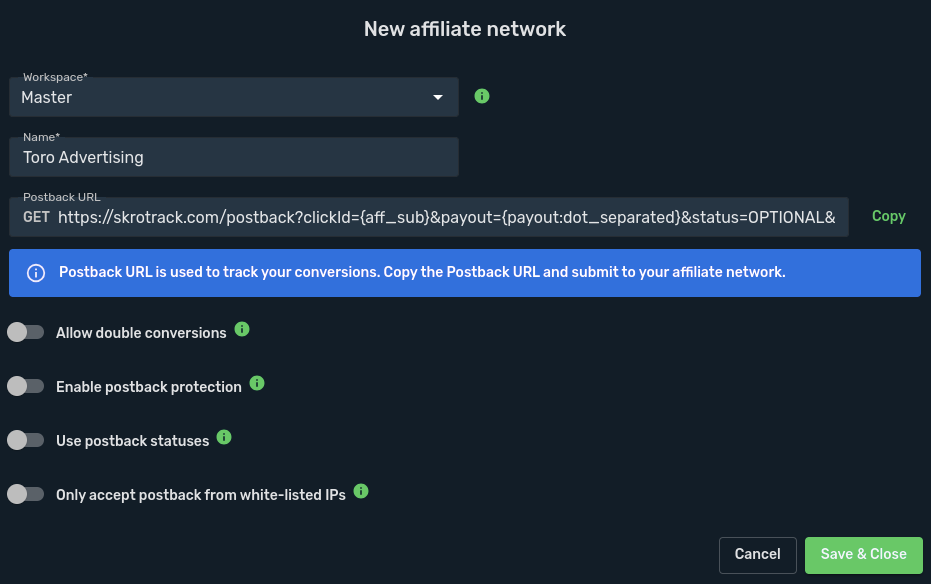
Note: Remember that the Postback URL you see here corresponds to the Affiliate Platform. This is not the same postback URL as the one you used in Traffic Source settings.
Click on "Save & Close" to finish the process.
Step 4: Add an Offer to Skro
- Click the "Offers" tab, then click "+Create".
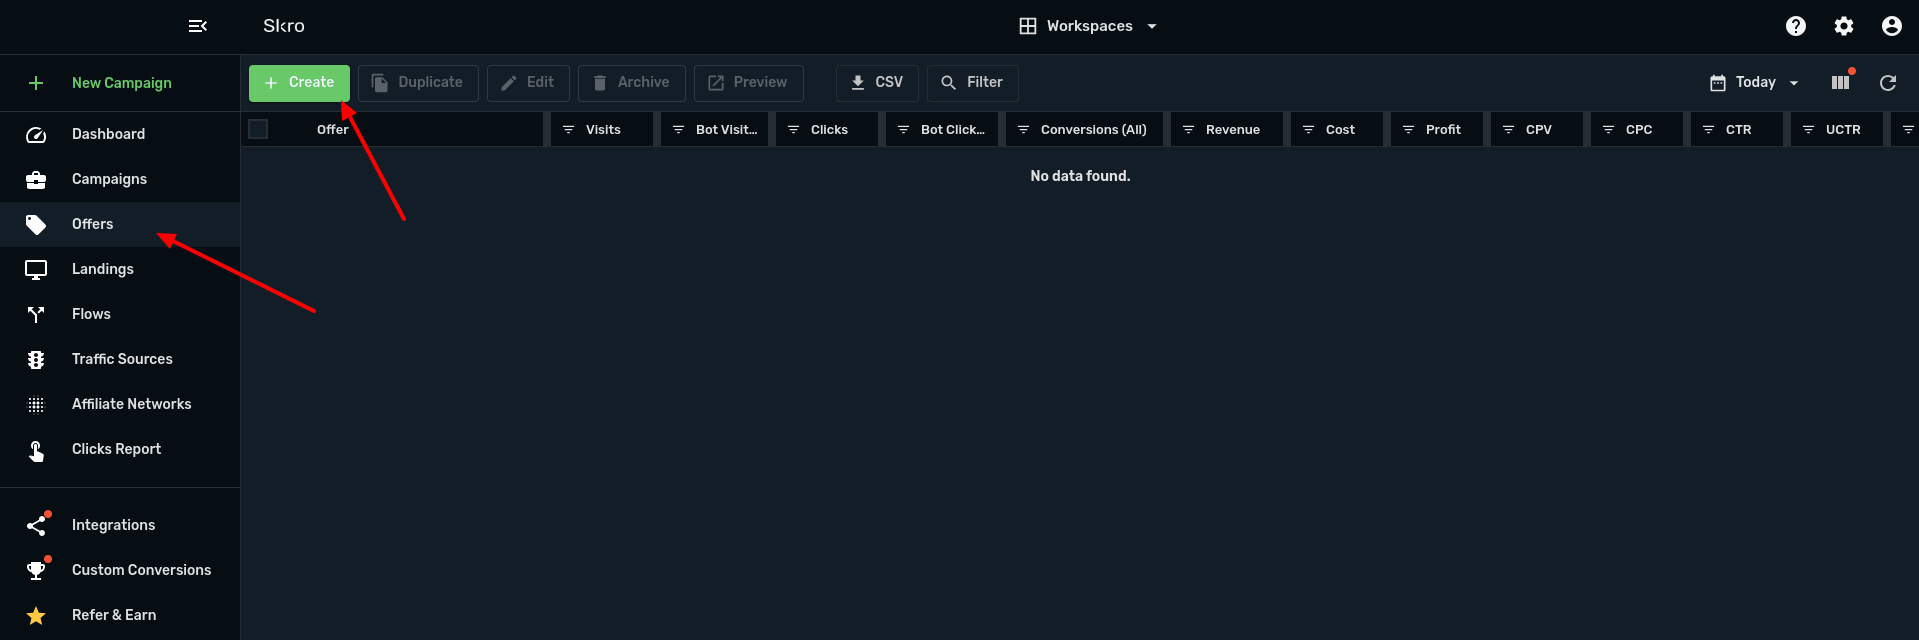
- Add an "Offer Name" and the URL of the offer.
E.g:
http://mypage.com/?a=14030&c=64375&s1=
If you have added an Affiliate network, then select it here. The parameters from the Affiliate network will be inserted in the offer URL
Lastly, in the "Payout" section, keep the "Auto" option if your Affiliate platform is able to receive payouts dynamically through the postback. If not, then click "Manual" and add the value of the Payout.
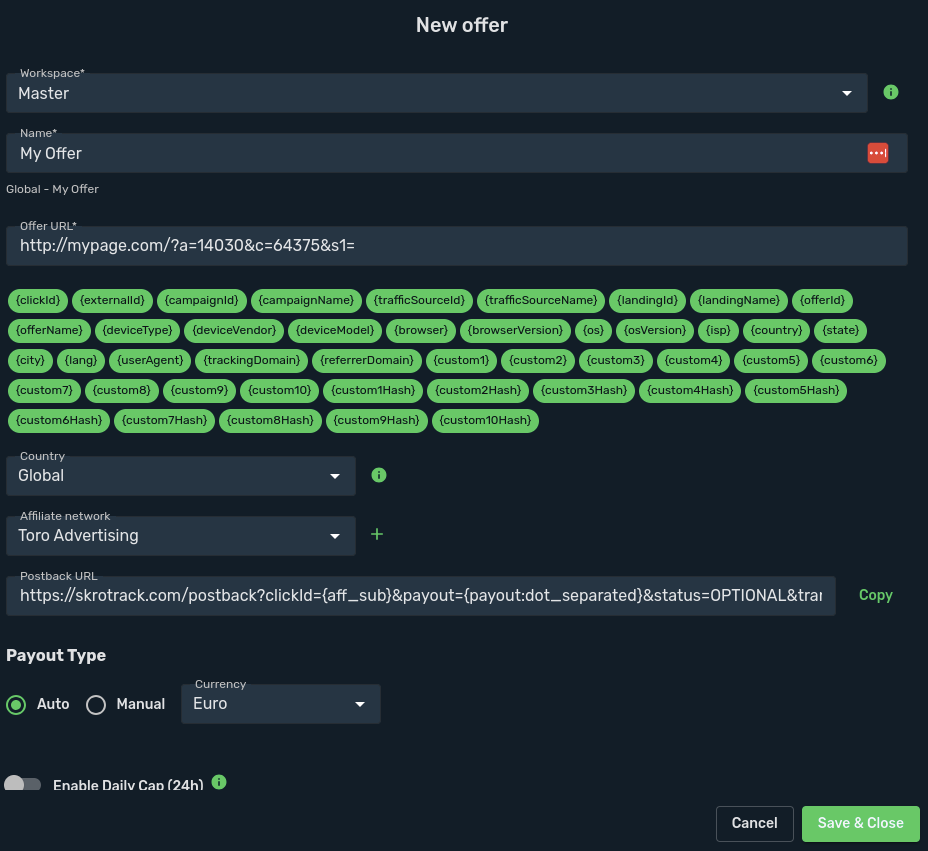 Once you are done with the Offer settings, click "Create offer".
Step 5: Create a Campaign in skro
When you are ready to create a campaign, click the "Campaigns" tab, then click "+New".

In order to create the campaign, follow these steps:
- Select ExoClick as your Traffic Source and "Auto" as your Cost Model. Make sure to choose the right currency as well.
- Write your Campaign Name. Skro also recommends adding a custom tracking domain instead of the default one to avoid issues with anti-virus tools.
- Add the last details of the campaign (destination type, offer, etc.) and click "Save"
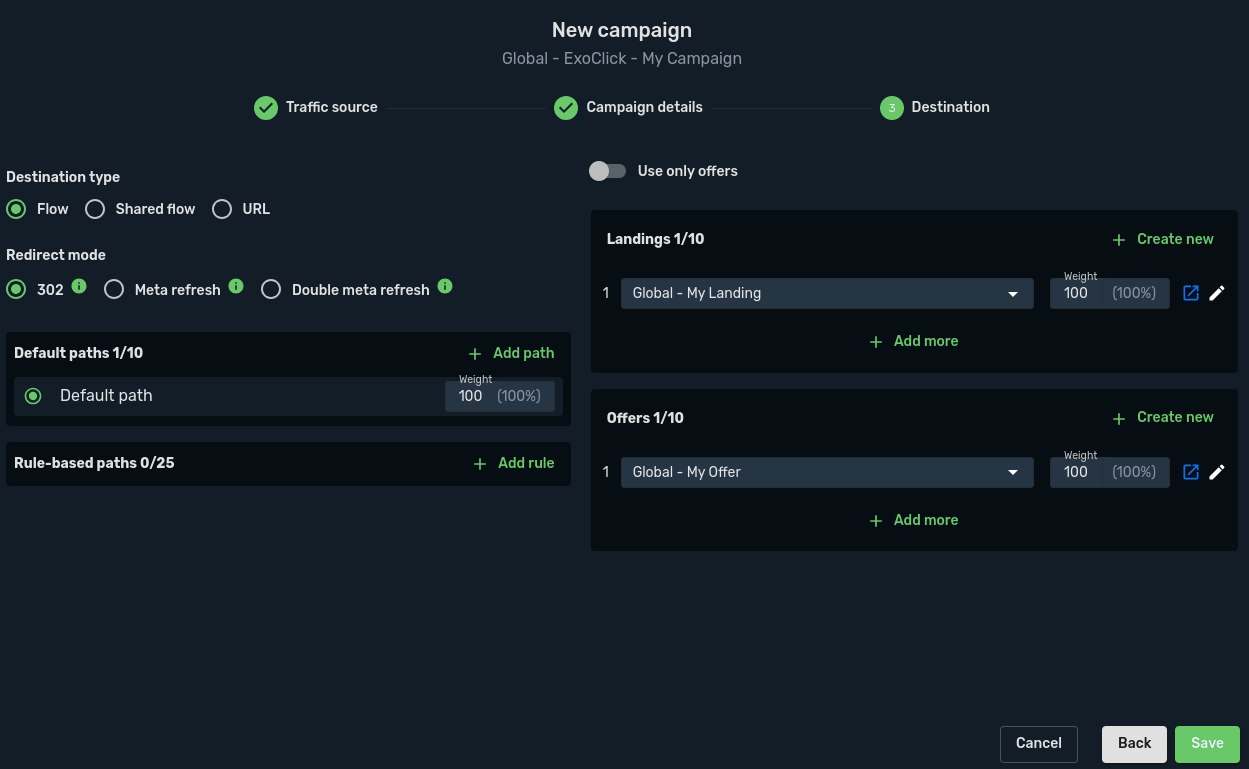
- The "Campaign Links" section will be unlocked and you will be able to get the Campaign URL. It should look similar to the following:
https://skrotrack.com/campaign/73cd89a4-1216-4179-94b1-b4f6c361d33f?cost={actual_cost}&tag={conversions_tracking}&site_id={site_id}&zone_id={zone_id}&campaign_id={campaign_id}&variation_id={variation_id}&src_hostname={src_hostname}&category_id={category_id}&country={country}&format={format}&keyword={keyword}&tags={tags}
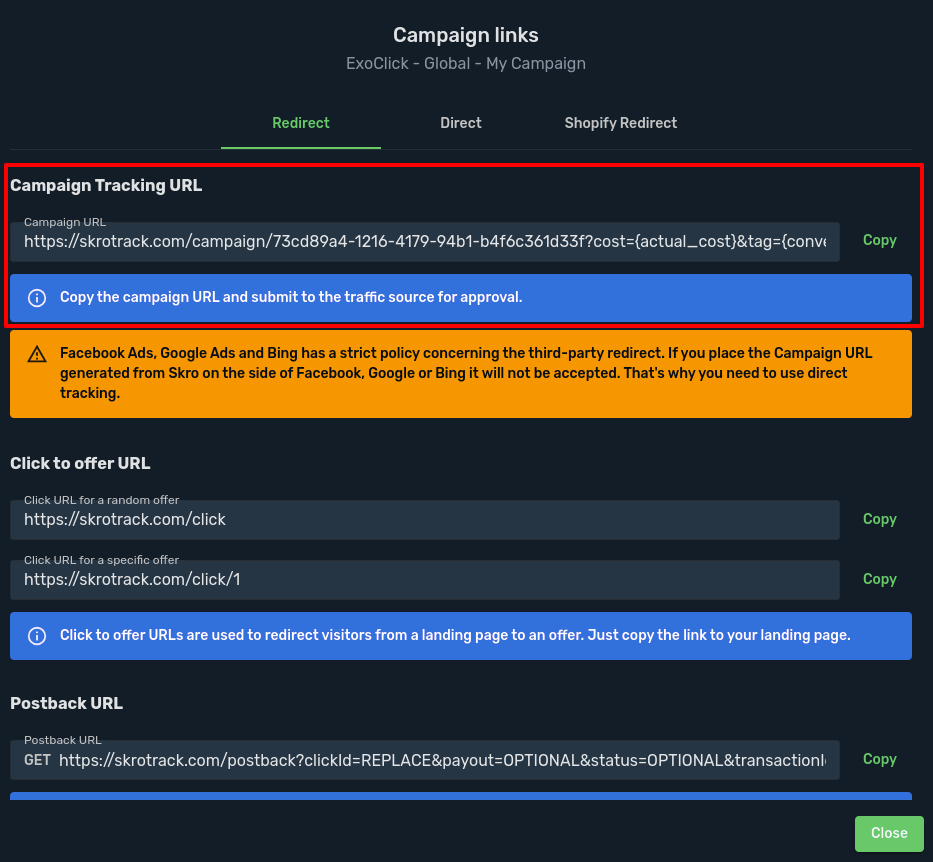
Step 6: Set up the Campaign in ExoClick
Paste the campaign URL created in the previous step as your "Variation" in your ExoClick campaign. Make sure it contains the {conversions_tracking} tag to send the conversion details to Skro.

Finish the campaign set up. You can find a detailed guide on how to create a campaign in Exoclick here.
If the set up has been done correctly, you will start seeing conversions both in Skro and Exoclick. Do not forget to enable the corresponding Goal column in your Campaigns List and your Statistics
ExoClick API Skro integration
By integrating Skro with ExoClick via API, you will be able to manage certain aspects of your ExoClick campaigns while at the same time make use of Skro's reporting tools.
Each change you make in Skro will have an instantaneous effect in ExoClick. Here are some of the actions you can make through API Skro integration
- Synchronize costs: Sync cost for campaigns, variations, zones and sites every 30 min.
- Check the status of integrated campaigns: Check the status of your campaigns, variations, zones and sites..
- Pause or resume an integrated campaign: Pause or resume campaigns, variations, zones and sites.
- Change bids for an integrated campaign: Change the bid value for campaigns and zones
Requirements
Before you can integrate with Skro, you need to generate an API Token in ExoClick.
Login to your Exoclick account, then click on your username to access your Profile. Click on New API Token, give a name to that token, then hit Save. You will see the API token under the "Token" column:

Instructions
To initiate the integration, here are the simple steps:
- Sign in to your Skro account and select the "Integrations" tab
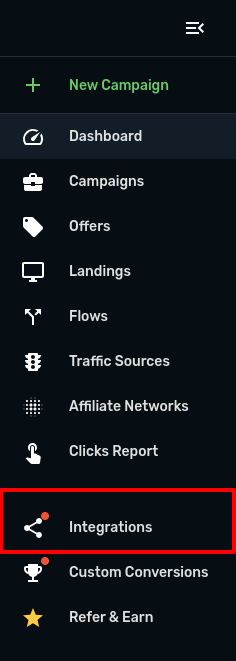
- In the Traffic Source Integrations section, click the "Add" button, then select ExoClick.
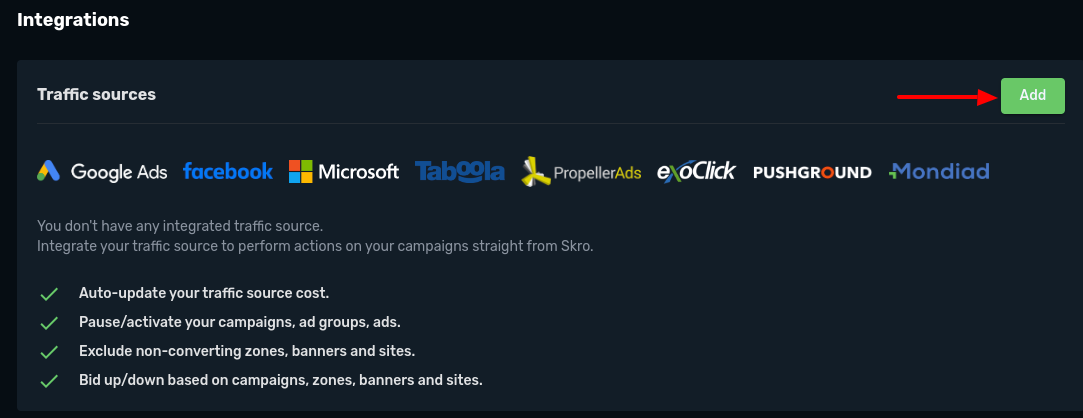
- Introduce your ExoClick API token value, then click "Create Integration".
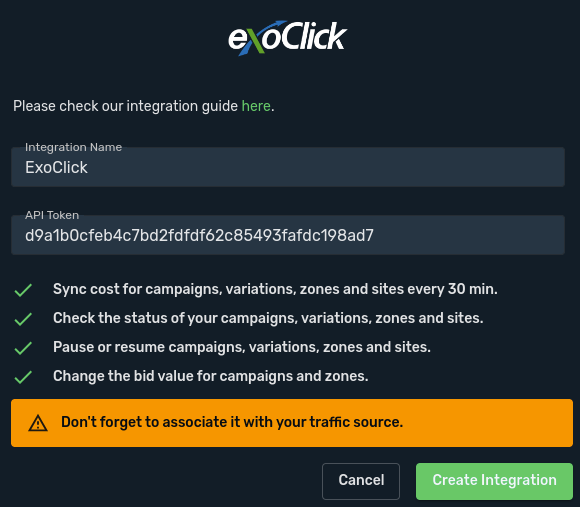
If the integration was made successfully, then Skro will show a confirmation message and you will be redirected back to Skro’s Integration tab.
Additional comments when comparing Skro with ExoClick
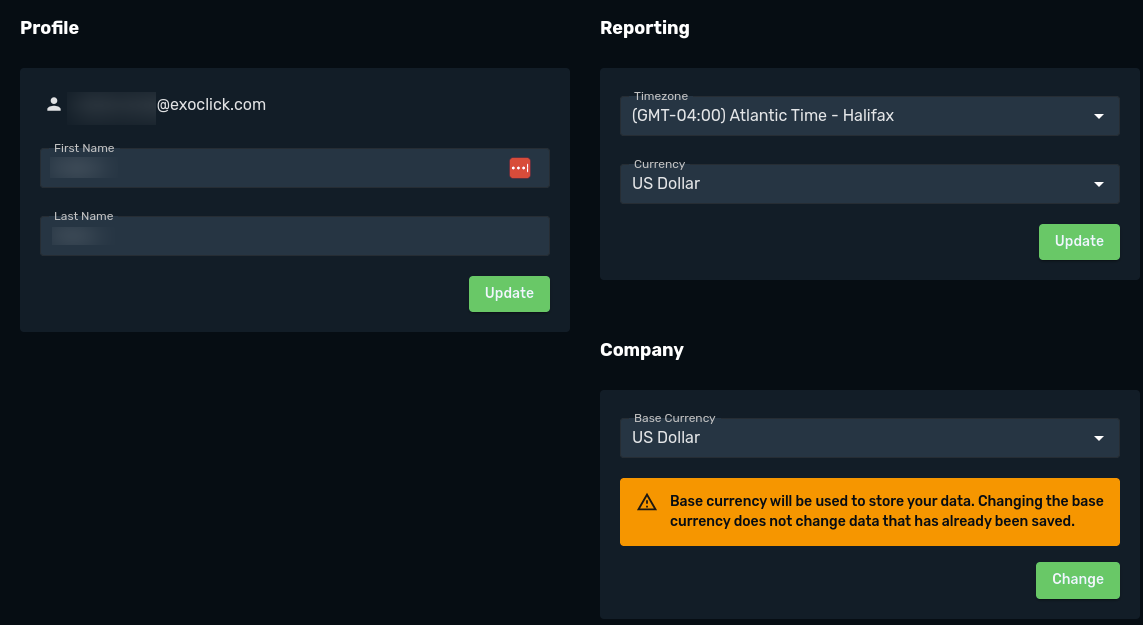
Leaving aside conversions tracking and API integration, there are a few settings in Skro you should bear in mind to make sure you see the same results in both platforms:
- TimeZone: There is an option in Skro to choose a time zone for reports.
We suggest you to use EST(United States - New York) time zone to match ExoClick’s server time zone
- Currency: Please select either USD or Euro so as to match the currency in your ExoClick account.
If you need further guidance on how to set up Conversion tracking in Skro, don't hesitate to contact Skro support by sending a message to support@skro.eu. You can also contact Exoclick's Customer Success to review these steps.