Third Party Ad-Serving
Third party ad serving allows advertisers to host, deliver and track events from their own server, instead of relying exclusively on ExoClick to perform these tasks. On a campaign level, this is achieved by taking advantage of HTML Banner tags and iframe URLs.
Some of the advantages of HTML Banner tags and iframe URLs are that most of the recurrent campaign updates, like changing and updating creatives, can be performed straight from the advertiser's own server. In addition, this approach is also helpful because it allows for automation, making tasks like tracking, A/B testing and segmentation easier to manage.
Inserting an HTML Banner tag or iframe URL into a campaign
If HTML / iframes are allowed in your account, head to Step 2 - Ads in your campaign creation window. From there, choose HTML Banners or iframe URL and click on the + AD VARIATIONS button to add the tag or URL to your campaign.
Currently, ExoClick uses HTML banner tags for all banner formats, and iframe URL for Interstitial and Native ads.
HTML banners will accept HTML tags as an input. Even though you can in theory build your creative right inside the input box by using HTML tags, the recommended practice is to create an iframe pointing to your host page:

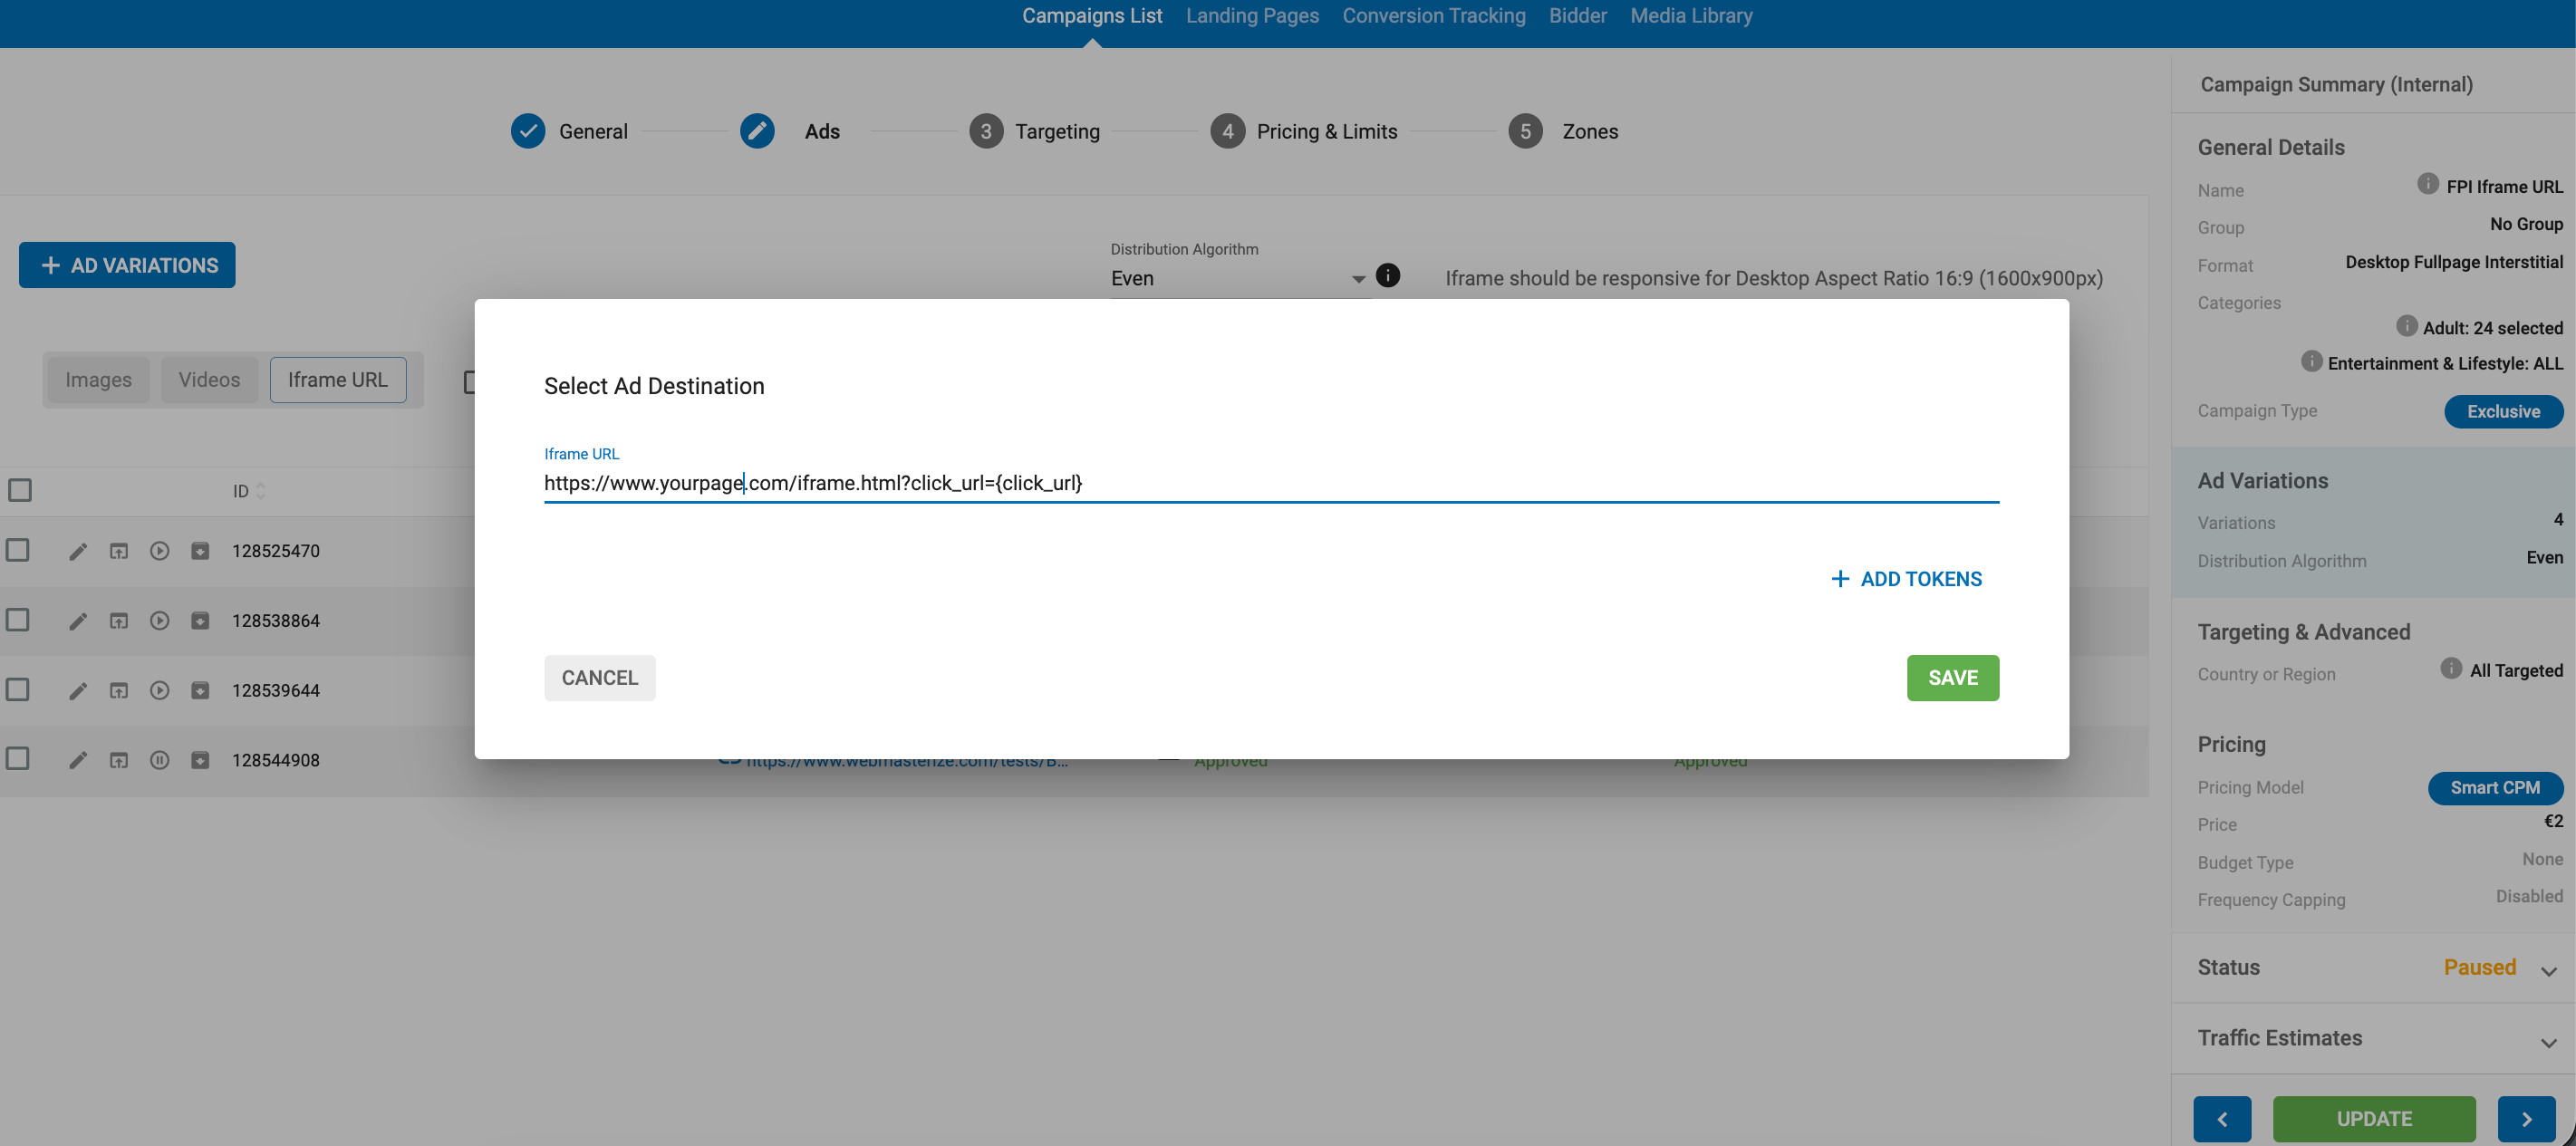
With the iframe URL, you just need to provide the ad destination URL:
Registering Clicks and Conversions in HTML campaigns
As HTML Banner and Iframe URL campaigns are served through a third party server, the Admin Panel will not register any clicks or conversions by default. If you want to track these events, you’ll need to follow these steps:
Step 1: Add the {click_url} and {conversions_tracking} parameters to your HTML/iFrame code
Add {click_url} and {conversions_tracking} to the ad tag, as shown in this example:
<body style="margin: 0px"><iframe id='a628d52a' name='a628d52a' src='https://ad.third-party-server.com/iframe?tag={conversions_tracking}&click_url={click_url}' frameborder='0' scrolling='no' width='300' height='250'></iframe></body>
Step 2: Add to your host page the code to detect the {click_url} value
Your host page needs to be able to detect the {click_url} value in order to generate the click and the {conversions_tracking} string in order to register the conversion in the Admin Panel. The way in which you fetch these values depends on the programming language your host page is built with. Here are some examples:
- Javascript:
<div id="anchor"></div>
<script src="https://code.jquery.com/jquery-3.6.0.min.js" integrity="sha256-/xUj+3OJU5yExlq6GSYGSHk7tPXikynS7ogEvDej/m4=" crossorigin="anonymous"></script>
<script type="text/javascript">
//get Params from iframe URL
function paramFetch(name)
{
  name = name.replace(/[\[]/, "\\\[").replace(/[\]]/, "\\\]");
  var regex = new RegExp("[\\?&]" + name + "=([^&#]*)"),
  results = regex.exec(location.search);
  return results == null ? "" : decodeURIComponent(results[1].replace(/\+/g, " "));
}
//create banner
  var tag = paramFetch('tag');
  var clickid = paramFetch('click_url');
  if (!clickid.endsWith(';')) {
            clickid += ';';
        }
  var link = document.createElement('a');
  link.href = clickid + 'https://www.mylandingpage.com?tag=' + tag ;
  link.target = '_blank';
  link.innerHTML = '<img src=\"banner300x250.jpg\">';
  document.getElementById('anchor').appendChild(link);
</script>
Note: In this script, you can add any variable that you might need to track through your iframe, provided that you specify the parameter from the URL that preceedes this value. For instance, if you want to track Sub IDs, you can use the following code:
<div id="anchor"></div>
<script src="https://code.jquery.com/jquery-3.6.0.min.js" integrity="sha256-/xUj+3OJU5yExlq6GSYGSHk7tPXikynS7ogEvDej/m4=" crossorigin="anonymous"></script>
<script type="text/javascript">
//get Params from iframe URL
<script type="text/javascript">
function paramFetch(name)
{
  name = name.replace(/[\[]/, "\\\[").replace(/[\]]/, "\\\]");
  var regex = new RegExp("[\\?&]" + name + "=([^&#]*)"),
  results = regex.exec(location.search);
  return results == null ? "" : decodeURIComponent(results[1].replace(/\+/g, " "));
}
  var tag = paramFetch('tag');
  var subid = paramFetch('subid'); // Fetch the value of the 'subid' parameter from the URL
  var link = document.createElement('a');
  link.href= 'https://www.mylandingpage.com?tag=' + tag + '&subid=' + subid ; // Track subid parameter
  link.target= '_blank';
  link.innerHTML = '<img src=\"banner300x250.jpg\">';
  document.getElementById('anchor').appendChild(link);
</script>
Sub ID tracking is a way to add extra information to your links so you can understand more about where your website traffic is coming from. By adding Sub ID parameters to your URLs, you can track specific details like which ad, platform, or campaign brought a visitor to your site.
- PHP:
<?php
$tag_tracker = isset($_GET['tag']) ? $_GET['tag'] : '';
$click_url = isset($_GET['click_url']) ? $_GET['click_url'] : '';
?>

if (substr($click_url, -1) !== ';') {
  $click_url .= ';';
}

<a target="_blank" href='<?php echo $click_url ?>https://ad.third-party-server-ad.com/click?tag=<?php echo $tag_tracker ?>' >
The final result of the link should be:
{click_url}https://ad.third-party-server-ad.com/click?tag={conversions_tracking}
When a user clicks on this ad, our server will automatically remove the {click_URL} value and redirect the visitor to the page, while registering the click and providing the details from the conversion.