ExoClick Ad Zone Integration with Vue.js
In this tutorial, we will walk through different examples of how to integrate ExoClick Ad Zones inside a Vue.js project.
Example: Banner
Step 1. Create components/BannerAd.vue
<template>
 <h2>Banner Ad 300x250</h2>
 <ins class="xxxxxxxxx" data-zoneid="xxxxxxxxx"></ins>
</template>


<script>
export default {
 name: 'BannerAd',
 mounted() {
   const adScript = document.createElement('script');
   adScript.src = 'https://a.magsrv.com/ad-provider.js';
   adScript.async = true;
   adScript.type = 'application/javascript';
   document.body.appendChild(adScript);


   adScript.onload = () => {
     (window.AdProvider = window.AdProvider || []).push({ serve: {} });
   };
 }
}
</script>
Remember to replace both ins class and data-zoneid with actual class and your own zone ID from your admin panel.
Step 2. Use it in App.vue
Import the ad component in your main app
<script setup>
import BannerAd from './components/BannerAd.vue';
</script>


<template>
 <main>
     <BannerAd />
 </main>
</template>
You can move <BannerAd /> anywhere in the layout (header, footer, sidebar, etc.).
Run the app and you should see the banner ad.

Example: VAST
This example uses Fluid Player as the video player to serve ads.
Step 1. Create components/FluidPlayer.vue
<template>
 <div class="video-section">
   <h2>Vast Ads & Fluid Player</h2>
   <div class="video-wrapper">
     <video
       id="example-player"
       controls
       style="width: 640px; height: 360px;"
     >
       <source
         data-fluid-hd
         src="https://www.test.com/video_720.mp4"
         title="720p"
         type="video/mp4"
       />
       <source
         src="https://www.test.com/video_360.mp4"
         title="360p"
         type="video/mp4"
       />
     </video>
   </div>
 </div>
</template>


<script setup>
import { onMounted } from 'vue';


onMounted(() => {
 // Load Fluid Player CDN
 const script = document.createElement('script');
 script.src = 'https://cdn.fluidplayer.com/v3/current/fluidplayer.min.js';
 script.onload = () => {
   // Initialize Fluid Player
   window.fluidPlayer('example-player', {
     layoutControls: {
       primaryColor: "#28B8ED",
       timelinePreview: {
         file: 'thumbnails.vtt',
         type: 'VTT'
       },
       controlForwardBackward: {
         show: true,
         doubleTapMobile: false
       }
     },
     vastOptions: {
       adList: [
         {
           roll: "preRoll",
           vastTag: "https://s.magsrv.com/v1/vast.php?idzone=xxxxxxxxx",
           timer: 5
         },
         {
           roll: "onPauseRoll",
           vastTag: "https://s.magsrv.com/splash.php?idzone=xxxxxxxxx",
           vAlign: "middle"
         }
       ],
       adCTAText: "Advertisement"
     }
   });
 };
 document.body.appendChild(script);
});
</script>
Remember to replace all placeholder values with your own.
Step 2. Use it in App.vue
Import the ad component in your main app
<script setup>
import FluidPlayer from './components/FluidPlayer.vue';
</script>

<template>
 <main>
   <FluidPlayer />
 </main>
</template>
Run the app and you should see the VAST ads.
Example: Popunder
Step 1. In your public folder, create a file named: popunder_script.js
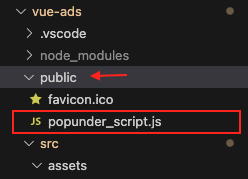
You can name it whatever you want.
Step 2. Paste Popunder script from your ExoClick admin panel inside the file.
Make sure to have the same formatting as you see in the example below.
(function() {
   function randStr(e,t){for(var n="",r=t||"ABCDEFGHIJKLMNOPQRSTUVWXYZabcdefghijklmnopqrstuvwxyz",o=0;o<e;o++)n+=r.charAt(Math.floor(Math.random()*r.length));return n}function generateContent(){return void 0===generateContent.val&&(generateContent.val="document.dispatchEvent("+randStr(4*Math.random()+3)+");"),generateContent.val}try{Object.defineProperty(document.currentScript,"innerHTML",{get:generateContent}),Object.defineProperty(document.currentScript,"textContent",{get:generateContent})}catch(e){};

   //version 7.0.0

   var adConfig = {
   "ads_host": "a.pemsrv.com",
   "syndication_host": "s.pemsrv.com",
   "idzone": xxxxxxxxx,
   "popup_fallback": false,
   "popup_force": false,
   "chrome_enabled": true,
   "new_tab": false,
   "frequency_period": 1,
   "frequency_count": 1,
   "trigger_method": 2,
   "trigger_class": "xxxxxxxxx",
   "trigger_delay": 0,
   "capping_enabled": false,
   "tcf_enabled": false,
   "only_inline": false
};


window.document.querySelectorAll||(document.querySelectorAll...
})();
Remember to replace idzone with your own Zone ID from the admin panel. Update trigger_class if you have a custom class configured for clicks.
Step 3. Add the Script to index.html
<!DOCTYPE html>
<html lang="">

<head>
 <meta charset="UTF-8">
 <link rel="icon" href="/favicon.ico">
 <meta name="viewport" content="width=device-width, initial-scale=1.0">
 <title>Title</title>
</head>

<body>
 <div id="app"></div>
 <script type="module" src="/src/main.js"></script>

<!-- ExoClick Popunder Script -->
 <script type="application/javascript" src="/popunder_script.js"></script>
 <!-- End ExoClick Popunder Script -->
</body>

</html>
With this setup, popunder ad will fire on user interaction.
Note: Push Notification ad script only works when the script is added to index.html