Notificações push: Como implementar a zona de anúncios de notificações push
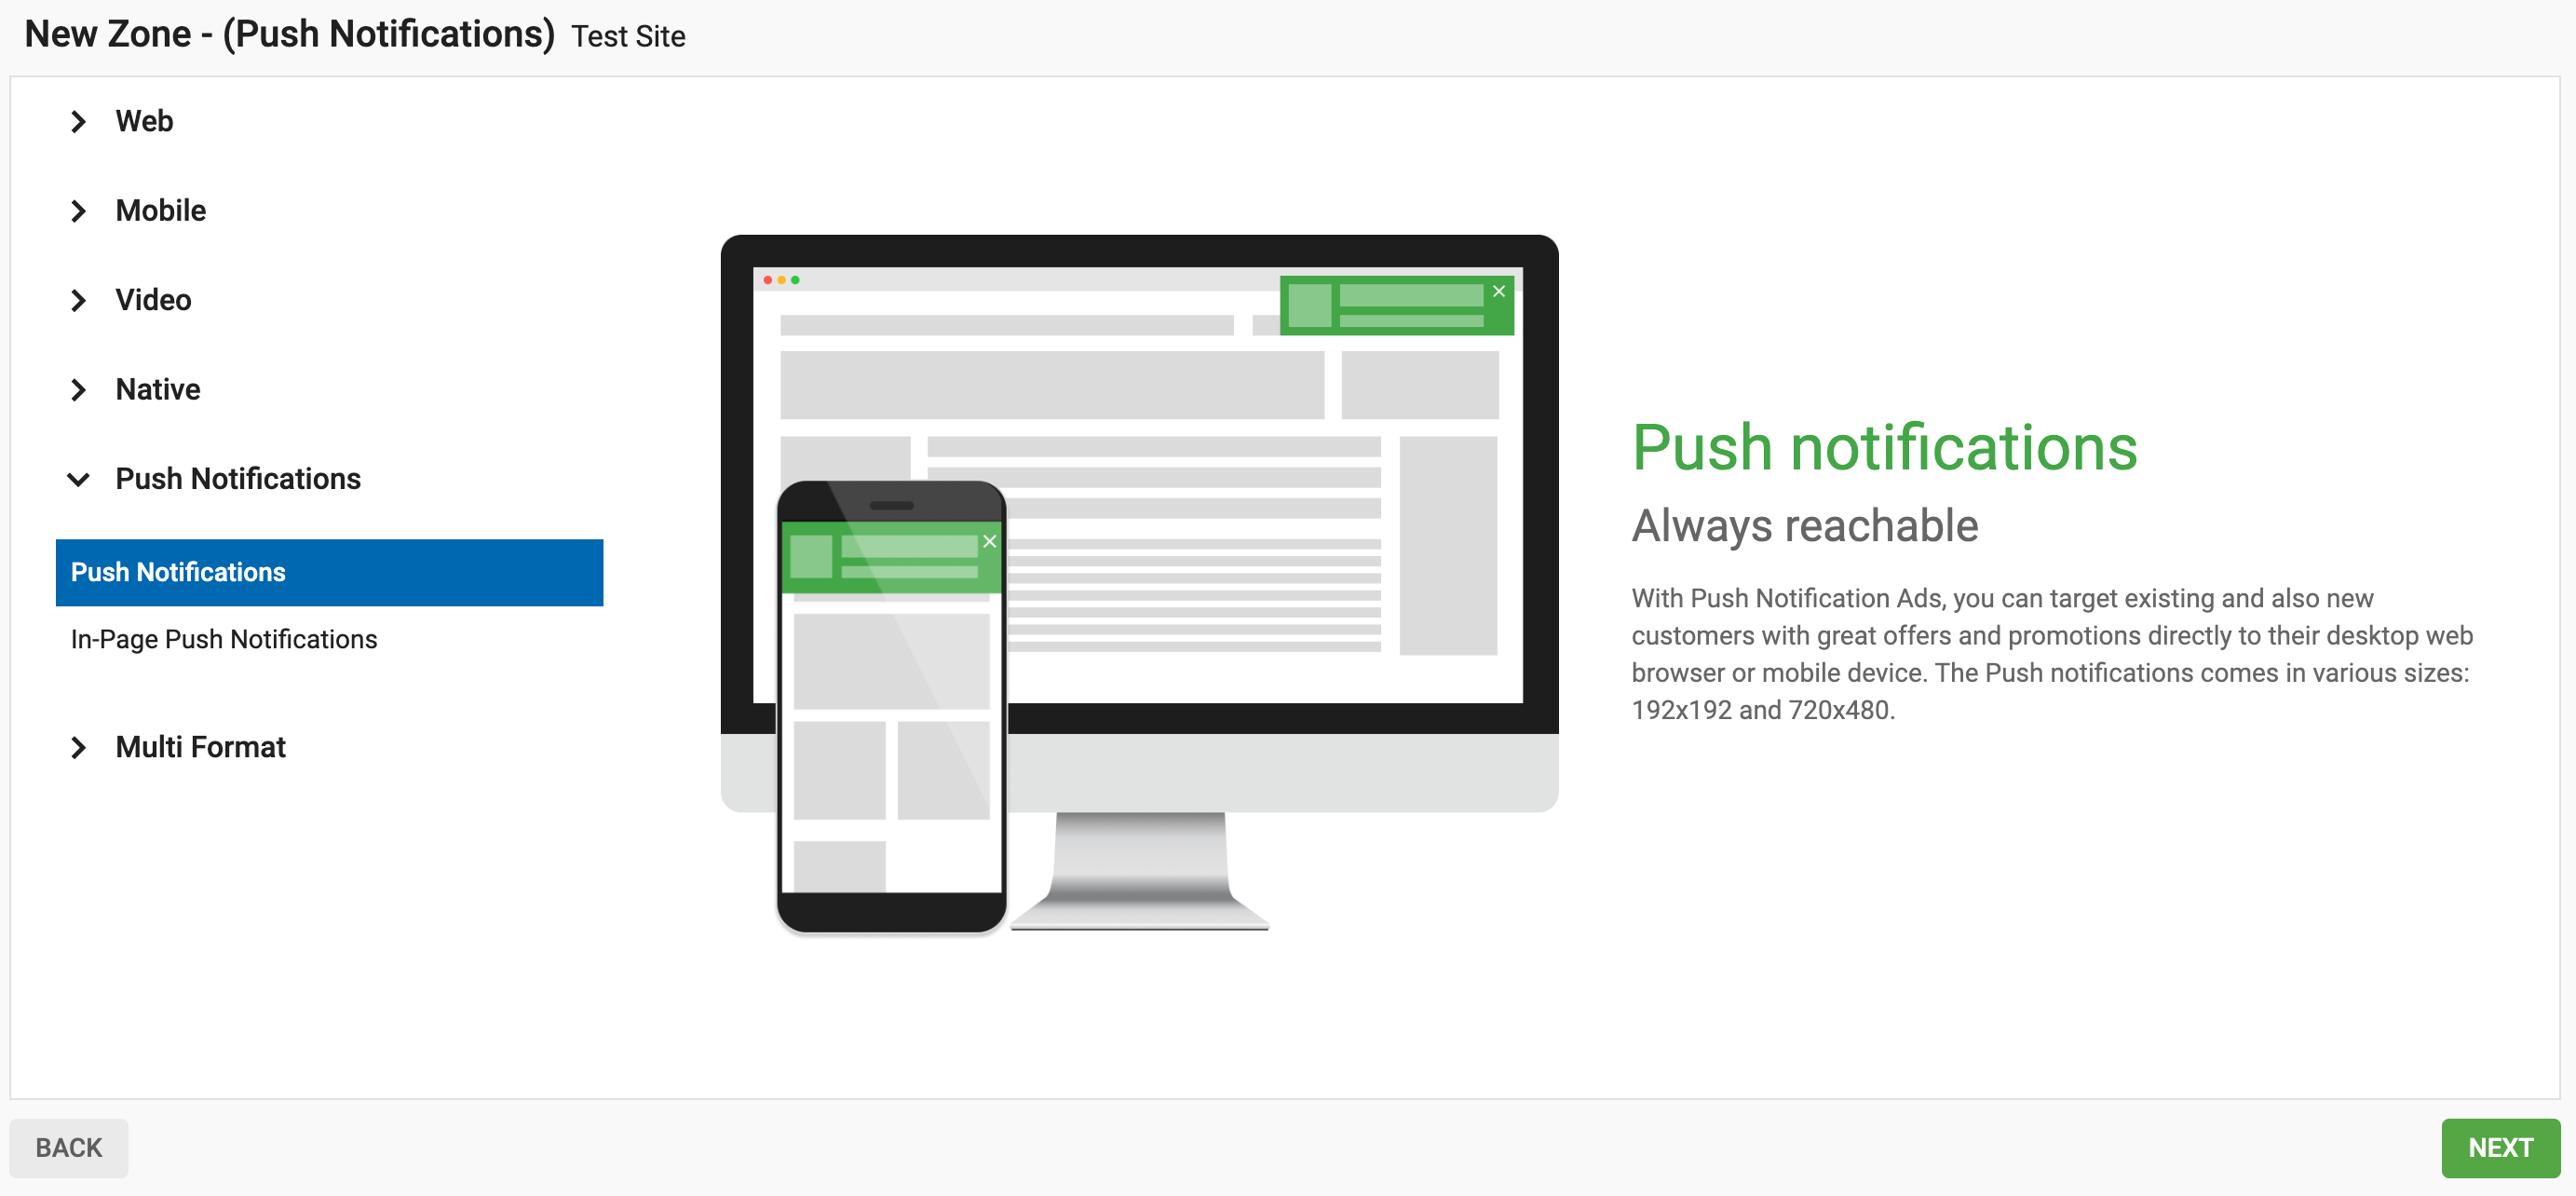
O formato de anúncio Push Notification está agora disponível na ExoClick. Neste guia da plataforma, mostramos-lhe como criar uma zona de anúncio Push Notification.
Como configurar uma zona de anúncios de notificações push
Passo 1 : Criar zona
No seu painel de administração, em Editor, aceda a 'Sites e zonas' e clique em 'Nova zona'. Aparecerá um menu suspenso com uma lista dos seus sites, selecione o site para o qual pretende ativar as notificações push.

Isto abrirá a página de seleção do formato do anúncio. Clique no menu pendente "Nativo", selecione "Notificações push" e clique em "Próximo"
Passo 2: Selecionar o método de integração
Agora, é necessário decidir como pretende recolher utilizadores opt-in para enviar notificações push. Existem três opções:
Para utilizar o seu próprio domínio quando as notificações push são enviadas, pode escolher entre dois métodos de implementação. Pode selecionar entre "Direto" e "Direto com um pedido de soft ask":
- Direto: Isto mostrará uma caixa de opção (Direta) aos utilizadores do seu site. Dentro da caixa, o utilizador pode escolher "Permitir" ou "Bloquear" notificações push
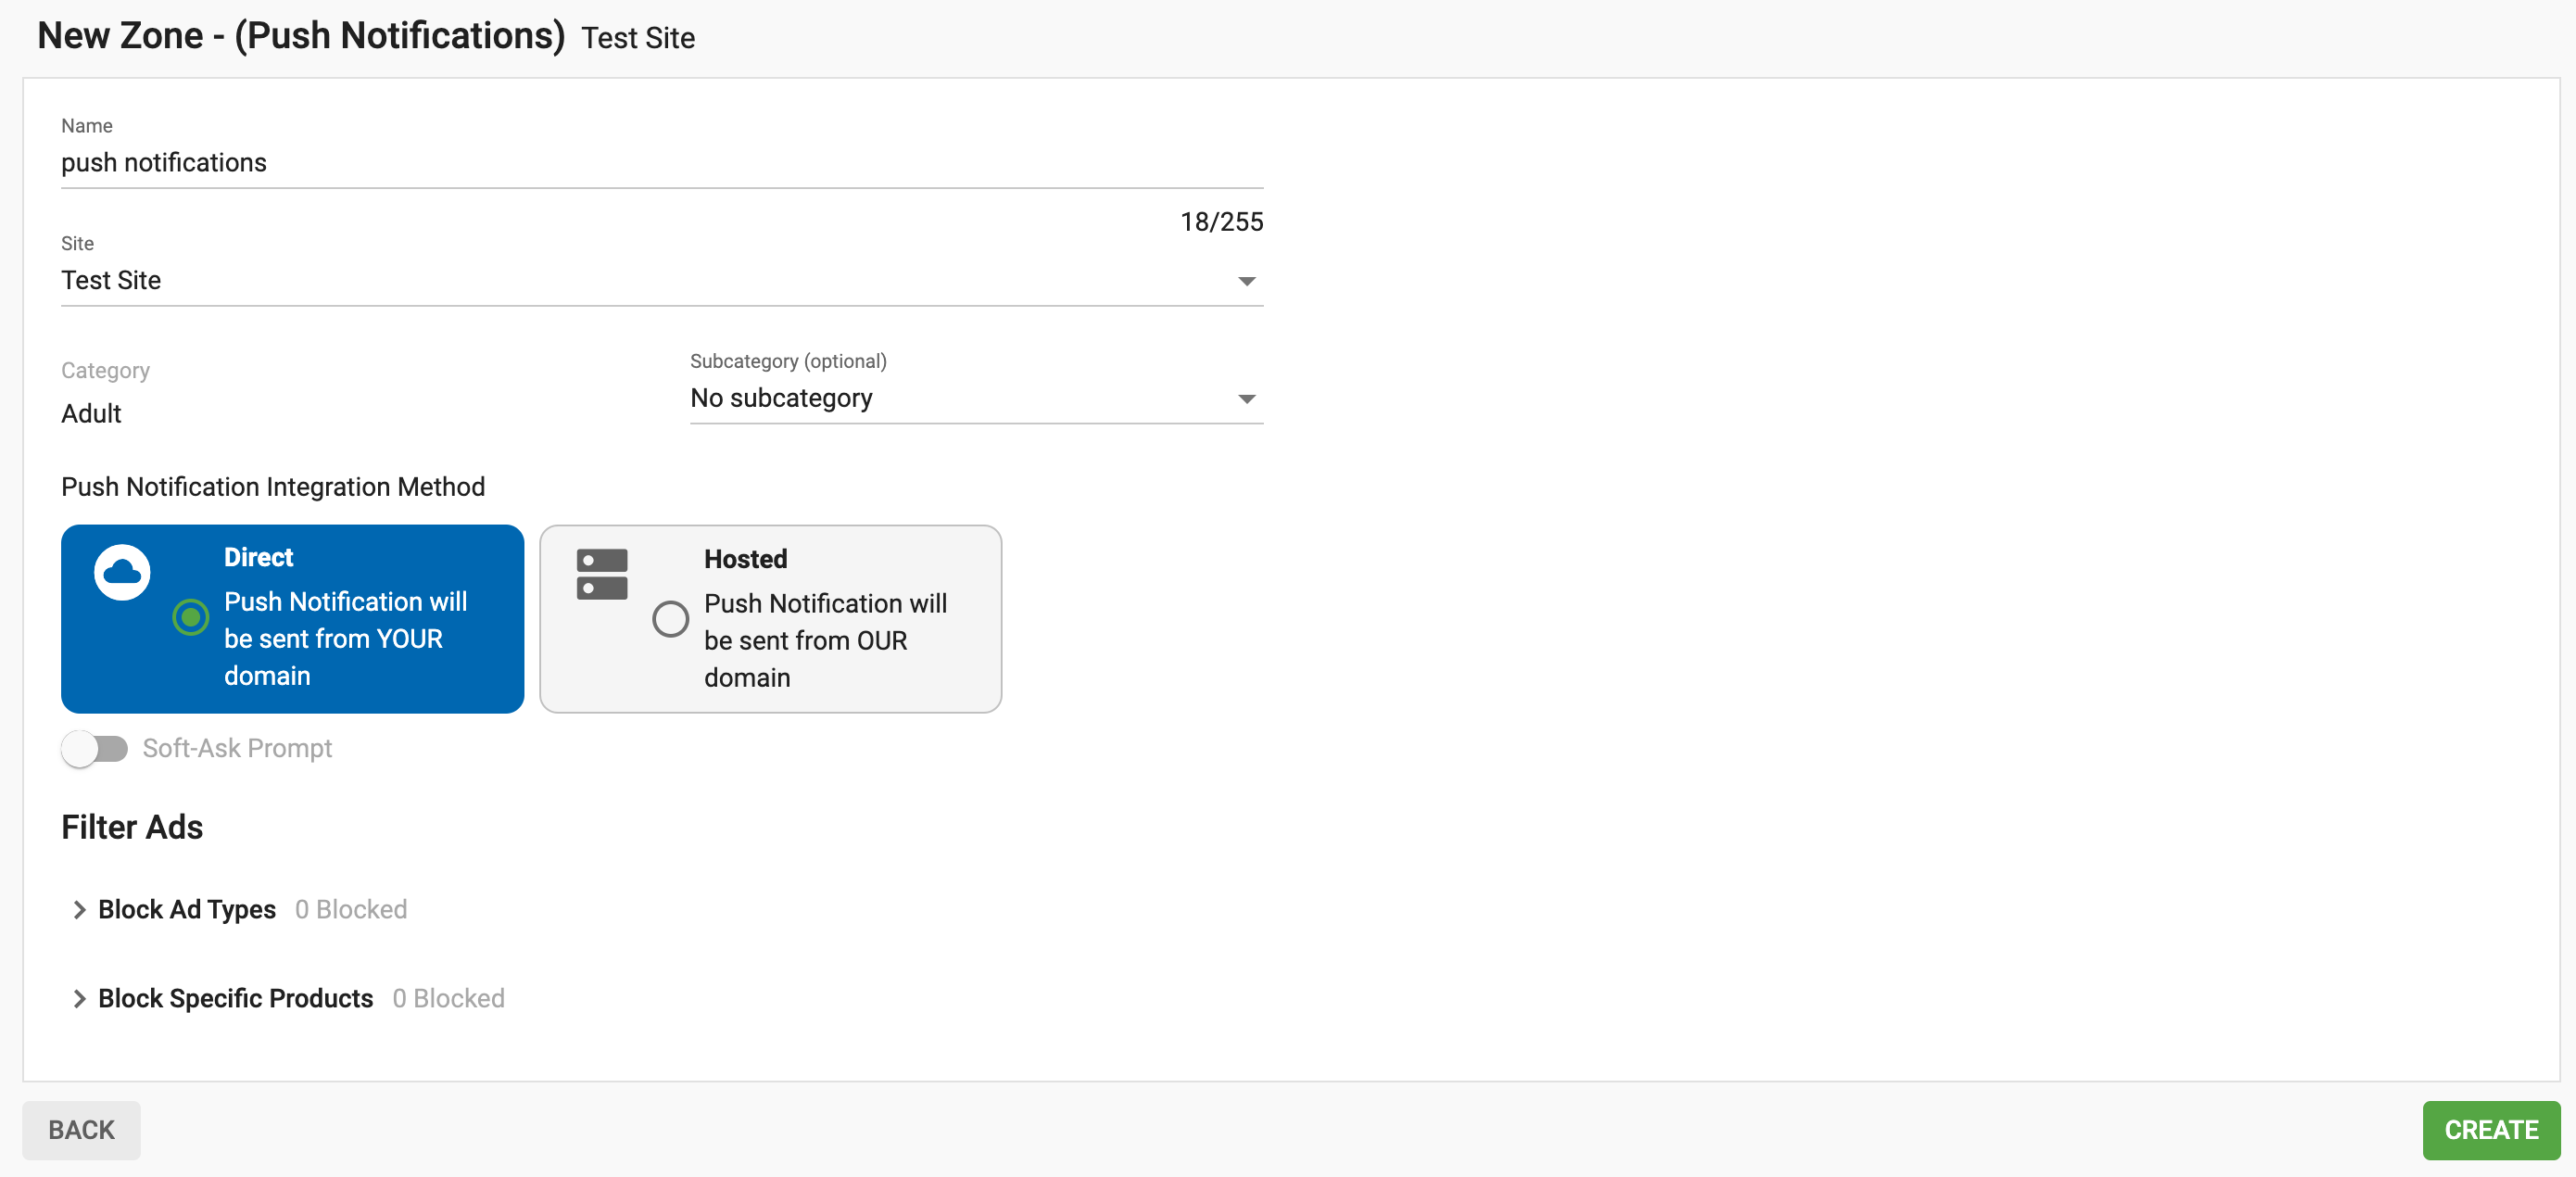
- Diretamente com um pedido de soft ask: Este é um processo de duas etapas e mostrará duas caixas de opt-in consecutivas no seu site. A primeira (Soft-ask) perguntará se o utilizador gostaria de receber notificações push. Dentro da caixa, o utilizador pode escolher "Não obrigado" ou "Permitir". Se o utilizador clicar em Permitir, aparecerá uma segunda caixa (Direto) onde o utilizador pode escolher "Permitir" ou "Bloquear" Para atuar neste caso, selecione Direto e active o botão de solicitação de pergunta suave
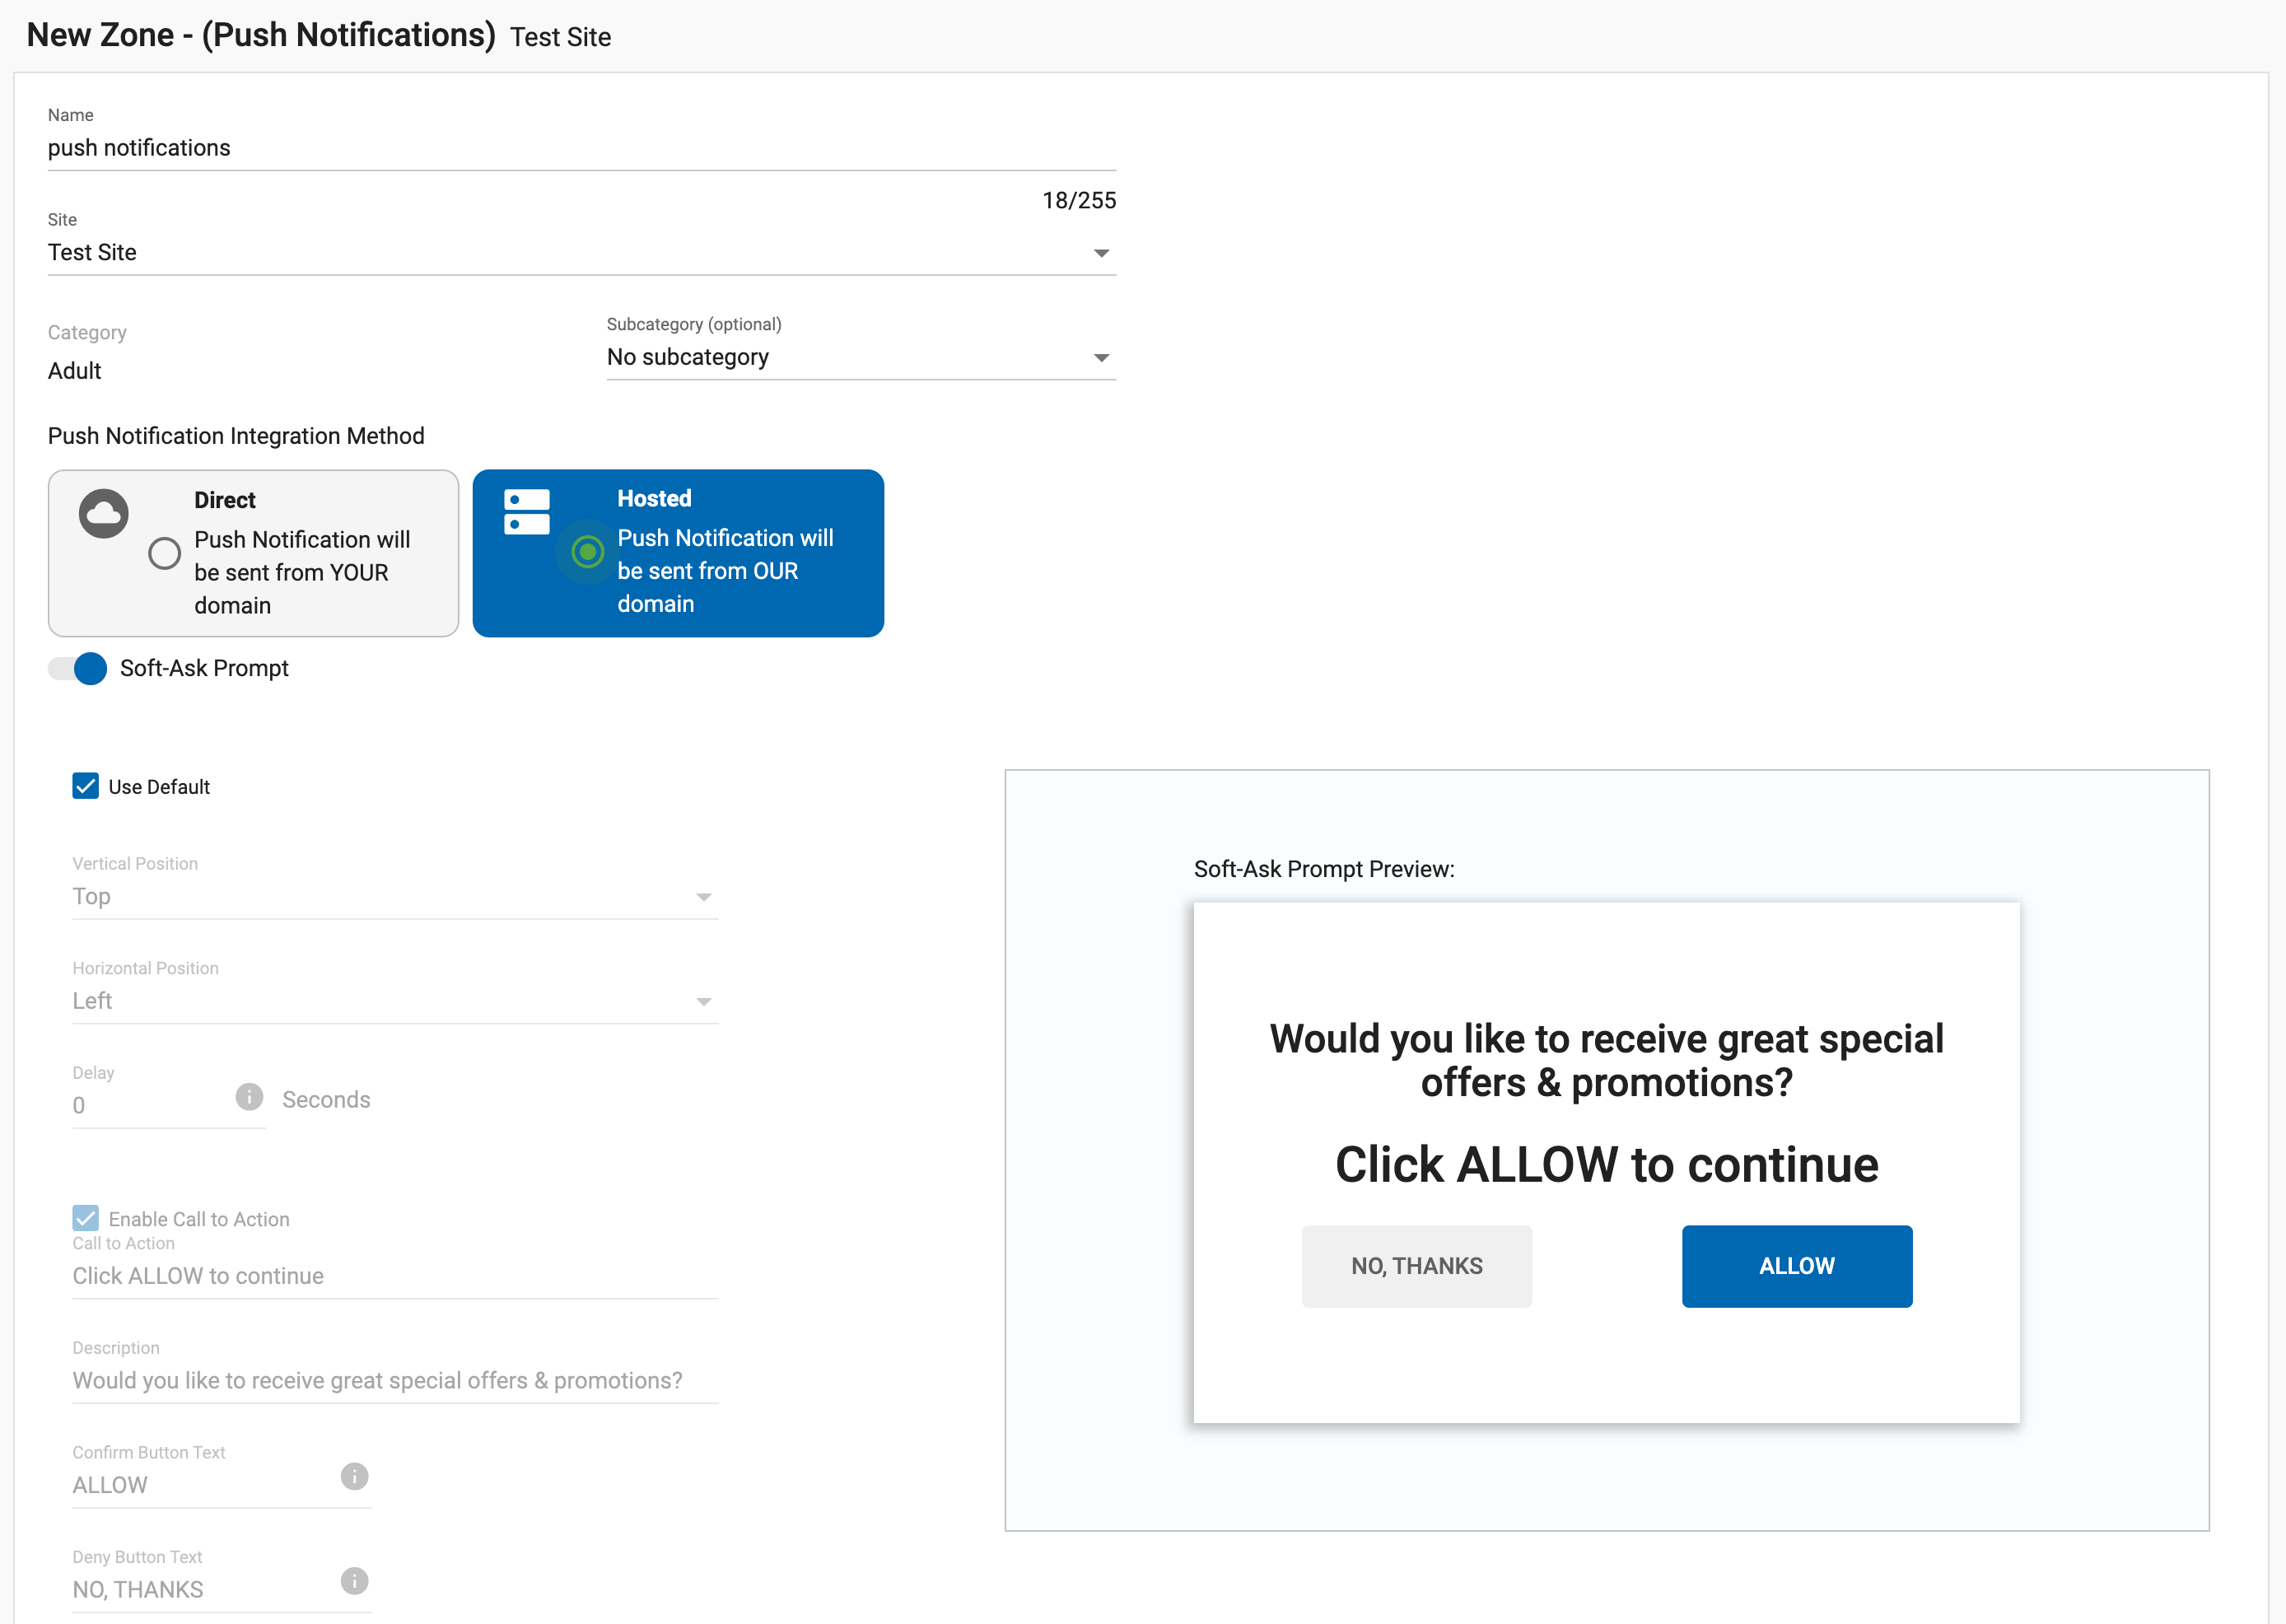
Para utilizar o domínio da ExoClick, existe um método de implementação:
- Alojado: Esta opção mostrará apenas a caixa de pergunta suave no seu site, perguntando se o utilizador gostaria de receber notificações push, dentro da caixa o utilizador pode escolher "Não, obrigado" ou "Permitir"
Atenção: Na caixa Soft-Ask, se um utilizador clicar na caixa "Não, obrigado", será automaticamente redireccionado novamente dentro de 2 dias. Se implementar a implementação Direta, se o utilizador clicar no botão "Bloquear", nunca mais será alvo de uma nova seleção.
Utilizando o seu próprio domínio: Isto resultará numa taxa de subscrição mais elevada, uma vez que os utilizadores diretos do seu site optam por aderir. O seu domínio aparecerá na caixa de notificação quando as notificações push forem enviadas.
Usando o domínio ExoClicks: É benéfico para os publishers, pois o usuário não associará as Notificações Push ao publisher, mas sim à rede de anúncios ExoClick. O domínio da ExoClick aparecerá nos anúncios de notificação push. Este método também permite que você implemente Notificações Push do seu site em outras redes, além da ExoClick. Leia esta postagem do blog para uma explicação detalhada.
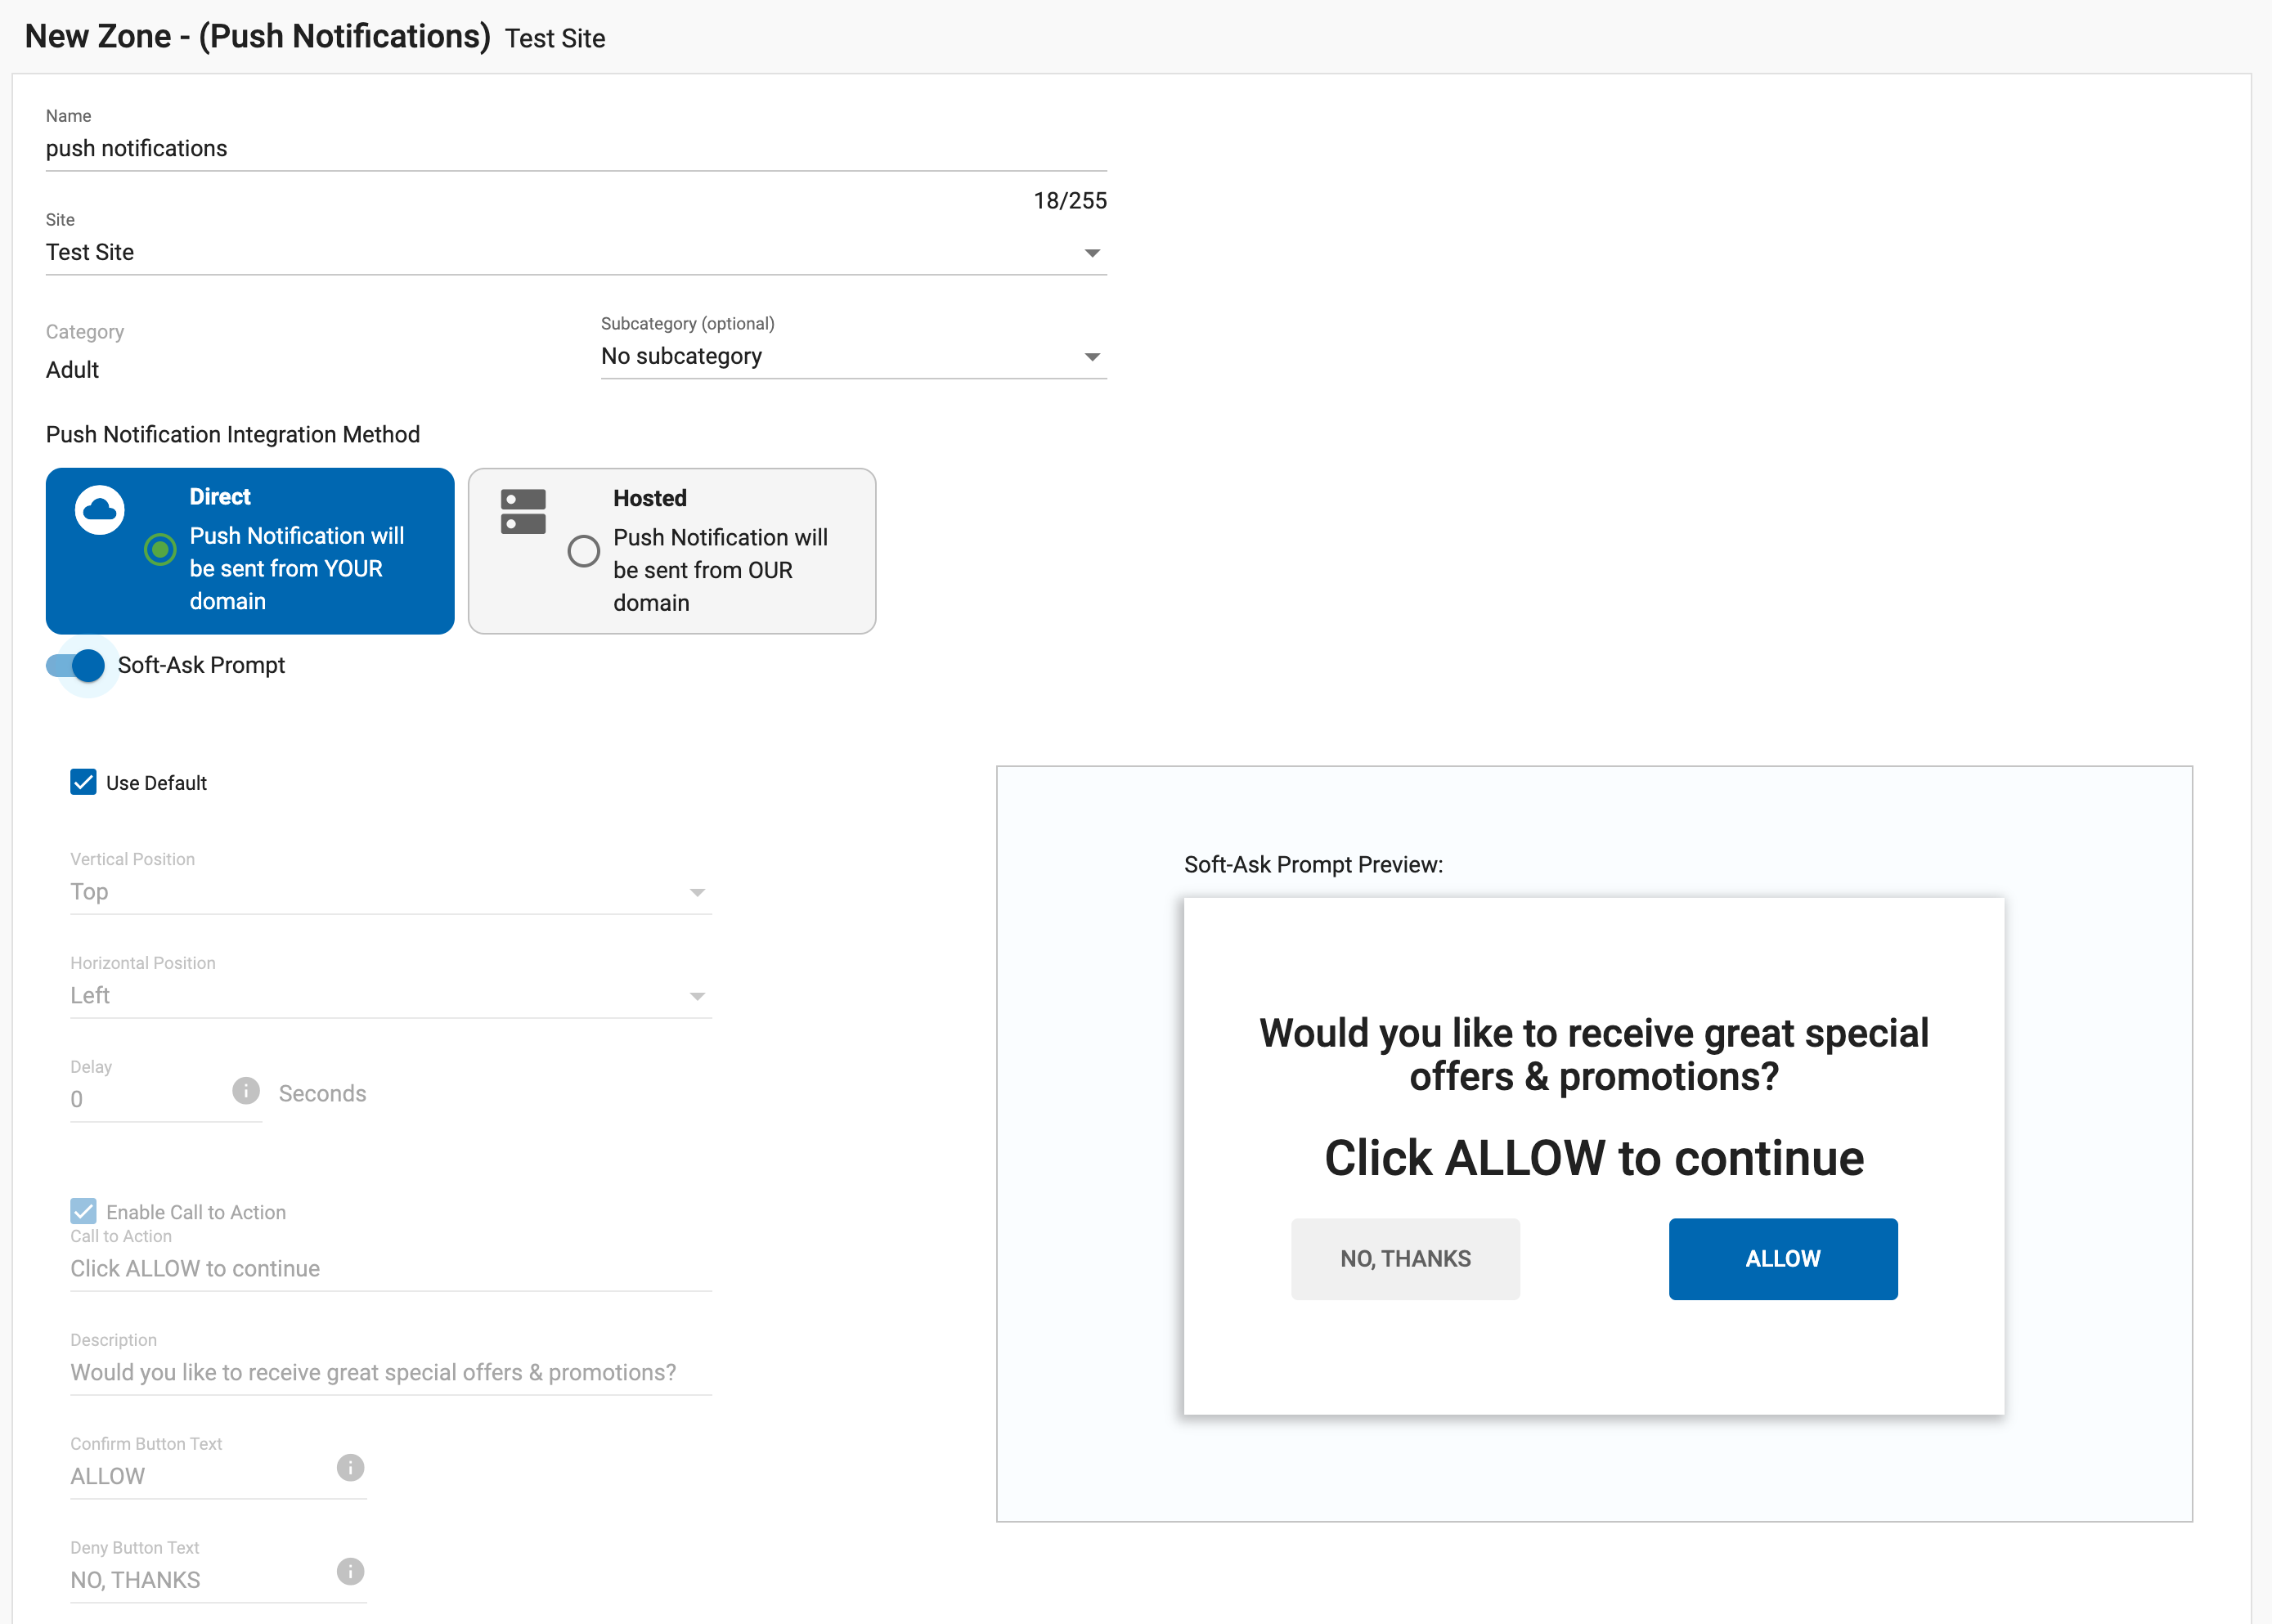
Etapa 3: Personalização do pedido de inquérito suave
Quando a caixa "Utilizar predefinição" estiver selecionada, serão apresentadas as definições abaixo.
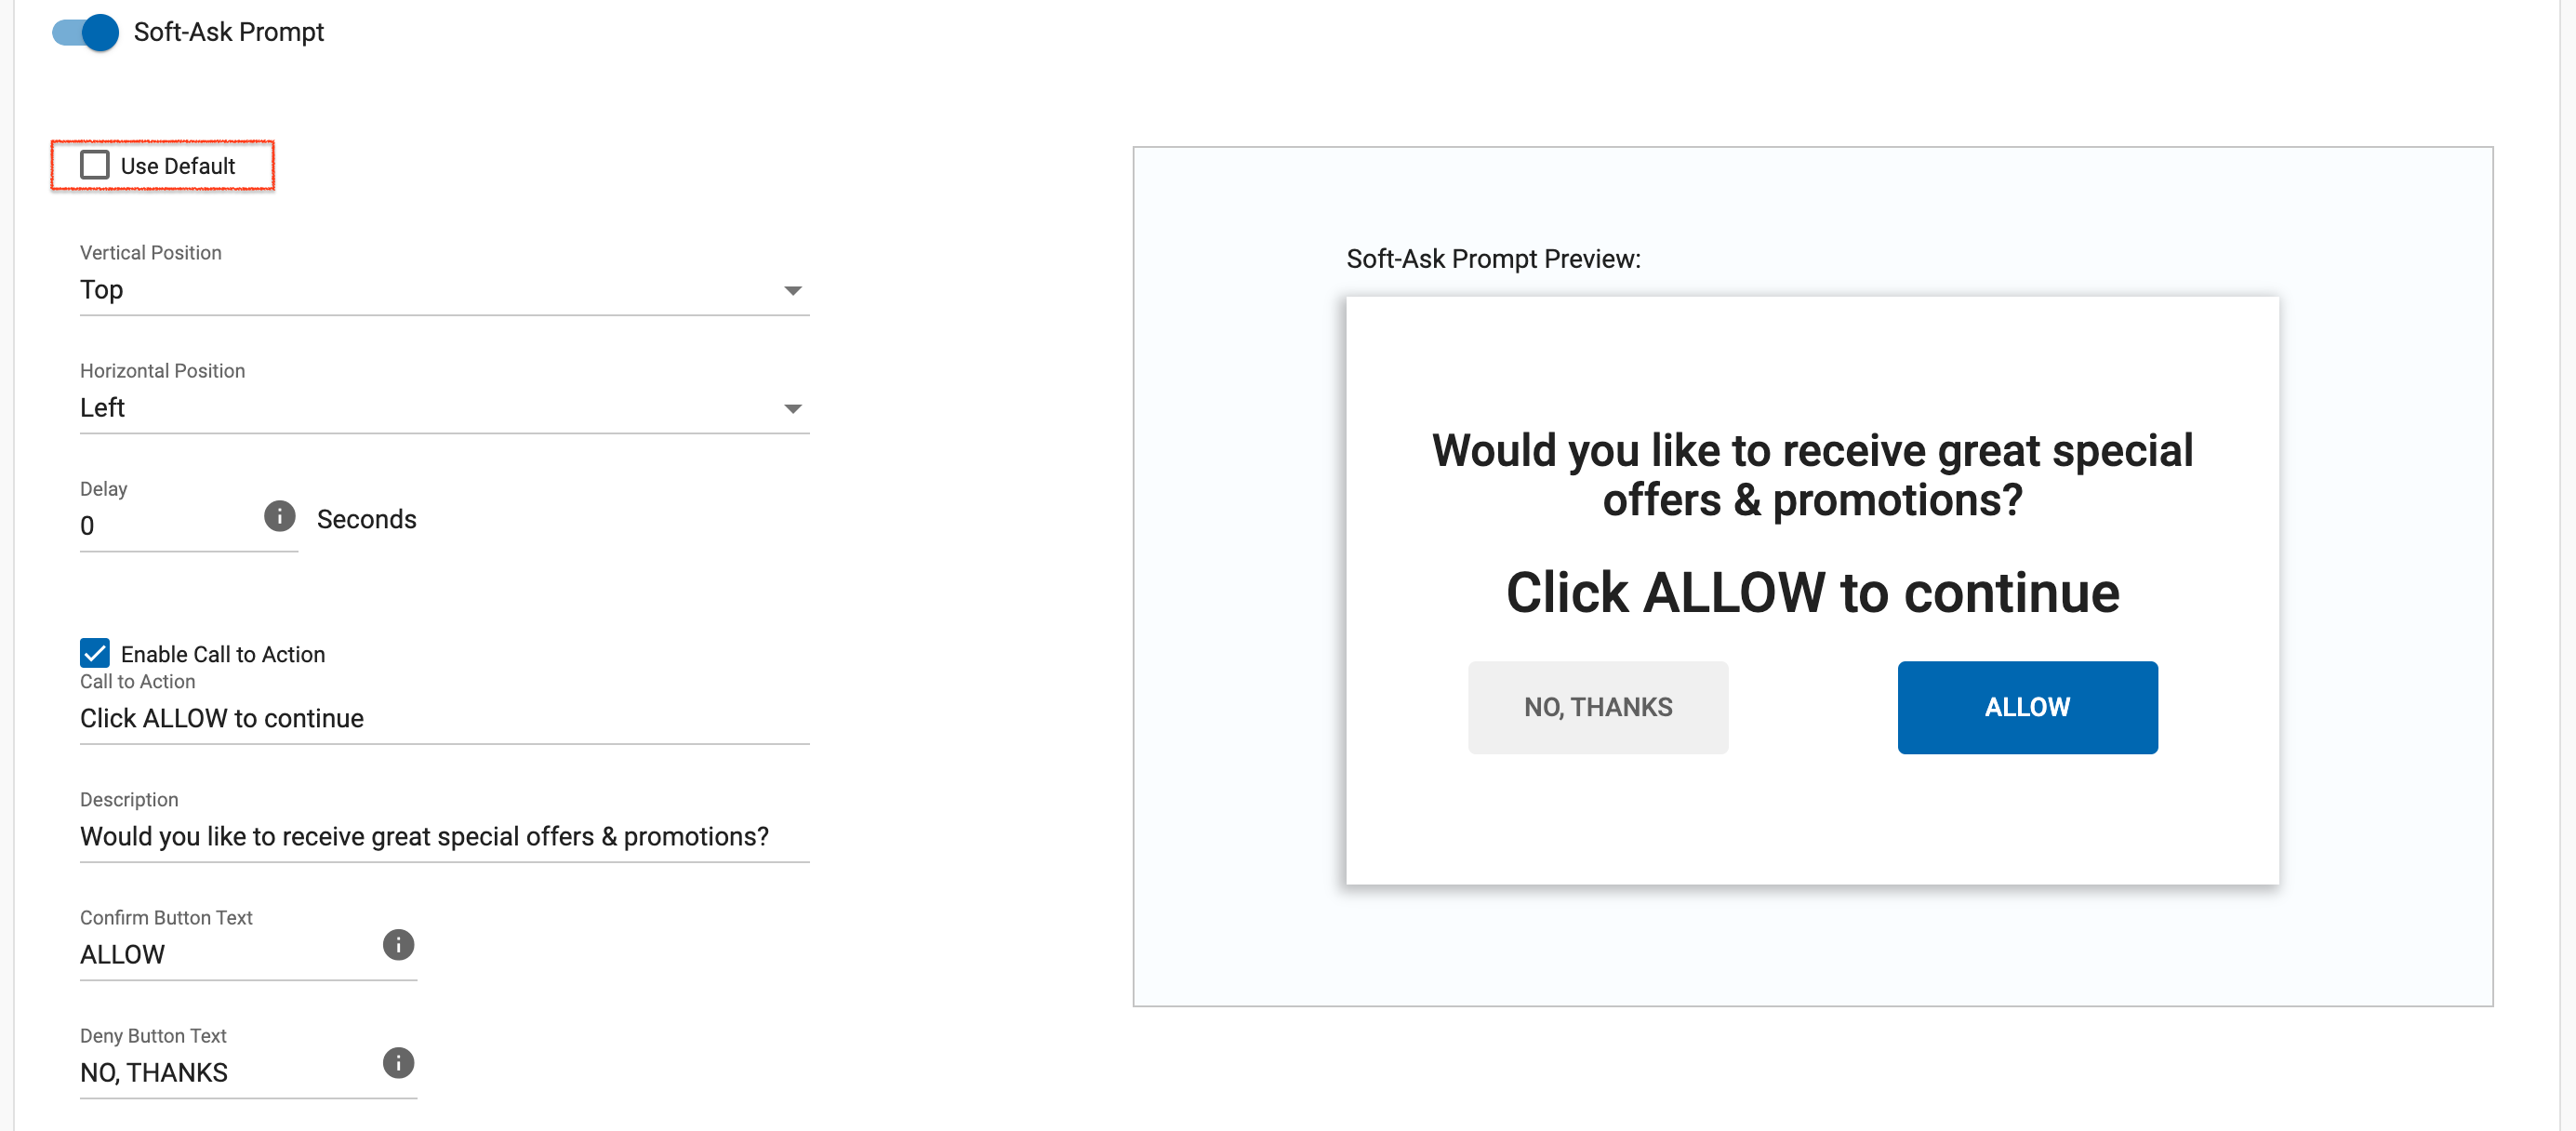
Com a caixa "Utilizar predefinição" desmarcada, pode personalizar as seguintes definições:
- Posição: Aqui pode escolher a posição em que a caixa de diálogo Soft-ask será apresentada no ecrã do utilizador:
- Vertical: Em cima, no meio, em baixo
- Horizontal: Esquerda, Centro ou Direita
- Delay: Recomendamos que defina este valor para menos de 5 segundos, de modo a que o utilizador veja a caixa do Soft-Ask Prompt assim que chegar ao seu site
Também pode editar o texto apresentado na caixa a partir do texto predefinido fornecido: Chamada à ação, Descrição, Texto do botão Confirmar, Texto do botão Recusar
Nota: Os textos predefinidos estão alojados no servidor da ExoClicks e estão em 12 idiomas: inglês, espanhol, francês, alemão, italiano, português, checo, húngaro, croata, eslovaco, russo e chinês. Os textos serão automaticamente apresentados na língua definida para o browser do utilizador final. Se introduzir os seus próprios textos, a caixa de diálogo Soft-Ask será sempre apresentada na língua que introduziu e não nos idiomas predefinidos que definimos.
Passo 4: Gerar o código da zona de publicidade
Depois de clicar em "Criar", o código da zona de publicidade é gerado automaticamente para que possa cortá-lo e colá-lo no seu sítio.
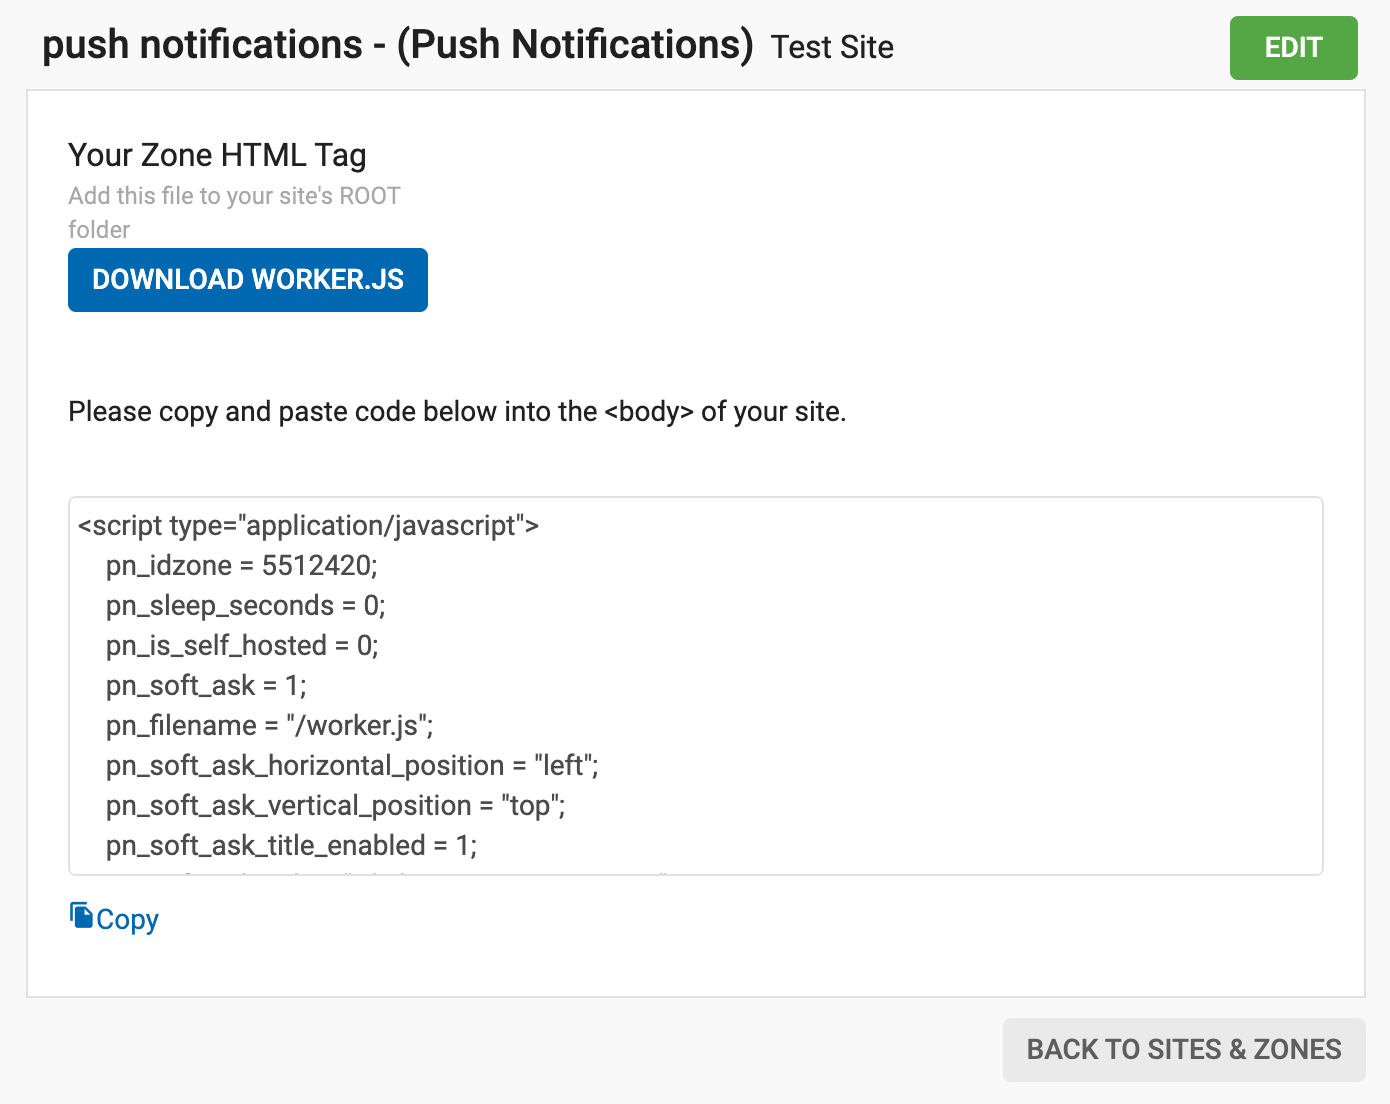
Nota: Deve colocar o ficheiro worker.js fornecido na pasta raiz do diretório do seu site para garantir que funciona corretamente.
Etapa 5: Estatísticas
Depois de um assinante ter optado por receber notificações push, há um atraso de até 2 horas antes de receber o primeiro anúncio.
Depois disso, um subscritor receberá um anúncio de notificação push de 3 em 3 horas, por exemplo, se um utilizador se inscrever às 7h00, receberá o primeiro anúncio entre as 7h00 e as 9h00
Por isso, não se esqueçam de ter isto em conta quando analisarem as vossas estatísticas.
Nota: As notificações push não funcionam nos browsers Safari e Mobile Safari, bem como em qualquer sítio Web que não seja HTTPs.
Caso tenha algum problema ao configurar sua zona de anúncios de notificação push, entre em contato com seu gerente de conta ou um especialista em sucesso do cliente aqui.