Vídeo Slider - Cómo configurar una zona de anuncios de vídeo slider
El nuevo formato Video Slider es similar al formato Instant Message existente, pero en lugar de mostrar imágenes muestra un vídeo. El vídeo se carga a través de una etiqueta VAST. El usuario final ve el anuncio deslizarse desde la derecha en la parte inferior de la página web. Para garantizar el cumplimiento, el usuario final puede cerrar el anuncio. Es totalmente adaptable y funciona en todos los navegadores. El formato es ideal para editores con sitios web de galerías de fotos que deseen monetizar su contenido con anuncios en vídeo, o para sitios de contenido en vídeo que deseen un formato alternativo de anuncios en vídeo. Además, ExoClick garantiza una tasa de relleno del 100% para el formato y el deslizador de vídeo es compatible con las directrices de la Better Ads Coalition.
Este tutorial le muestra en 4 sencillos pasos cómo crear una zona de anuncios Video Slider.
Paso 1: Crear una nueva zona publicitaria
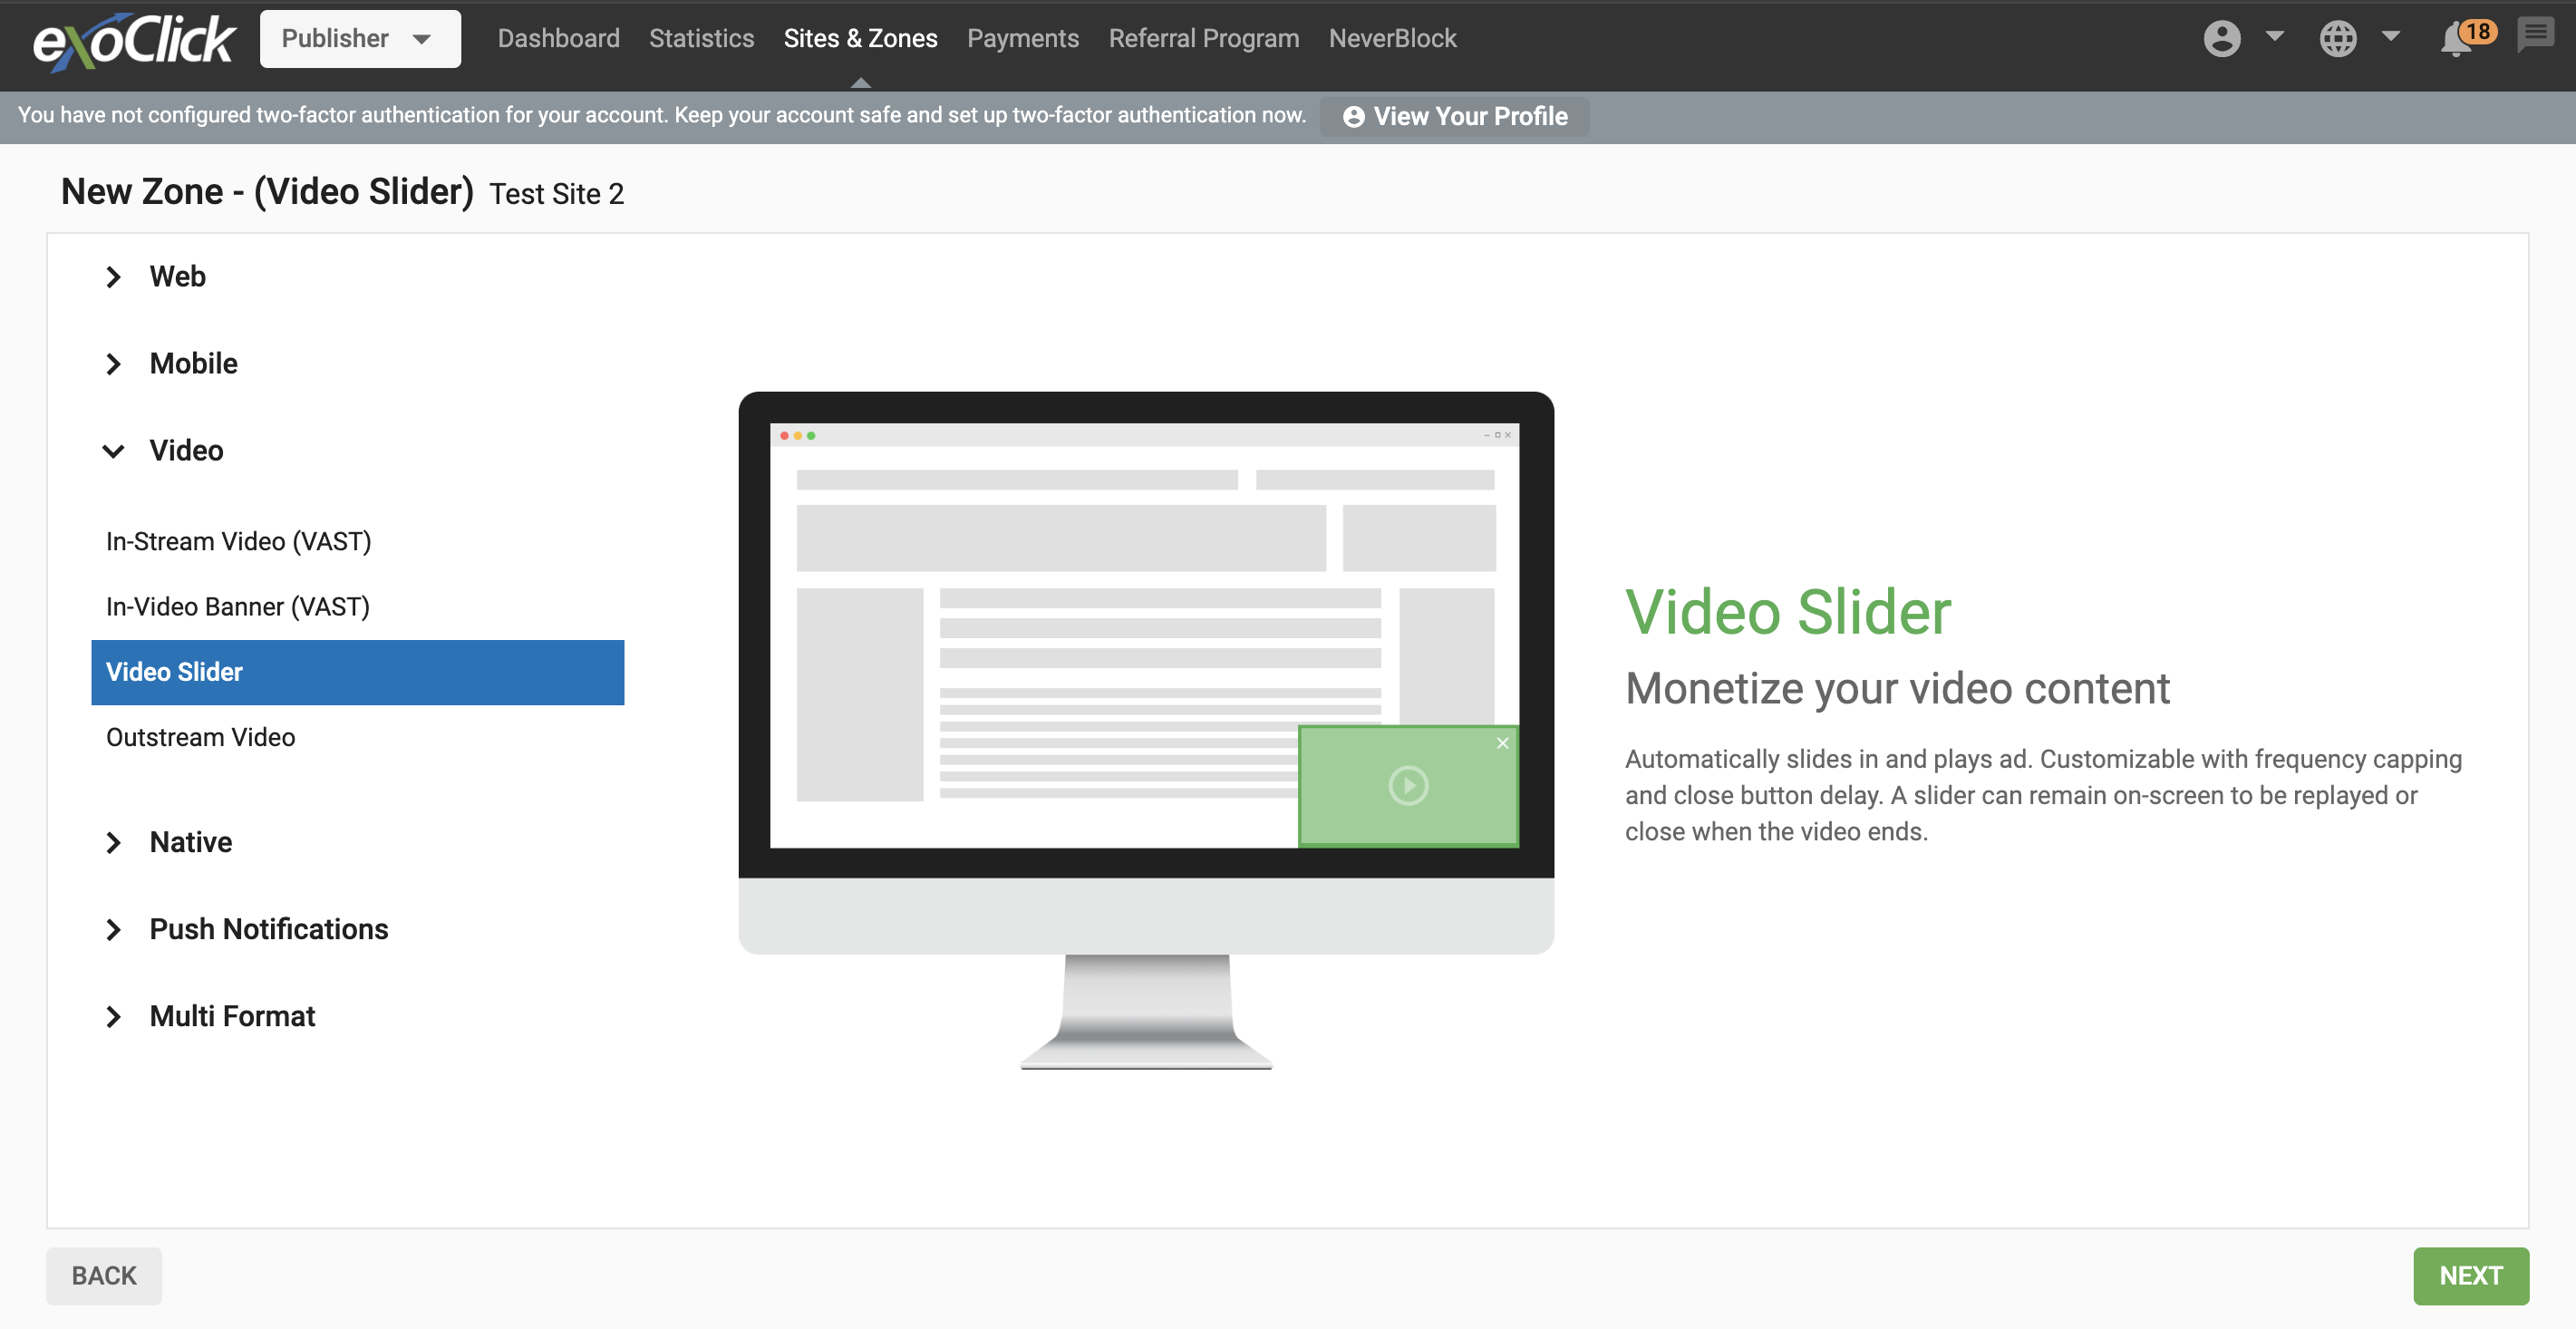
En primer lugar, vaya a la pestaña "Sitios y zonas" y haga clic en "Nueva zona"
Hay un menú desplegable con una lista de todos sus sitios web, seleccione el que desea colocar la zona de anuncios in-stream.

Seleccione la categoría "Vídeo" y en el menú desplegable seleccione "Deslizador de vídeo" y haga clic en "SIGUIENTE"

Paso 2: Editar las características de la zona de anuncios de Video Slider
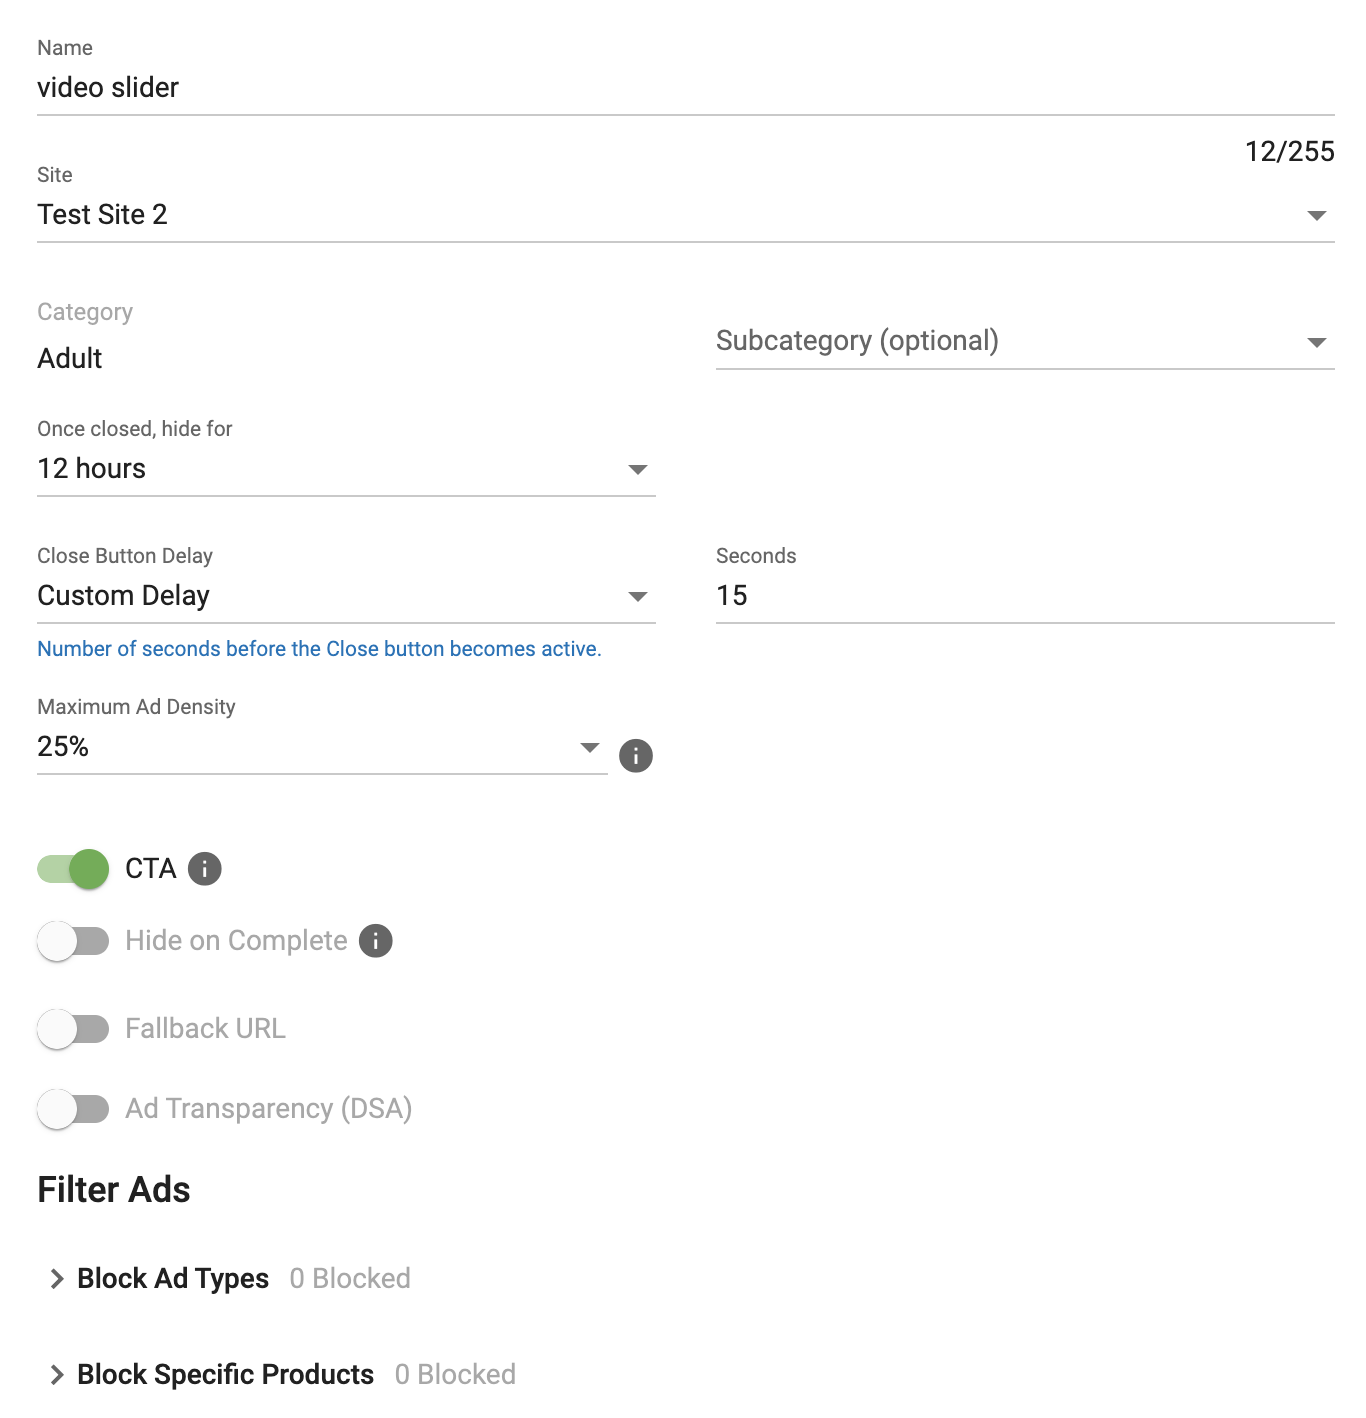
- Nombre: Personaliza el nombre de la zona publicitaria a tu gusto (mínimo 5 caracteres).
- Categoría (por defecto): Se selecciona automáticamente en función de la categoría del sitio que seleccionó en el paso anterior.
- Subcategoría (opcional): Le recomendamos que no seleccione ninguna subcategoría para maximizar su potencial de ingresos.
- Una vez cerrado, ocultar por: Esto es como el límite de frecuencia y puedes elegir la próxima vez que quieres mostrar el anuncio a cada usuario, te recomendamos que lo configures en "24h".
- Botón Cerrar: Segundos necesarios antes de que un usuario pueda ocultar el anuncio. Introduzca 0 (por defecto) para mostrar el botón de cierre desde el principio.
- Densidad máxima de pantalla: Esto le permitirá elegir qué porcentaje de la pantalla ocupa la zona publicitaria cuando se activa.Como editor, esta función le permite asegurarse de que sus zonas publicitarias de Video Slider se muestren bien en todos los dispositivos, especialmente en los móviles. También se asegurará de que sus zonas de anuncios cumplen las directrices comunes para una buena publicidad.
- CTA: Un diseño de llamada a la acción que anima a los usuarios a realizar una acción en la variación. Desactive esta opción para ocultar la CTA.
- Ocultar al finalizar: El control deslizante se ocultará una vez finalizado el anuncio en vídeo. Desactive este ajuste para mantener el anuncio en pantalla con un botón de repetición.
- Transparencia de los anuncios (DSA): Garantiza que los anuncios cumplan las directrices normativas y ofrezcan información clara y veraz a los usuarios. En el caso de los anuncios de servicio dinámico (DSA), implica mostrar detalles relevantes, como la identidad y el propósito del anunciante, para generar confianza y fomentar un ecosistema publicitario transparente.
- URL alternativa: Puede configurar una etiqueta VAST alternativa para mostrar dentro del Slider en caso de que no se cumpla un CPM mínimo. Al habilitar Fallback URL, verá dos opciones:
- CPM mínimo: El CPM mínimo que deben cumplir los anunciantes para aparecer en tu zona.
- Tipo de suelo: Puede elegir si desea aplicar Suelo blando, en el que el CPM no está garantizado, o Suelo duro, en el que el CPM está garantizado.
- URL alternativa: La etiqueta VAST alternativa se mostrará en lugar de la creativa de Exoclick.

Paso 3: Filtrar anuncios
En esta sección puede bloquear por tipos de Anuncio y/o por Productos específicos.
Bloquear tipos de anuncios
Esto le permite bloquear la publicidad en función de la audiencia de su tráfico.
Productos específicos por bloques
También puede bloquear tipos de productos específicos que no desee mostrar en su zona de anuncios. Nota: Si bloquea demasiados productos, es posible que no se muestren anuncios o que sus ingresos se reduzcan considerablemente.
Una vez completados estos pasos, haga clic en "CREAR"
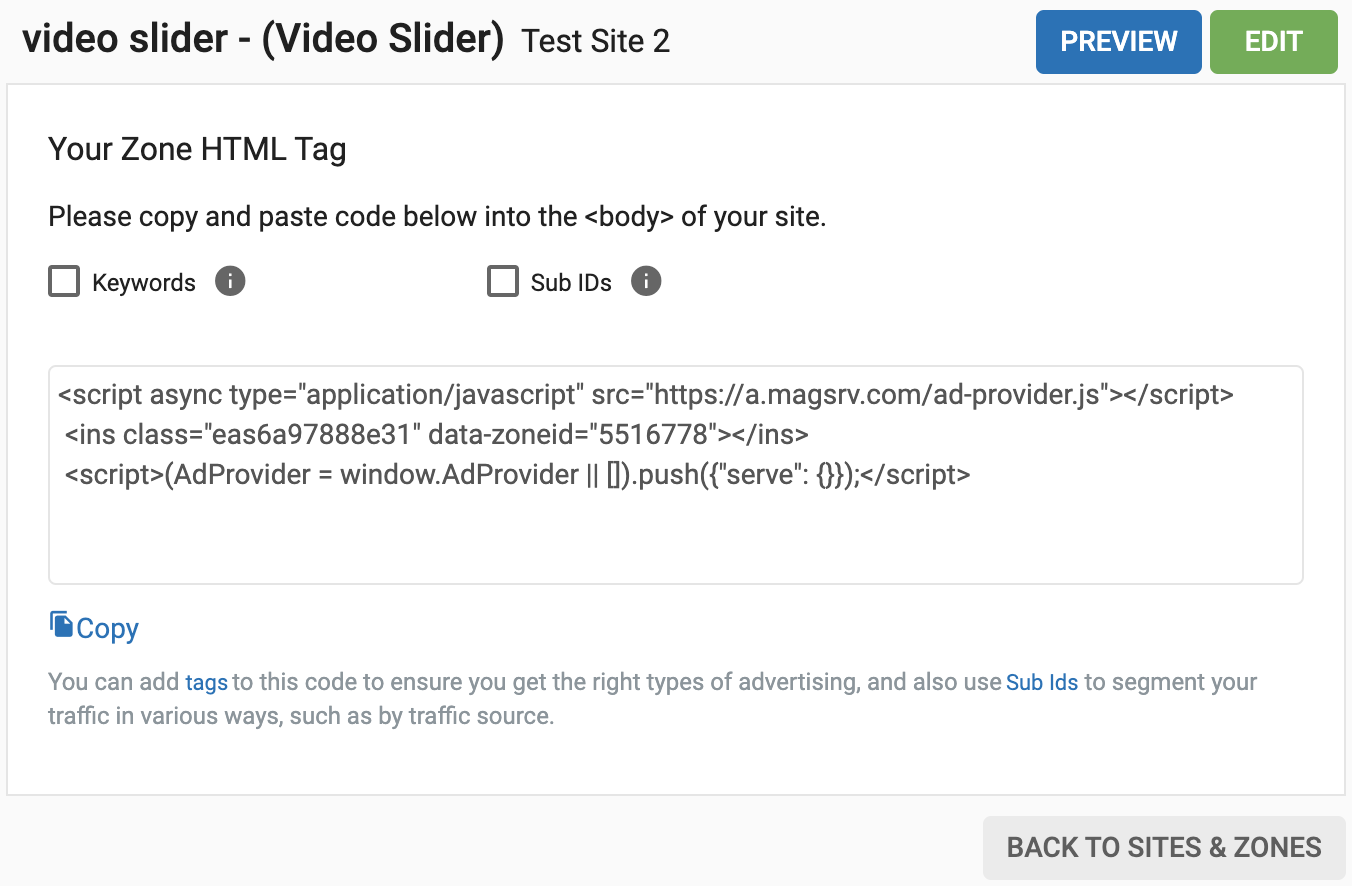
Paso 4: Código del fragmento de integración
Una vez que haya seleccionado sus opciones de zona de anuncios Video Slider se generará un fragmento de código que tendrá que incrustar dentro de la etiqueta en su sitio. El número de zona de identificación generado será un número único de la zona de anuncios que ha creado.
