Como acompanhar as conversões com a Shopify
*Este guia é apenas para o Shopify. Se pretender conhecer os passos genéricos para o acompanhamento de conversões, consulte a secção Anunciantes
A ExoClick dá-lhe acesso a fontes de tráfego globais, funcionalidades de segmentação, big data e ferramentas de análise estatística para filtrar resultados e otimizar as suas campanhas. Este manual explica como acompanhar as conversões da sua loja Shopify na rede ExoClick.
Nesta documentação, apresentaremos dois exemplos de seguimento de eventos:
- checkout_completed
- product_added_to_cart
Antes de prosseguirmos com os exemplos, certifique-se de que tem um objetivo de conversão criado na sua conta.
Evento de check-out concluído
Se você quiser acompanhar as compras em sua loja Shopify usando o rastreamento do ExoClick Pixel, poderá utilizar eventos como checkout_completed. Esse evento registra quando um visitante conclui uma compra e é acionado uma vez para cada checkout. É importante observar que, neste exemplo, o valor da meta de conversão é dinâmico.
Para adicionar o evento checkout_completed à sua loja da Shopify, siga estas etapas:
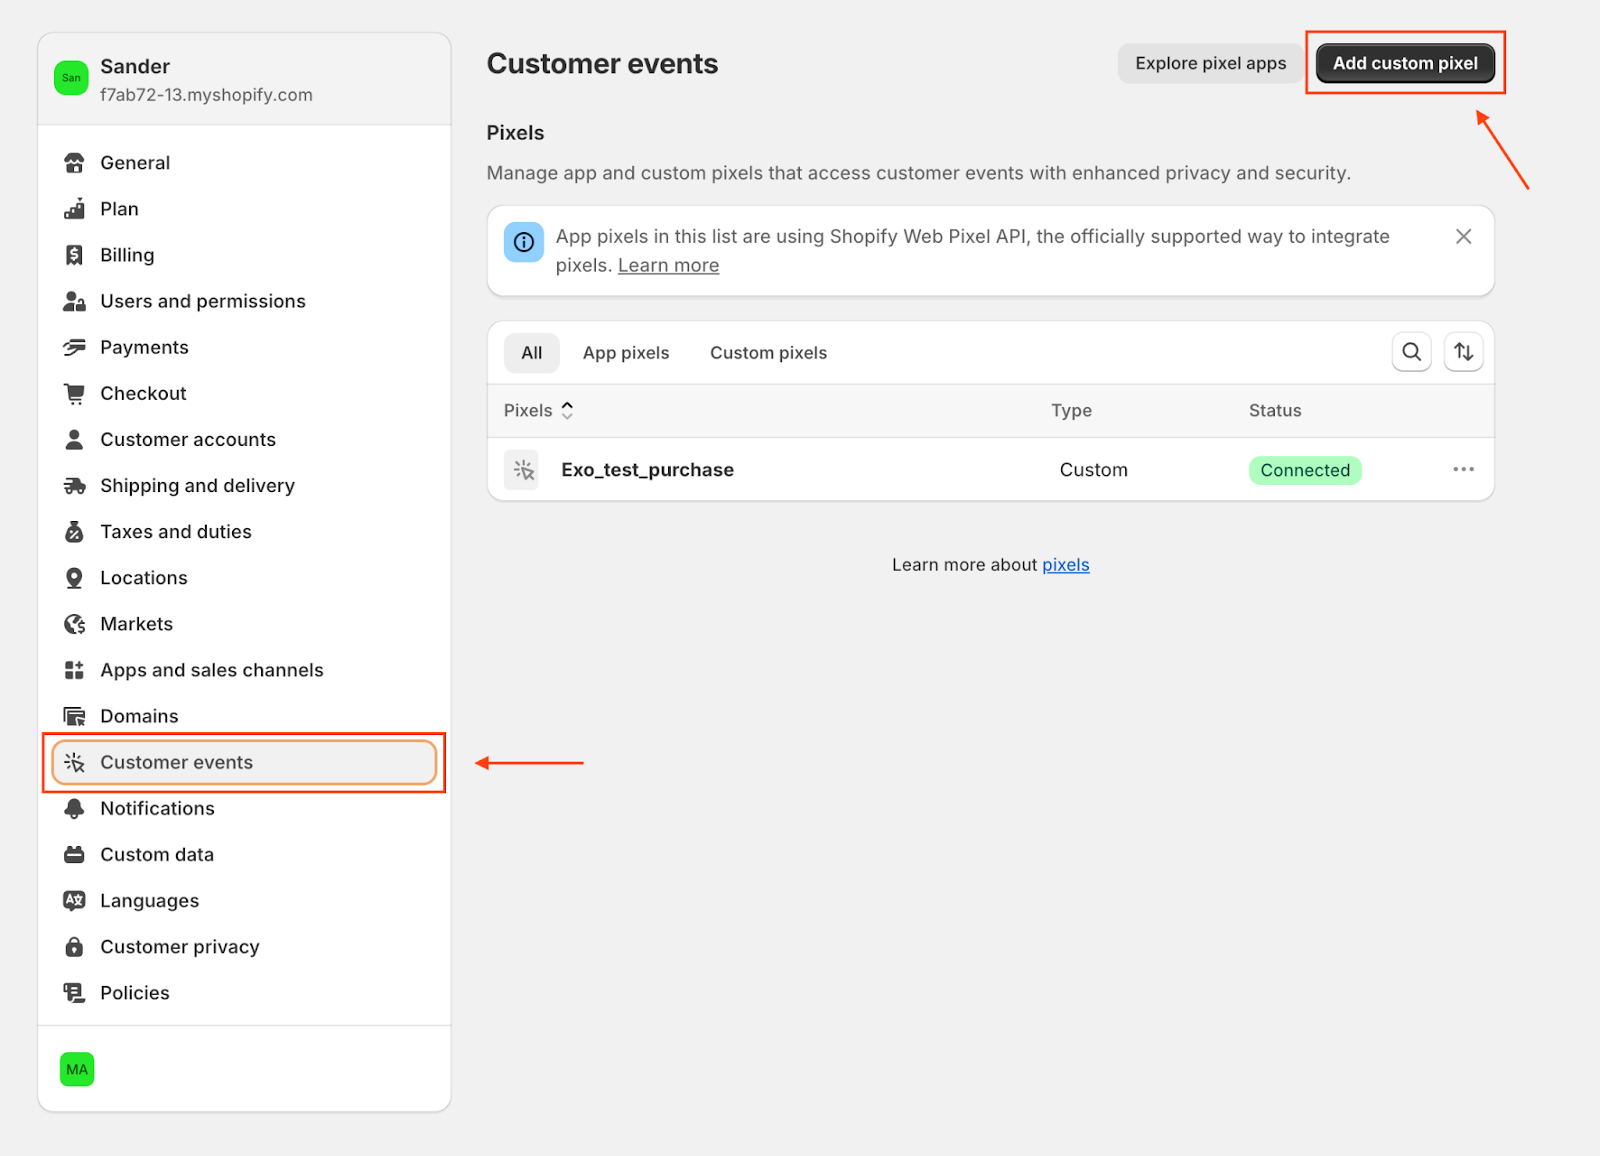
- Vá para Configurações no seu painel de administração da Shopify.
- Selecionar Eventos de clientes.
- Clique em Adicionar pixel personalizado.

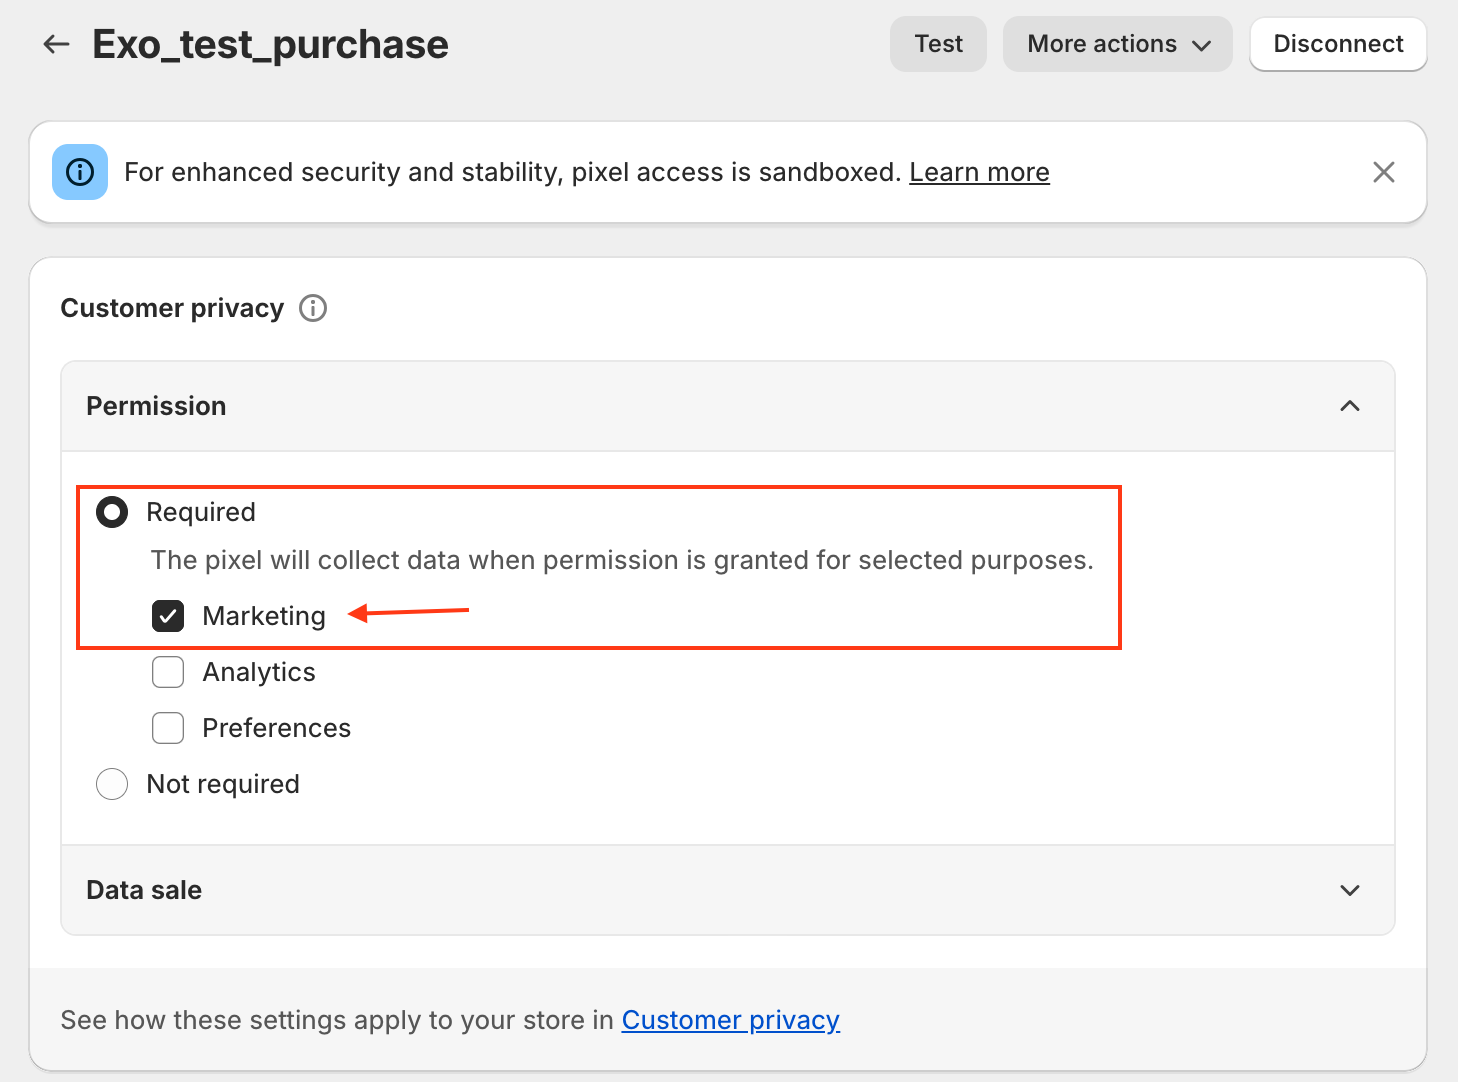
Depois de dar um nome ao seu pixel personalizado, vamos configurá-lo:
- Definir Permissão para Marketing necessária para cumprir a Política de Cookies.

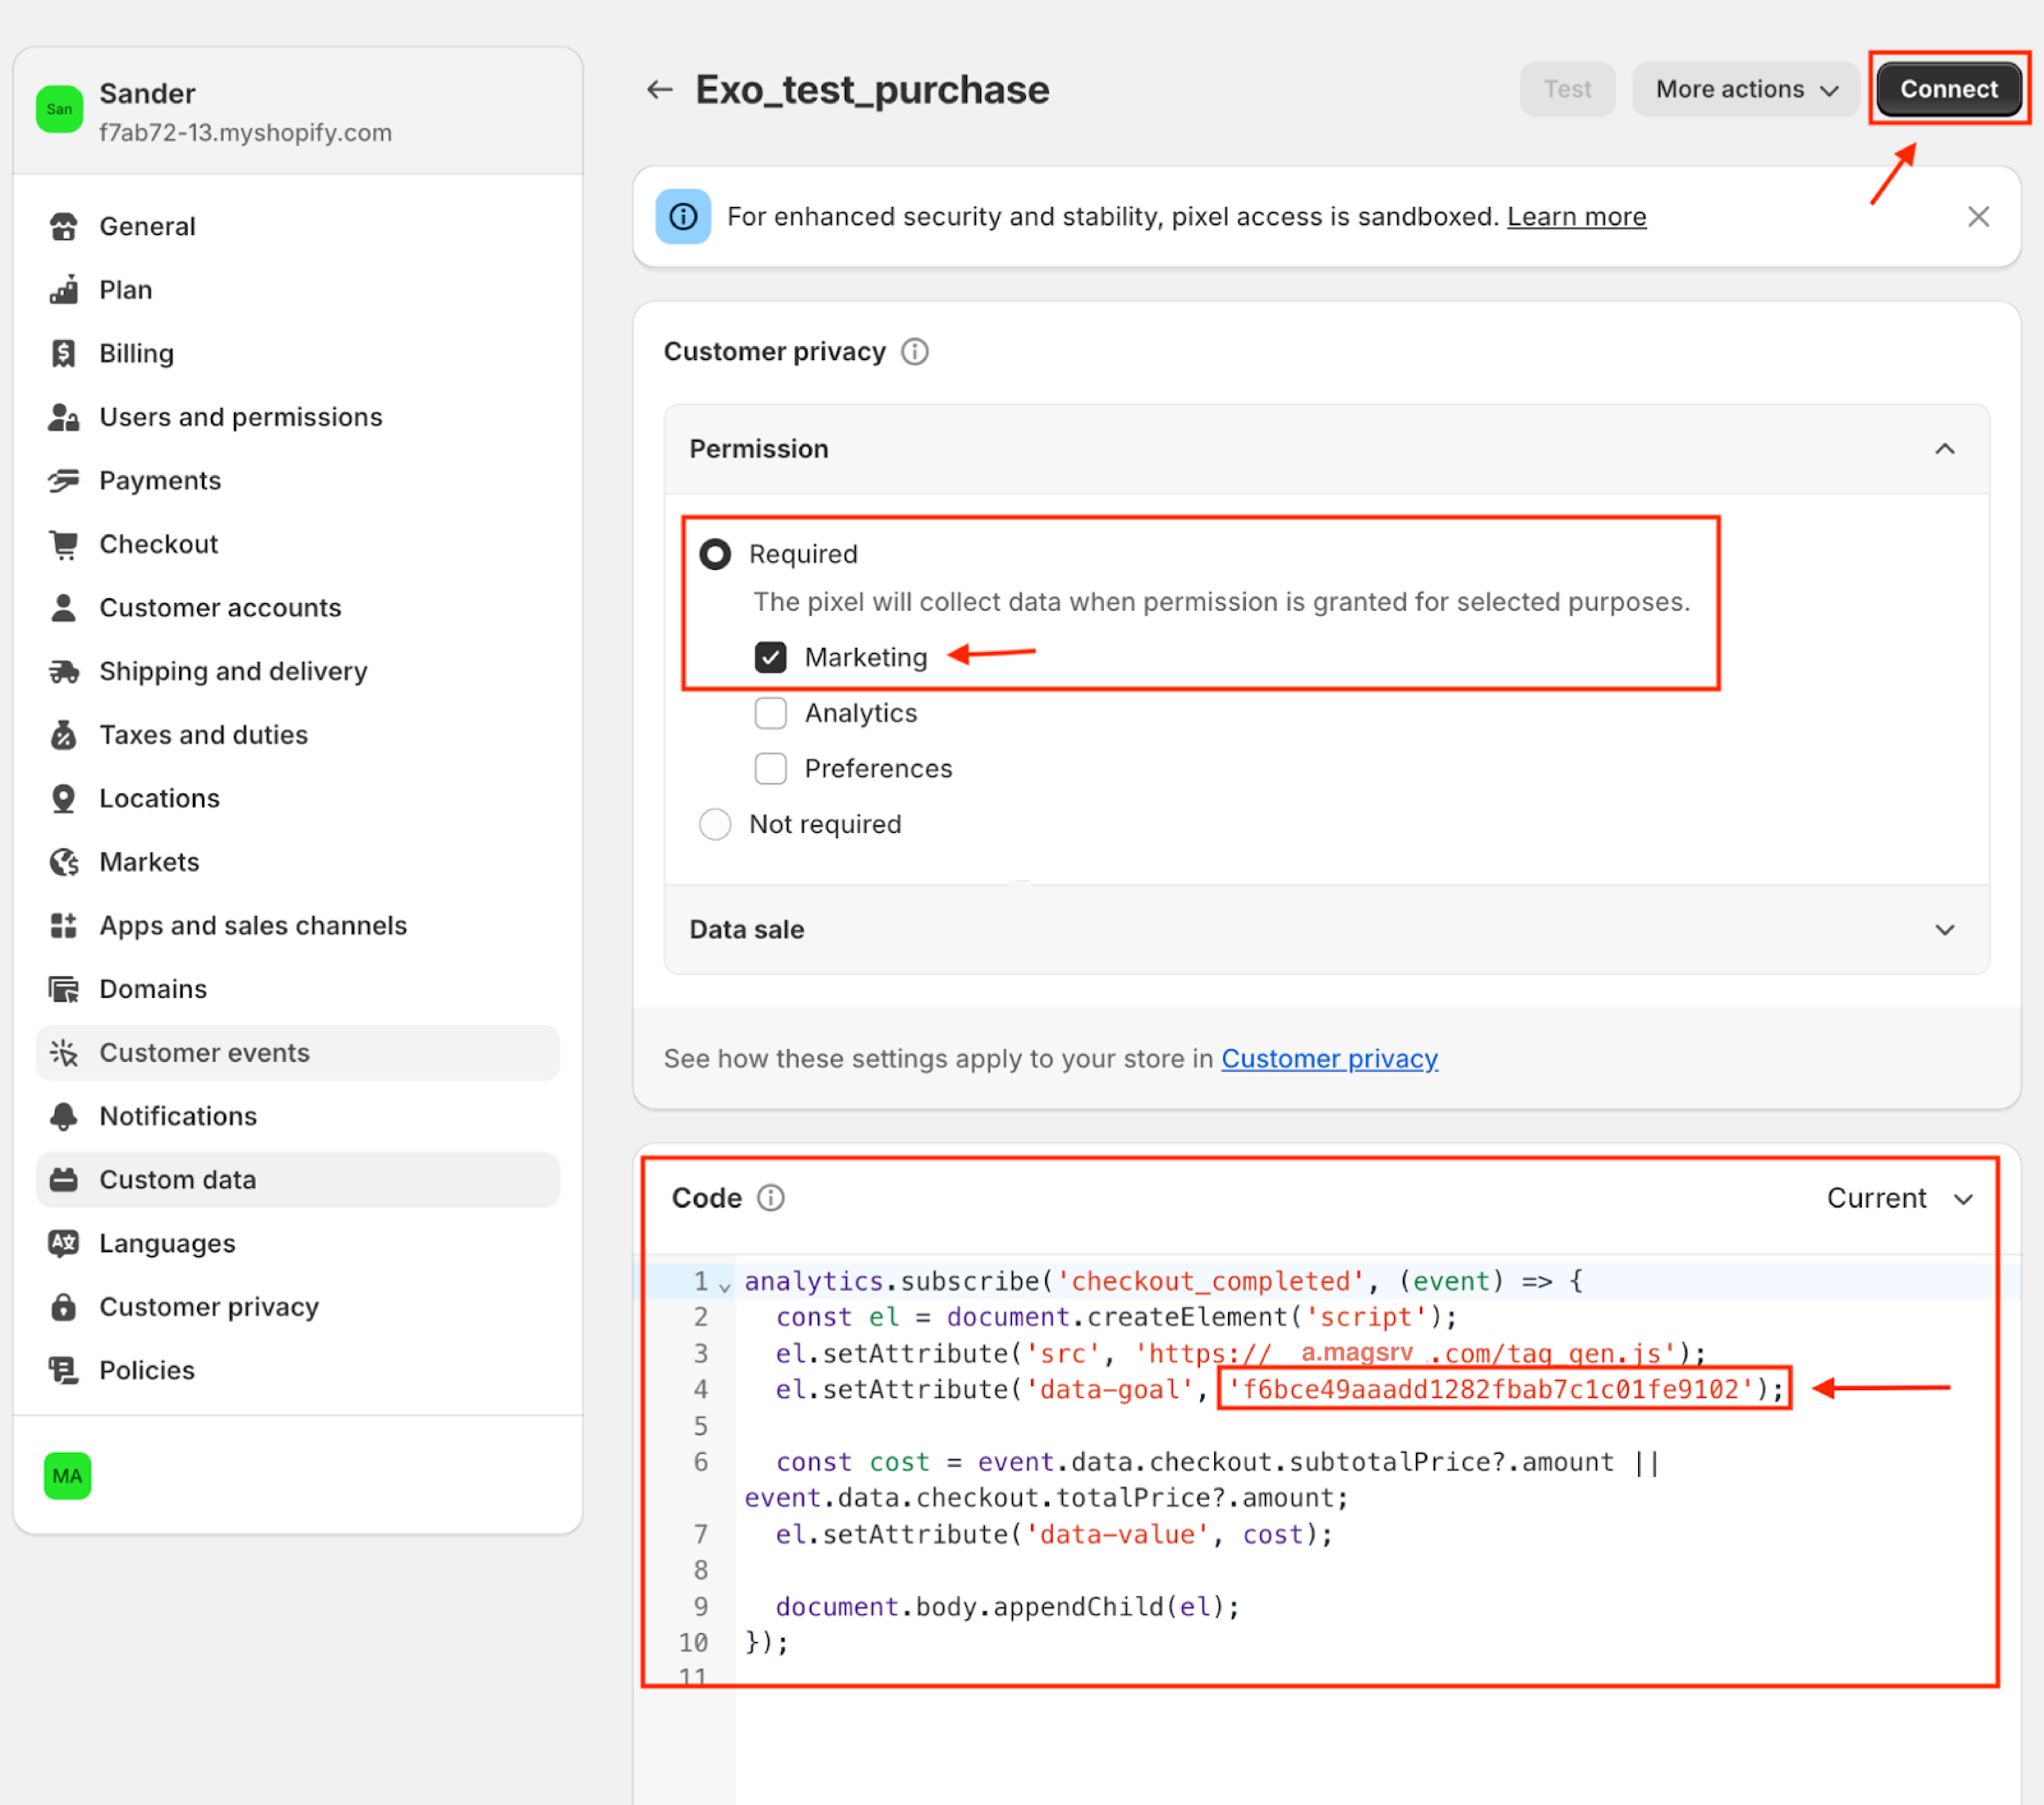
- Adicione o seguinte código:
analytics.subscribe('checkout_completed', (event) => {
  const el = document.createElement('script');
  el.setAttribute('src', 'https://a.magsrv.com/tag_gen.js');
  el.setAttribute('data-goal', 'XXXXX');
  const cost = event.data.checkout.subtotalPrice?.amount || event.data.checkout.totalPrice?.amount;
  el.setAttribute('data-value', cost);

  document.body.appendChild(el);
});
- Certifique-se de que substitui
'XXXXX'pelo seu próprio ID de golo. - Por fim, prima o botão Ligar.

Uma vez conectado, faça uma compra de teste usando o recurso de pagamento de teste da Shopify para confirmar que tudo está configurado corretamente.
Após um checkout bem sucedido, deverá ver as conversões juntamente com o valor dinâmico registado na secção de receitas do seu painel de administração da ExoClick.
Nota: Pode demorar alguns minutos até que a conversão apareça no painel de administração da ExoClick.

Evento de produto adicionado ao carrinho
O evento product_added_to_cart rastreia quando um cliente adiciona um item ao carrinho de compras. É importante notar que, neste exemplo, não há nenhum valor atribuído para o objetivo de conversão.
Para configurá-lo, siga as mesmas etapas descritas anteriormente para o evento checkout_completed. No entanto, observe que o código será diferente desta vez.
- Adicione o seguinte código:
analytics.subscribe('product_added_to_cart', (event) => {
  const el = document.createElement('script');
  el.setAttribute('src', 'https://a.magsrv.com/tag_gen.js');
  el.setAttribute('data-goal', 'XXXXXX');

  document.body.appendChild(el);
});
- Certifique-se de que substitui
'XXXXX'pelo seu próprio ID de golo. - Por fim, prima o botão Ligar.
Uma vez ligado, teste a configuração adicionando um produto ao carrinho. Se tudo estiver configurado corretamente, verá a conversão reflectida no seu painel de administração da ExoClick.
Nota: Pode demorar alguns minutos até que a conversão apareça no painel de administração da ExoClick.

Configuração adicional do evento
Se você quiser configurar outros tipos de eventos, consulte o manual da Shopify Documentação de eventos padrão da Shopify.
Nota: Estes eventos são personalizados. Se pretender adicionar mais eventos, tenha em atenção que isso exigirá o seu próprio esforço de desenvolvimento.
Se pretender obter informações adicionais sobre os píxeis da Shopify, consulte esta página: Documentação sobre os pixels da Shopify