Wie man ExoClick in AgeGO integriert
Dieser Leitfaden soll dies erläutern:
- So melden Sie eine Website bei AgeGO an.
- Übergabe von Altersverifikationsparametern an ExoClick und Blockieren von Anzeigen in Werbezonen.
- Wie man AgeGO und ExoClick-Anzeigenbereiche zusammen integriert, um Nutzern SFW-Anzeigen zu zeigen, bevor sie ihr Alter verifizieren.
Wie meldet man eine Website bei AgeGO an?
Um eine Site bei AgeGO anzumelden, loggen Sie sich in das AgeGO-Dashboard ein. Gehen Sie dann zu "Meine Sites" und klicken Sie auf "Neue Site":
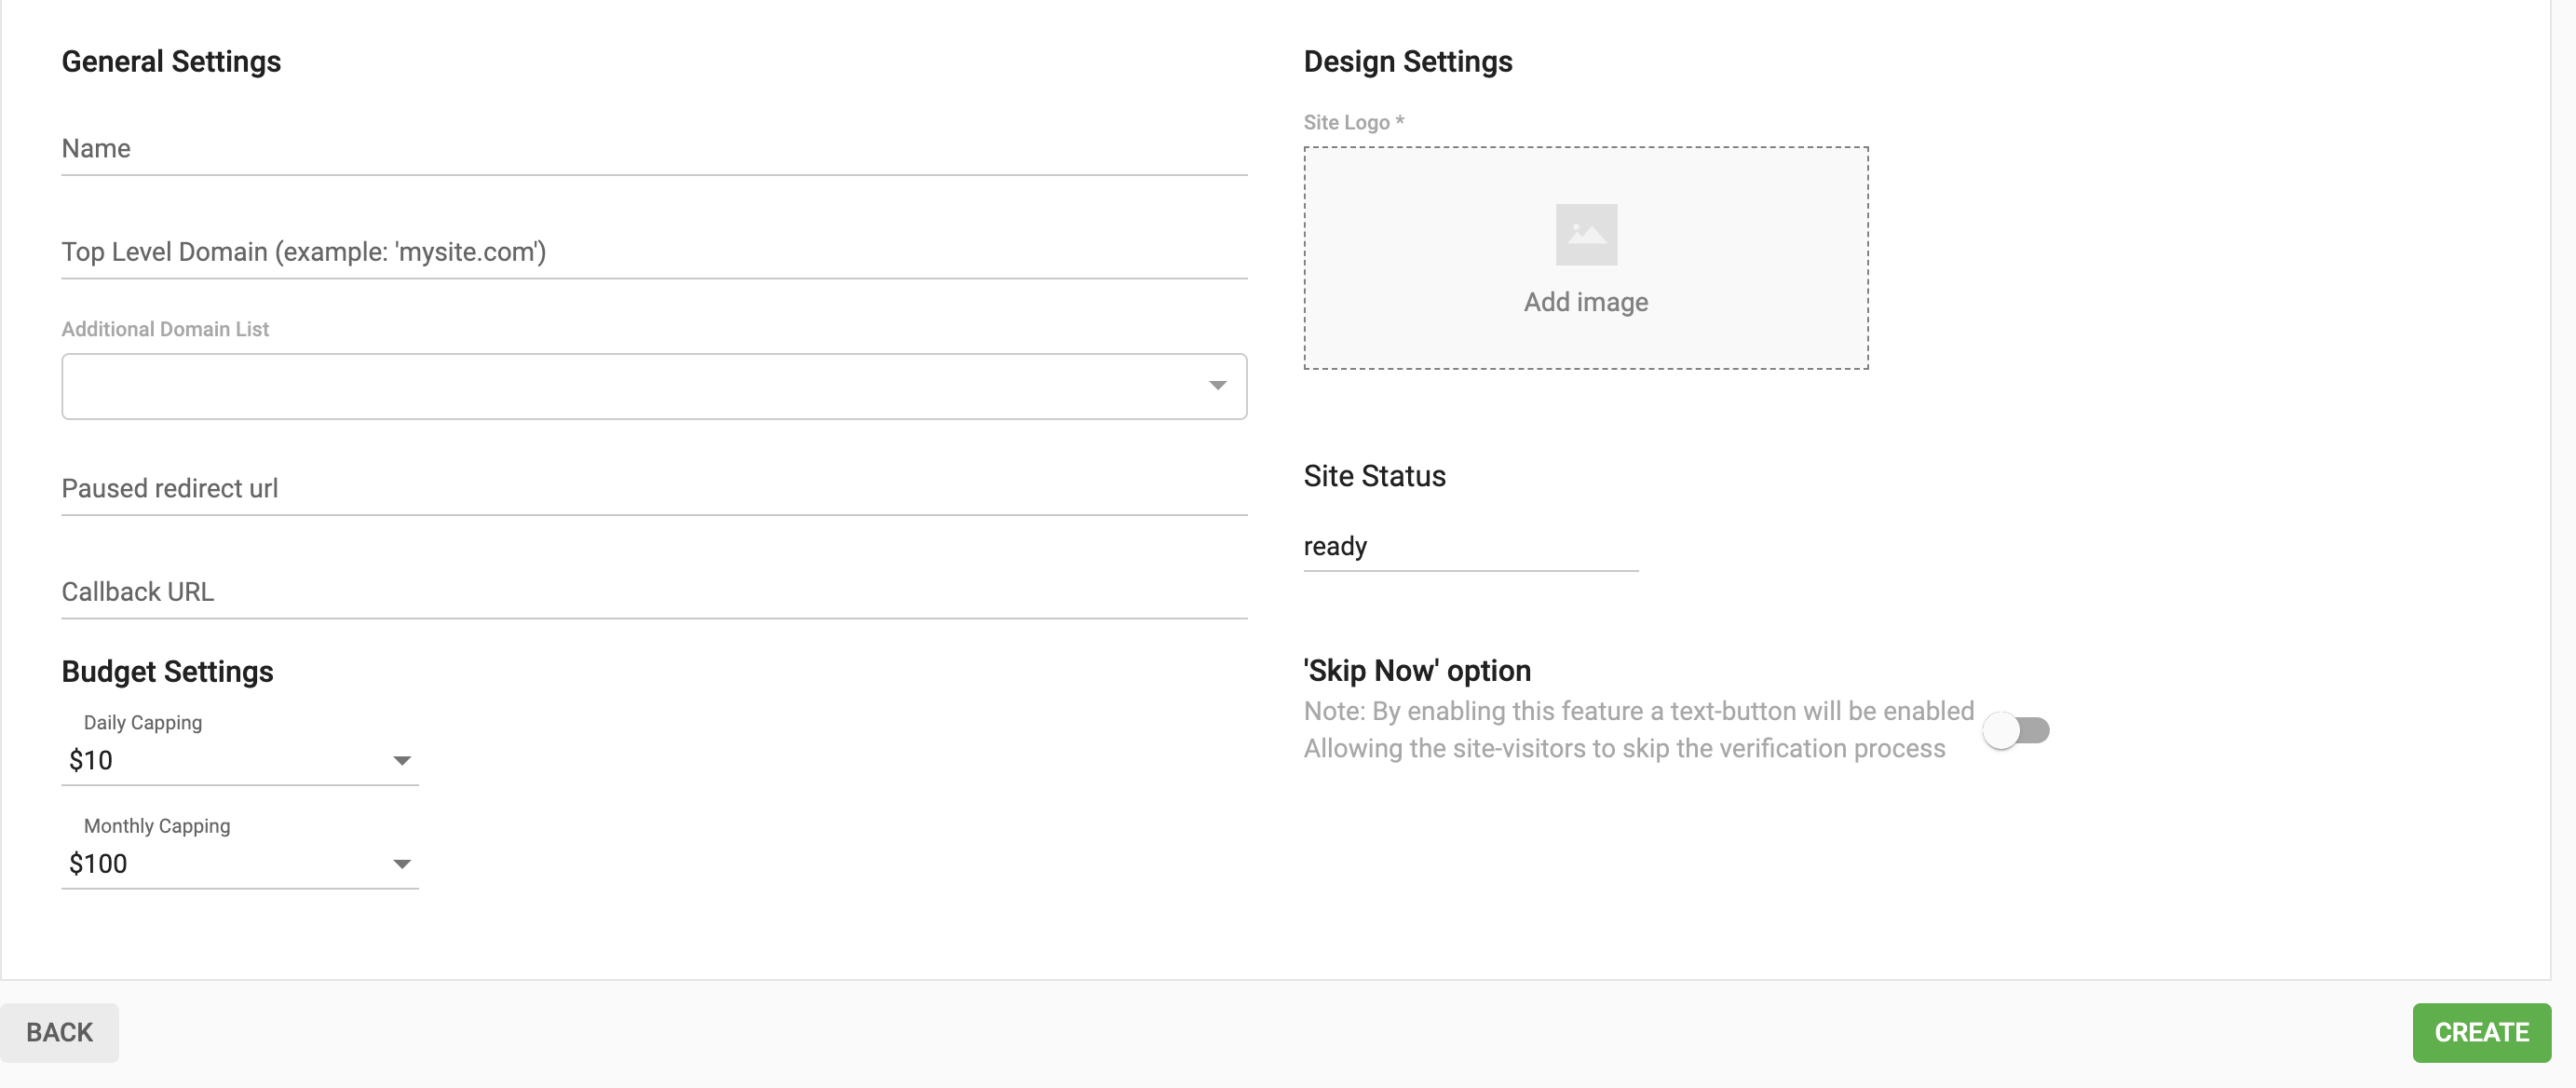
Bei diesen Einstellungen müssen Sie zumindest den Namen und die Top Level Domain hinzufügen. Sobald Sie diese Einstellungen vorgenommen haben, klicken Sie auf "Erstellen". Die Website wird zu Ihrem Konto hinzugefügt.
Standardmäßig haben alle Sites bei der Erstellung den Status "Bereit". Das bedeutet jedoch noch nicht, dass Ihre Site AgeGO nutzen kann. Um AgeGO für Ihre Site zu aktivieren, müssen Sie AgeGO über das Kontaktformular kontaktieren und die Site-ID Ihrer Site angeben
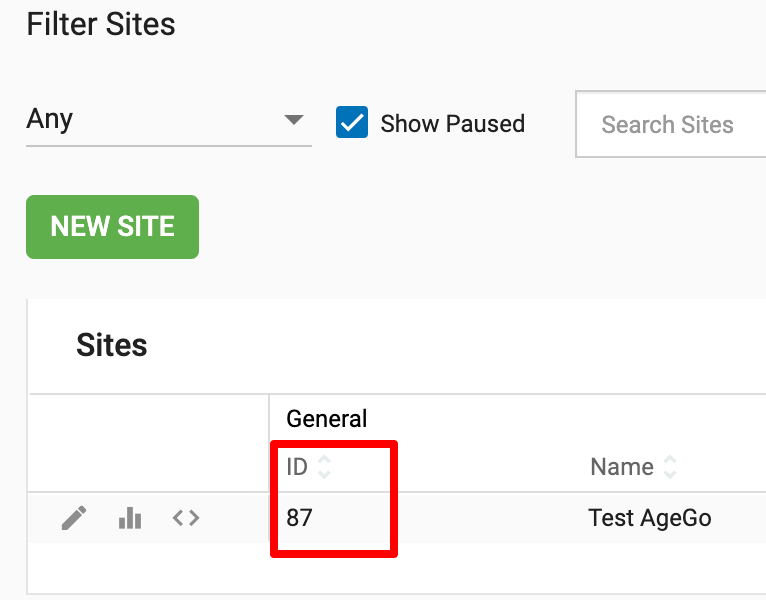
Sie finden die Site ID neben dem Namen Ihrer Website:
Sobald Ihre Website genehmigt ist, ändert sich ihr Status auf "Läuft" und Sie können den Integrationsanweisungen folgen, um AgeGO in Ihre Website zu integrieren. Diese Lösung bietet derzeit zwei Methoden, Modal (einfach oder fortgeschritten) und S2S, und die Einrichtungsanweisungen für jede Methode sind im AgeGO-Dashboard verfügbar. Für die Zwecke dieses Leitfadens werden wir über die Modal-Methode sprechen.
Wie man den Altersverifizierungsstatus überwindet und SFW-Anzeigen schaltet
Wenn Sie ein Altersverifikationssystem (AgeGO oder einen anderen Anbieter) verwenden, möchten Sie vielleicht weiterhin Anzeigen für alle Nutzer anzeigen (sowohl für diejenigen, die ihr Alter nicht verifiziert haben, als auch für diejenigen, die es getan haben).
Um zu erkennen, ob ein Nutzer die Altersprüfung bestanden hat oder nicht, verwenden Sie den Parameter data-ex_av in Ihren Anzeigenbereichen. Dieser Parameter erlaubt 3 Werte:
- "0": Keine Altersüberprüfung (undefiniert)
- "1": Altersüberprüfung - Verifiziert
- "2": Altersüberprüfung - nicht verifiziert
Um dann Anzeigen für bestimmte Nutzer zu blockieren (in diesem Zusammenhang diejenigen, die ihr Alter nicht verifiziert haben), verwenden Sie den Parameter data-block-ad-types. Dieser Parameter kann mehrere Werte annehmen, aber für diesen Leitfaden werden wir nur den Wert "101" verwenden.
Wenn Sie also eine SFW-Anzeige schalten wollen und den Nutzer als jemanden identifizieren wollen, der sein Alter noch nicht verifiziert hat, werden Sie die Parameter wie folgt integrieren:
- Synchrone Anzeigenformate (Banner, FPI, Multiformat usw.):
<script async type="application/javascript" src="https://a.magsrv.com/ad-provider.js"></script>
 <ins class="eas6a97888e2" data-zoneid="XXXXXXXX" data-ex_av="2"  data-block-ad-types="101"></ins>
 <script>(AdProvider = window.AdProvider || []).push({"serve": {}});</script>
- In-Stream:
https://s.magsrv.com/v1/vast.php?idzone=XXXXXX&ex_av=2&block_ad_types=101 - Popunder (Link):
https://s.pemsrv.com/v1/link.php?cat=&idzone=XXXXX&type=8&ex_av=2&block_ad_types=101 - Direkter Link:
https://s.zlinkt.com/v1/d.php?z=XXXXXXX&ex_av=2&blocked_ad_types=101
Hinweis: Sie müssen sowohl data-ex_av als auch data-block-ad-types verwenden, wenn Sie SFW-Anzeigen schalten, sonst wird der Benutzer nicht richtig identifiziert und die Anzeigen werden nicht blockiert.
Und wenn Sie einem verifizierten Nutzer alle Arten von Anzeigen schalten wollen, werden Sie sie wie folgt schalten:
- Asynchrone Anzeigenformate (Banner, FPI, Multiformat usw.):
<script async type="application/javascript" src="https://a.magsrv.com/ad-provider.js"></script>
<ins class="eas6a97888e2" data-zoneid="XXXXXXX" data-ex_av="1"></ins>
<script>(AdProvider = window.AdProvider || []).push({"serve": {}});</script>
- In-Stream:
https://s.magsrv.com/v1/vast.php?idzone=XXXXXXXX&ex_av=1 - Popunder (Link):
https://s.pemsrv.com/v1/link.php?cat=&idzone=XXXXXXX&type=8&ex_av=1 - Direkter Link:
https://s.zlinkt.com/v1/d.php?z=XXXXXXX&ex_av=
Wie man ein SFW-Erlebnis schafft
Die folgende Anleitung erklärt, wie man ein "SFW-Erlebnis" schafft, d. h. wie man sicherstellt, dass nur SFW-Anzeigen geschaltet werden, wenn der Nutzer sein Alter noch nicht verifiziert hat. Beachten Sie, dass diese Methode nur eine Empfehlung ist und Sie die Einrichtung ändern können, wenn Sie einen anderen Benutzerfluss benötigen.
Für diese Einrichtung müssen wir eine separate Skriptdatei erstellen. In diesem Beispiel haben wir sie main.js genannt:
function getCookie(name) {
  const value = `${document.cookie};`;
  const parts = value.split(`${name}=`);
  if (parts.length !== 2) return false;
  const token = parts.pop().split(";").shift();
  const format = token.split(".");
  if (format.length !== 3) return false;
  try {
    format.slice(0, 2).forEach(part => {
      const padded = part + "=".repeat((4 - part.length % 4) % 4);
      atob(padded.replace(/-/g, "+").replace(/_/g, "/"));
    });
    return true;
  } catch (e) {
    return false;
  }
}

function verifier(event, container) {
    window.AGEGO = window.AGEGO || function () {
    (AGEGO.e = AGEGO.e || []).push(arguments)
    };
     AGEGO('configure', {
    siteId: XXXXXXX, // Site ID of your site in AgeGo
    autoBlur: true,
    verifyMode: 'inline',
    requireAgeVerification: true,
    allowDirectContinue: false,
    overlay: {
        logo: 'wlogo.png', // Logo of your site
        theme: 'auto'
        },
    events: {
        onVerificationFlowEnd() {
            console.log("Verification successfull");
            window.location.reload();
            },
                onVerificationFlowFailed() {
            console.log("Verification failed with errorcode:" + error);
            },
                onAgeVerify() {
            console.log("Begin Age Verification process");
            },
                onDirectContinue() {
            console.log("DirectContinue action");
            },
                onUnderageSkip() {
            console.log("Skipped");
            },
                onVerifiedBefore() {
            console.log("Verified Before");
            }
        }
           }
    );

            var n = document.createEvent("Event");
            n.initEvent("DOMContentLoaded", !0, !0),
            document.dispatchEvent(n);
}

const TARGET_SELECTOR = '.main, .footer; // replace with classes where click will be intercepted

function intercept(e) {
   const container = e.target.closest(TARGET_SELECTOR);
   if (!container) return;

   e.preventDefault();
   e.stopImmediatePropagation();
   e.stopPropagation();

   verifier(e, container);
}
Diese Datei enthält drei Funktionen: eine Funktion zur Erkennung von Cookies, eine Funktion zum Laden des AgeGO-Overlays und eine Funktion zur Erkennung des Klicks auf bestimmte Klassen. In diesem Fall verwenden wir die Klassen .main und .footer.
Dann platzieren Sie im HTML-Code Ihrer Website Folgendes:
<!--Code from AgeGo-->
<script src="https://verifycdn.agego.com/v1/verify.js"></script>

<!-- Code with custom functions-->
<script src="main.js"></script>

<!-- Ad provider code-->
<script async type="application/javascript" src="https://a.magsrv.com/ad-provider.js"></script>

<!-- Ad zones. XXXX and YYYYY correspond to the class and zone IDs provided by the Admin Panel. -->
<div id="videontv">
  <ins class="XXXXXX" data-zoneid="YYYYYY" data-block-ad-types="101"  data-ex_av="2"></ins>
  <ins class="XXXXXX" data-zoneid="YYYYYY" data-block-ad-types="101"  data-ex_av="2"></ins>
</div>

<!-- Code to serve ads with the right params-->
<script>
    const agegoValue = getCookie("agego_aver");
    if (agegoValue !== false)  {
               console.log("user verified");
               const adInsElements = document.querySelectorAll("ins");
               adInsElements.forEach(ins => {
                ins.setAttribute("data-ex_av", "1");
                ins.setAttribute("data-block-ad-types", "0");
                });
           }
             else {
                 console.log("user not verified");
                 ['pointerdown', 'click', 'touchstart'].forEach(type => {
                 document.addEventListener(type, intercept, { capture: true });
                 });
             }
    (AdProvider = window.AdProvider || []).push({"serve": {}});
</script>
In diesem Beispiel sind Anzeigen standardmäßig SFW, bis der Benutzer ihr Alter verifiziert. Wenn der Benutzer auf die ausgewählten Klassen klickt, die wir zuvor erwähnt haben, erscheint das AgeGO-Overlay. Nachdem der Nutzer sein Alter verifiziert hat, lädt die Seite normal und blockiert diesmal keine Anzeigen.
Ein paar Anmerkungen zu diesem Tutorial:
- Diese Einstellung beruht auf dem von AgeGO gesetzten Cookie
agego_aver. Dies kann jedoch geändert werden: Sie können einen Wert in localStorage mithilfe der Ereignisse des AgeGO-Skripts festlegen und dann entscheiden, welche Anzeigen auf der Grundlage dieses Werts angezeigt werden sollen. - Beide Methoden konzentrieren sich ausschließlich auf die Anzeigenschaltung. Video-Thumbnails und andere Website-Inhalte werden bei diesem Code nicht berücksichtigt.
- Derzeit hat AgeGO keine eingebaute Ländererkennung. Sie müssen entscheiden, wann Sie diesen Code anzeigen möchten.
Wenn Sie data-ex_av und data-block-ad-types basierend auf verschiedenen Ereignissen Ihrer Wahl einrichten möchten, sollten Sie sich unsere anderen Tutorials ansehen: dynamisch Anzeigentypen blockieren, dynamisch Anzeigentypen in In-Stream-Anzeigenbereichen blockieren.
Für eine allgemeinere Integration von Anzeigenzonen mit einer Lösung zur Altersüberprüfung lesen Sie bitte dieses andere Tutorial